1. Product voorbijview
This manual provides instructions for the Fanttik F2 Master Mini Cordless Rotary Tool Kit and the Fanttik D2 PLUS Laser Level. These tools are designed for precision tasks and accurate leveling applications.

Image 1.1: The Fanttik F2 Master Mini Cordless Rotary Tool (left) and D2 PLUS Laser Level (right).
1.1 F2 Master Mini Cordless Rotary Tool
The F2 Master is a compact, cordless rotary tool featuring a brushless hollow cup motor for reduced noise and enhanced performance. It offers 5 adjustable speed settings for various precision tasks such as grinding, polishing, drilling, and engraving. The tool includes a Revostor Hub for organized accessory storage and a durable aluminum case with a pop-up mechanism for easy access.
1.2 D2 PLUS Laser Level
The D2 PLUS is a high-precision laser level utilizing advanced high-brightness green laser technology. It provides a projection range of up to 100 ft with an accuracy of 3/32 inches at 30 ft. It features independent or combined vertical and horizontal line projection, a wide-angle expansion for vertical lines, and a pulse mode for extended working range with an optional receiver.
2. Veiligheidsinformatie
Neem altijd de volgende veiligheidsmaatregelen in acht om letsel en schade aan het product te voorkomen.
- Lees alle instructies vóór gebruik.
- Wear appropriate personal protective equipment, such as safety glasses, when operating the rotary tool.
- Zorg ervoor dat de werkplek schoon en goed verlicht is.
- Gebruik geen elektrisch gereedschap in een explosieve omgeving, zoals in de aanwezigheid van ontvlambare vloeistoffen, gassen of stof.
- Houd kinderen en omstanders uit de buurt wanneer u elektrisch gereedschap gebruikt.
- Bewaar gereedschap buiten het bereik van kinderen.
2.1 Laserveiligheid
The D2 PLUS Laser Level is a Class II laser product. Observe the following precautions:
- VOORZICHTIGHEID: Kijk niet rechtstreeks in de laserstraal.
- Richt de laserstraal niet opzettelijk op mensen of dieren.
- Avoid exposing the eyes to direct or reflected laser beams.
- Wijzig het laserapparaat niet.
- Gebruik het product alleen zoals beschreven in deze handleiding.
3. Inhoud van het pakket
Controleer of alle hieronder vermelde artikelen in uw pakket zitten:

Image 3.1: Contents of the D2 PLUS Laser Level package.
- D2 PLUS laserwaterpas
- USB-C-kabel
- Magnetische beugel
- Target Plate
- Trekkoordtas
- Gebruiksaanwijzing
- F2 Master Mini Cordless Rotary Tool
- F2 Master Revostor Hub with 35 accessories (3/32" / 2.3mm)
- F2-M2 Magnetic Wrench
4. F2 Master Rotary Tool - Setup & Operation
4.1 Componenten overview
- Rotary Tool Body: Main unit with motor and battery.
- Spantang: Holds the accessory bits.
- Speed Indicator Lights: Display current speed setting.
- Power/Speed Button: Regelt vermogen en snelheid.
- Revostor Hub: Magnetic stand for organizing accessories.
- Aluminum Case: Protective case with pop-up mechanism.
4.2 Het roterende gereedschap opladen
The F2 Master is battery-powered. Ensure it is fully charged before first use.
- Connect the USB-C charging cable to the charging port on the rotary tool.
- Sluit het andere uiteinde van de kabel aan op een geschikte USB-stroomadapter (niet meegeleverd).
- The indicator lights will show charging status. Once fully charged, disconnect the cable.
4.3 Accessoires bevestigen
The Revostor Hub provides organized storage and easy access to various accessories.

Image 4.1: The Revostor Hub for organized accessory storage.
- Ensure the rotary tool is turned off.
- Draai de spantangmoer los.
- Insert the desired accessory bit (3/32" / 2.3mm shank) into the collet.
- Tighten the collet nut securely using the F2-M2 Magnetic Wrench to hold the bit in place. Do not overtighten.
4.4 Aan/uit-schakelaar en snelheidsregeling
The F2 Master features a brushless motor for efficient and quiet operation.

Image 4.2: The F2 Master operates quietly at 32 dB when idle.
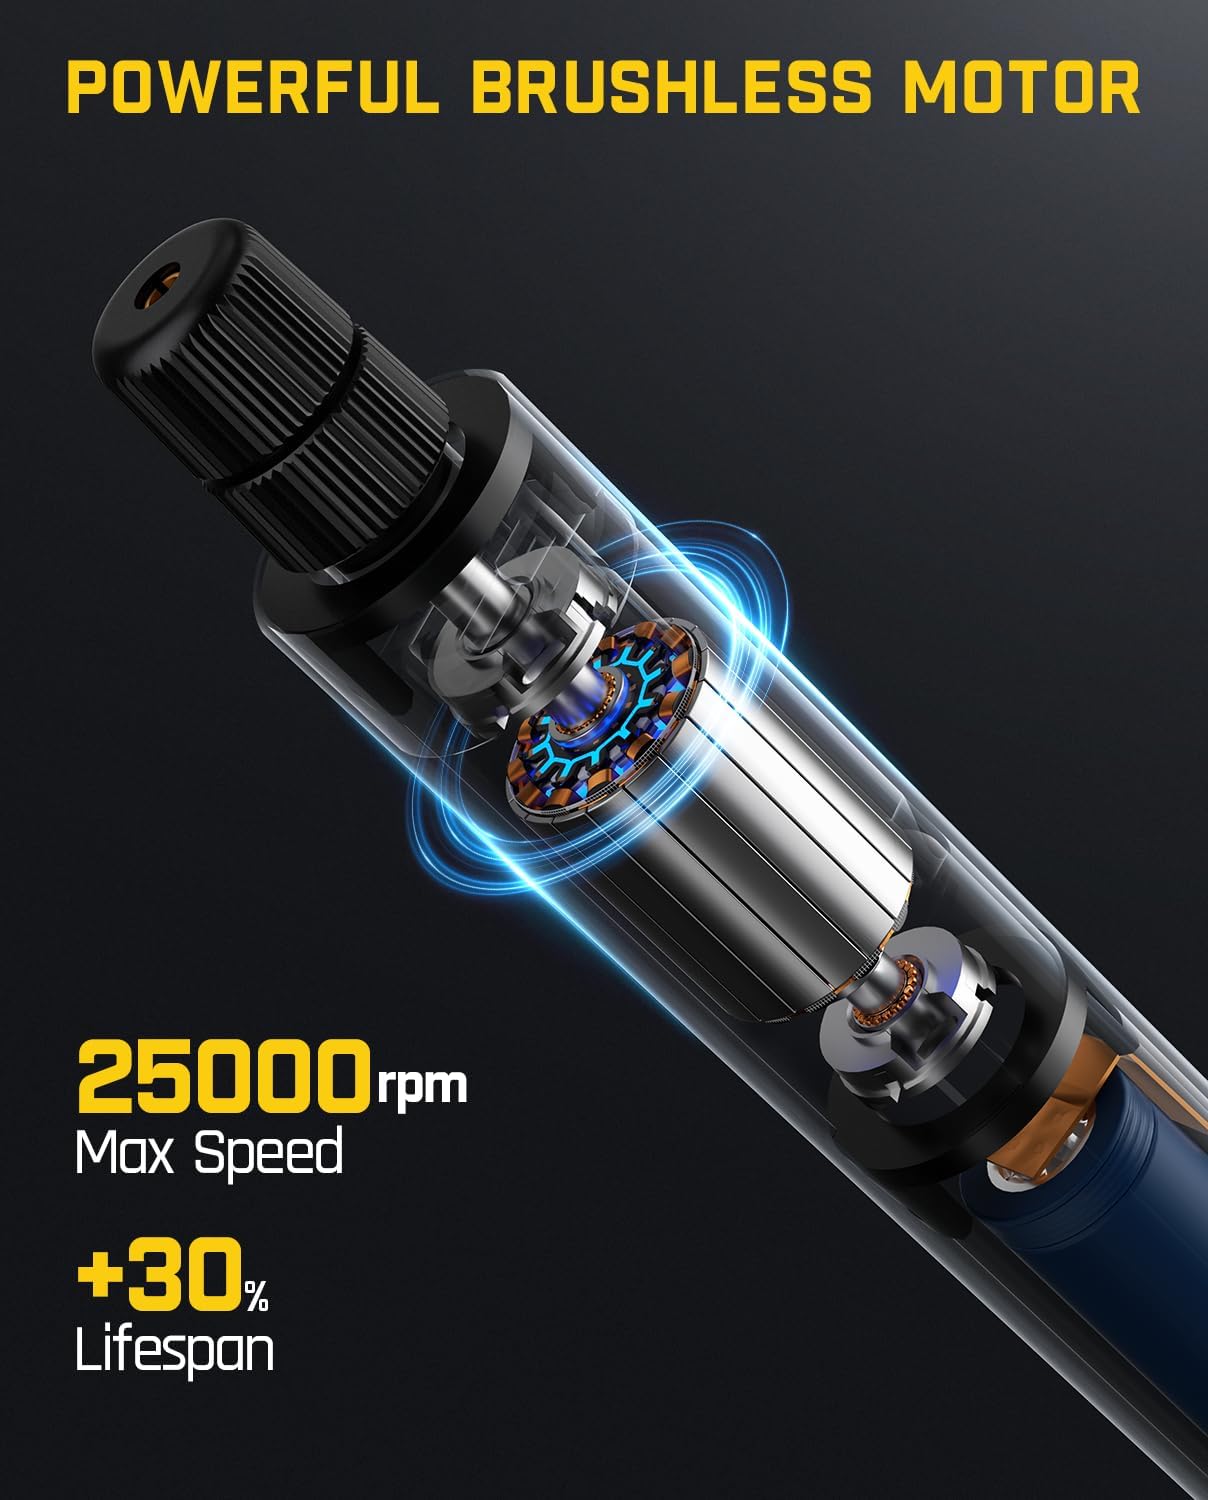
Image 4.3: The F2 Master's powerful brushless motor provides up to 25,000 RPM.
- Inschakelen: Press and hold the Power/Speed button until the indicator lights illuminate. The tool will start at the lowest speed setting.
- Om de snelheid aan te passen: Briefly press the Power/Speed button to cycle through the 5 available speed settings. The indicator lights will show the selected speed.
- Uitschakelen: Press and hold the Power/Speed button until the indicator lights turn off.
5. D2 PLUS Laser Level - Setup & Operation
5.1 Componenten overview
- Laserzenders: Project horizontal and vertical green laser lines.
- Configuratiescherm: Buttons for power, mode selection, and pulse mode.
- Pendelslot: Secures the pendulum for manual mode or transport.
- Batterij-indicator: Geeft de resterende levensduur van de batterij weer.
- USB-C-oplaadpoort: Voor het opladen van de interne batterij.
5.2 Charging the Laser Level
The D2 PLUS has a 2600 mAh rechargeable battery, providing 7-14 hours of continuous use.

Image 5.1: The D2 PLUS Laser Level features a USB-C charging port.
- Connect the provided USB-C charging cable to the charging port on the side of the laser level.
- Sluit het andere uiteinde van de kabel aan op een geschikte USB-stroomadapter (niet meegeleverd).
- The battery indicator lights will show charging status. Disconnect once fully charged.
5.3 In-/uitschakelen en modusselectie
The D2 PLUS uses an OSRAM green laser, which is four times brighter than traditional red lasers.

Image 5.2: The D2 PLUS utilizes a bright OSRAM green laser.

Image 5.3: The D2 PLUS offers three distinct line modes.

Image 5.4: Manual Mode (left) and Self-Leveling Mode (right) applications.
- Zelfnivellerende modus: Unlock the pendulum by sliding the pendulum lock switch to the 'unlocked' position. Press the power button to turn on the laser. The laser will self-level within 4 degrees. If the tilt exceeds 4 degrees, the laser will flash rapidly to indicate it is out of level. Press the power button to cycle through horizontal line, vertical line, or both.
- Handmatige modus: Lock the pendulum by sliding the pendulum lock switch to the 'locked' position. Press and hold the power button for 3 seconds to turn on the laser. The laser lines can now be projected at any angle without self-leveling. Press the power button to cycle through horizontal line, vertical line, or both.
- Pulsmodus: In self-leveling mode, briefly press the pulse mode button (often indicated by a 'P' or wave icon) to activate pulse mode. This mode extends the working range up to 200 ft when used with a compatible laser receiver (not included), especially useful in bright environments.

Image 5.5: Pulse Mode extends the working range of the D2 PLUS Laser Level.
5.4 De laserwaterpas monteren
The D2 PLUS can be mounted using its integrated magnetic bracket or a tripod.

Image 5.6: The D2 PLUS offers high precision, up to ±3/32 in at 30 ft.
- Magnetische beugel: Attach the magnetic bracket to metallic surfaces for stable positioning.
- Statief montage: The laser level has a standard tripod thread (1/4"-20) on its base for mounting to a tripod (not included).
6. Onderhoud
Goed onderhoud zorgt voor een lange levensduur en optimale prestaties van uw gereedschap.

Image 6.1: The D2 PLUS Laser Level is designed for durability against dust, water, and minor impacts.
- Schoonmaak: Gebruik een zachte, damp cloth to clean the tool surfaces. Do not use abrasive cleaners or solvents. For the laser level, gently wipe the laser windows with a clean, lint-free cloth.
- Opslag: Store both tools in their original packaging or a protective case in a dry, cool place, away from direct sunlight and extreme temperatures. Ensure the pendulum lock on the laser level is engaged during storage and transport.
- batterij zorg: For optimal battery life, charge the tools regularly, even if not in frequent use. Avoid fully discharging the batteries for extended periods.
- Inspectie: Periodically inspect the tools for any signs of damage, loose parts, or wear. Do not operate damaged tools.
7. Probleemoplossing
Raadpleeg de onderstaande tabel voor veelvoorkomende problemen en hun oplossingen.
| Probleem | Mogelijke oorzaak | Oplossing |
|---|---|---|
| F2 Master does not turn on. | Batterij bijna leeg. | Charge the rotary tool using the USB-C cable. |
| F2 Master accessory bit is loose. | Collet nut not tightened sufficiently. | Ensure the collet nut is securely tightened with the magnetic wrench. |
| D2 PLUS laser lines are flashing rapidly. | Laser level is out of its self-leveling range (>4 degrees). | Place the laser level on a flatter surface or adjust its position until the flashing stops. |
| D2 PLUS laser lines are dim or not visible outdoors. | Fel omgevingslicht. | Activate Pulse Mode and use a compatible laser receiver (not included). |
| D2 PLUS laser lines are not self-leveling. | Pendulum lock is engaged (Manual Mode). | Slide the pendulum lock switch to the 'unlocked' position for Self-Leveling Mode. |
If you encounter issues not covered here, please contact Fanttik customer support.
8. Specificaties
8.1 Fanttik F2 Master Mini Accu-rotatiegereedschap
| Functie | Specificatie |
|---|---|
| Motortype | Brushless Hollow Cup Motor |
| Maximale rotatiesnelheid | 25,000 toeren per minuut |
| Snelheidsinstellingen | 5 instelbare instellingen |
| Noise Level (Idle) | 32dB |
| Gewicht | 0.22 pond |
| Accessory Shank Size | 3/32" / 2.3 mm |
| Energiebron | Op batterijen |
| Speciale kenmerken | Portable, Cordless, Revostor Hub, Aluminum Case |
8.2 Fanttik D2 PLUS Laser Level
| Functie | Specificatie |
|---|---|
| Lasertype | Green Laser (OSRAM) |
| Laserclassificatie | Class II, <1 mW |
| Projectiebereik | Tot 100 ft |
| Nauwkeurigheid | ±3/32 inch op 30 voet |
| Zelfnivellerend bereik | ±4 graden |
| Verticale lijnhoek | 130° |
| Batterijcapaciteit | 2600mAh |
| Continue gebruikstijd | 7-14 uur |
| Oplaadpoort | USB-C |
| Duurzaamheid | Dust Resistance, Water Resistance, Resistant to fall from 1m |
9. Garantie en ondersteuning
Fanttik products are manufactured to high-quality standards. For warranty information or technical support, please refer to the warranty card included in your package or visit the official Fanttik webwebsite. Houd uw modelnummer en aankoopdatum bij de hand wanneer u contact opneemt met de ondersteuning.
For further assistance, you may contact Fanttik customer service through their official channels.


