1. Inleiding
This manual provides instructions for the safe and proper installation, operation, and maintenance of your suptek Single Monitor Mount MD01AW. Please read this manual thoroughly before installation and keep it for future reference.
The suptek MD01AW is a single monitor desk mount featuring a gas spring arm for smooth and effortless adjustments. It is designed to enhance your ergonomic workspace by allowing flexible positioning of your monitor.
Verenigbaarheid
- Schermgrootte: 13 tot 32 inch
- Draagvermogen: 4.4 tot 19.8 pond (2 tot 9 kg)
- VESA-compatibiliteit: 75x75mm en 100x100mm

Figure 1: suptek Single Monitor Mount MD01AW with a monitor. This image illustrates the product's load capacity (2-9kg), screen size compatibility (13"-32"), and VESA pattern (75x75/100x100mm).
2. Inhoud van het pakket
Please verify that all parts are present and undamaged before installation. If any parts are missing or damaged, contact suptek customer support.
- Monitorarmassemblage
- Bureau Clamp Baseren
- Grommet Mount Base (optional)
- VESA-plaat
- Hardwarekit (schroeven, ringen, afstandhouders)
- Inbussleutels
- Gebruiksaanwijzing
3. Veiligheidsinformatie
WAARSCHUWING: Failure to read and follow these instructions may result in serious personal injury, property damage, or voiding of your warranty.
- Overschrijd het maximale draagvermogen van 9 kg niet.
- Ensure your desk surface is strong enough to support the combined weight of the mount and your monitor.
- Use only the provided hardware. If you are unsure about any part of the installation, consult a qualified professional.
- Houd kinderen en huisdieren uit de buurt tijdens de installatie.
- Controleer regelmatig alle schroeven en verbindingen om er zeker van te zijn dat ze nog goed vastzitten.
4. Installatie en installatie
The suptek MD01AW offers two installation methods: C-clamp en een doorvoerringbevestiging.

Figure 2: Two installation options for the monitor mount. The C-clamp option is suitable for desk thicknesses of 10-70mm, and the grommet mount option is for desk thicknesses of 10-70mm with a hole diameter of 10-60mm.
4.1 C-Clamp Installatie
- Bevestig de C-clamp base to the edge of your desk. Ensure the clamp is securely tightened to prevent movement. The C-clamp fits desks with a thickness of 10-70mm.
- Insert the main pole of the monitor arm into the C-clamp base. Tighten the securing screw.
4.2 Grommet Mount Installation
- If your desk has a grommet hole (10-60mm diameter) and a thickness of 10-70mm, use the grommet mount option.
- Thread the grommet base through the desk hole. Secure it from underneath the desk using the provided plate and nut.
- Insert the main pole of the monitor arm into the grommet base. Tighten the securing screw.
4.3 De monitor bevestigen
- Attach the VESA plate to the back of your monitor using the appropriate screws and spacers from the hardware kit. Ensure the screws are tightened securely but do not overtighten.
- Slide the monitor (with the attached VESA plate) onto the VESA head of the monitor arm. Ensure it clicks into place or is secured with the locking screw.
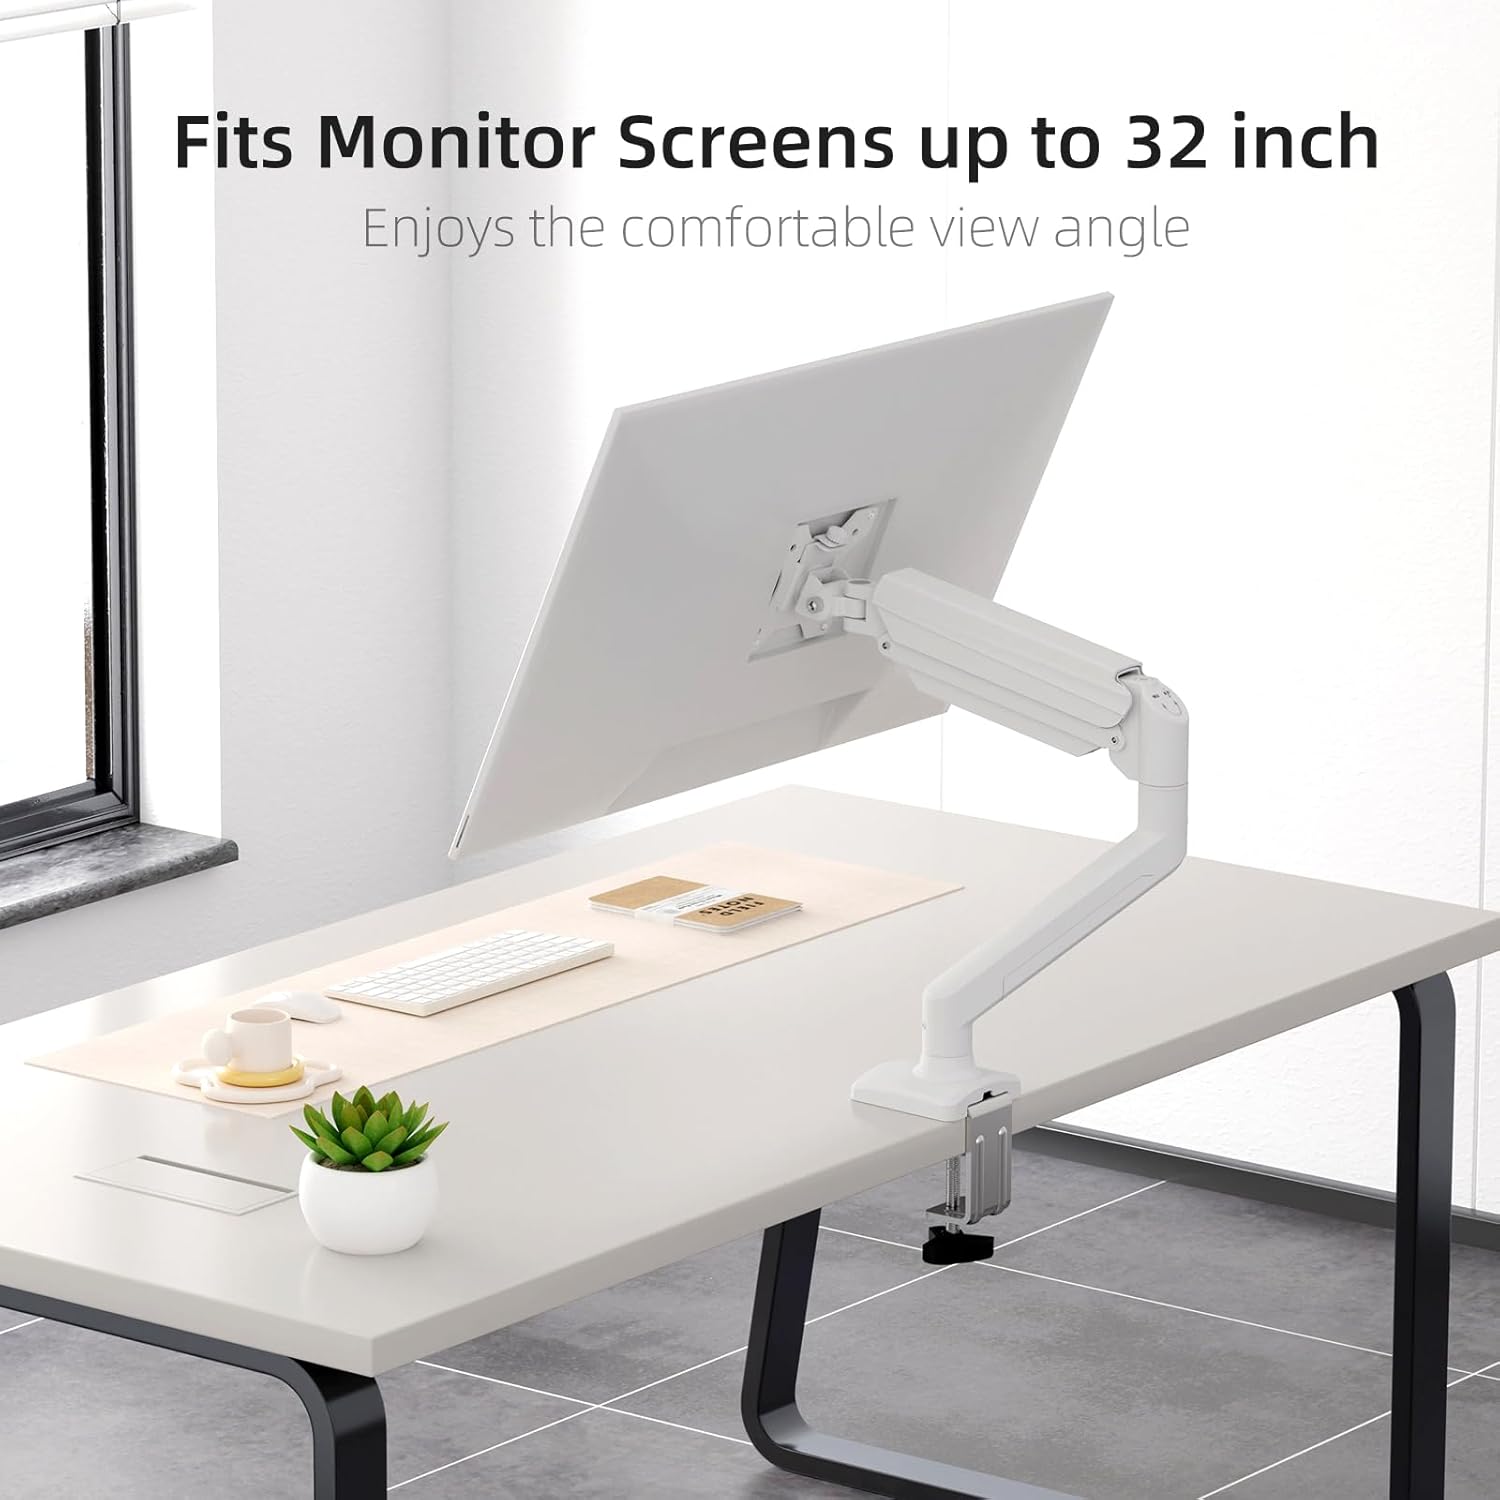
Figure 3: Monitor attached to the suptek monitor arm. This image demonstrates how the mount accommodates monitor screens up to 32 inches, providing a comfortable viewhoek.
5. Bediening en afstellingen
The gas spring arm allows for flexible and smooth adjustments to achieve your desired monitor position.

Figure 4: Full adjustability of the monitor arm. The arm allows for tilt (±90°), swivel (±90°), and 360° rotation for optimal viewind.
5.1 Gasveerspanningsafstelling
The gas spring tension needs to be adjusted according to the weight of your monitor. Use the provided Allen key to adjust the tension screw located on the arm.
- If the monitor falls down, turn the screw clockwise (+) to increase tension.
- If the monitor rises up too easily, turn the screw counter-clockwise (-) to reduce tension.

Figure 5: Easy gas spring adjustment. Turn the screw clockwise (+) to increase tension if the equipment falls down, or counter-clockwise (-) to reduce tension if the equipment raises up too easily.
5.2 Height, Tilt, Swivel, and Rotation
- Hoogteverstelling: Gently push or pull the monitor to the desired height. The gas spring will hold it in place once tension is correctly set.
- Kantelen: Tilt the monitor screen up or down (±80°) to reduce glare and optimize viewhoek.
- Draaibaar: Swivel the monitor left or right (±90°) to share your screen or adjust your viewpositie.
- Rotatie: Rotate the monitor 360° between landscape and portrait orientations.
5.3 Kabelbeheer
Route your monitor cables through the integrated cable management clips on the arm to maintain a tidy workspace.

Figure 6: Integrated cable management. Cables can be routed along the arm to keep the workspace neat and prevent wire entanglement.
6. Onderhoud
Regular maintenance ensures the longevity and safe operation of your monitor mount.
- Schoonmaak: Veeg de houder af met een zachte, damp doek. Vermijd schurende reinigingsmiddelen of oplosmiddelen.
- Controleer verbindingen: Periodically check all screws and bolts, especially those securing the mount to the desk and the monitor to the VESA plate, to ensure they are tight.
- Gasveer: If the gas spring tension feels off, re-adjust it according to Section 5.1.
7. Probleemoplossing
If you encounter issues with your monitor mount, refer to the following common problems and solutions.
| Probleem | Mogelijke oorzaak | Oplossing |
|---|---|---|
| Monitor sags or falls down | De spanning van de gasveer is te laag voor het gewicht van de monitor. | Increase gas spring tension by turning the adjustment screw clockwise (+). Refer to Section 5.1. |
| De monitor drijft omhoog of is moeilijk naar beneden te drukken. | De spanning van de gasveer is te hoog voor het gewicht van de monitor. | Decrease gas spring tension by turning the adjustment screw counter-clockwise (-). Refer to Section 5.1. |
| Mount is wobbly or unstable | Bureau klampDe doorvoerring is niet voldoende vastgedraaid. | Zorg ervoor dat het bureau schoon isamp Of de doorvoerbevestiging is stevig aan het bureau bevestigd. Controleer alle aansluitpunten. |
| Monitor does not attach to VESA plate | Incorrect VESA screws or plate orientation. | Ensure you are using the correct VESA screws for your monitor and that the VESA plate is oriented correctly. |
8. Specificaties
- Merk: suptek
- Model: MD01AW
- Materiaal: Gelegeerd staal
- Kleur: Wit
- Montagetype: Tafelmontage (C-cl)amp of doorvoerring)
- Bewegingstype: Rotate, Tilt, Swivel, Height Adjustment
- Compatibele apparaten: Monitors 13-32 inches
- Draagvermogen: 4.4 - 19.8 lbs (2 - 9 kg)
- VESA-compatibiliteit: 75x75mm, 100x100mm
- Maximale kantelhoek: 80 graden
- Bureaudikte (C-cl)amp): 10-70mm
- Desk Thickness (Grommet): 10-70mm
- Diameter van het doorvoergat: 10-60mm
- Artikelgewicht: Ongeveer 4.76 pond (2.16 kg)
- Pakket afmetingen: Ongeveer 15.12 x 7.99 x 4.25 inch
9. Garantie en ondersteuning
suptek products are manufactured with quality and care. For warranty information or technical support, please refer to the contact details provided with your purchase or visit the official suptek website. Please have your model number (MD01AW) and purchase date available when contacting support.


