1. Inleiding
This instruction manual provides detailed guidance for installing and operating your BRICKSHINING LED Lighting Kit, specifically designed for the LEGO Home Alone 21330 model. This lighting kit is intended to enhance the visual appeal of your LEGO model by illuminating its various features.
Important Note: The LEGO Home Alone 21330 model set is NOT included with this lighting kit. This product provides lighting accessories only.
2. Inhoud van het pakket
Controleer of alle hieronder vermelde componenten in uw pakket aanwezig zijn:
- LED Light Kit components (various lights, connecting wires, expansion boards)
- Battery Box (for AAA batteries, batteries not included)
- USB-voedingskabel
- Installation Guide (electronic version available)
- Remote Control (for advanced lighting kits)

Afbeelding 2.1: voorbijview of included items: packaging, LED light kit, and installation guide.

Afbeelding 2.2: Gedetailleerd view of the lighting kit components and packaging.
3. Installatie en installatie
The installation process involves integrating the LED lights and wiring into your pre-assembled LEGO Home Alone 21330 model. A detailed electronic installation guide is provided to assist you with precise placement of each component. The design ensures that wires are concealed for a clean and aesthetically pleasing display.
3.1 Algemene installatiestappen
- Bereid je LEGO-model voor: Ensure your LEGO Home Alone 21330 model is fully assembled before beginning the lighting installation.
- Consult the Electronic Guide: Refer to the detailed electronic installation instructions for step-by-step visual guidance on where to place each light and route the wires.
- Componenten verbinden: Carefully connect the LED lights to the expansion boards and then to the main power source (battery box or USB cable). Ensure all connections are secure.
- Verberg draden: Route the thin wires along existing LEGO brick lines and gaps to minimize visibility. The kit is designed for discreet wiring.
- Testfunctionaliteit: Periodically test the lights during installation to ensure proper operation before fully securing all components.
Video 3.1: Demonstration of the BRICKSHINING LED lighting kit installation and remote control functionality for the LEGO Home Alone 21330 model.

Image 3.1: The fully illuminated LEGO Home Alone 21330 model with the BRICKSHINING lighting kit.
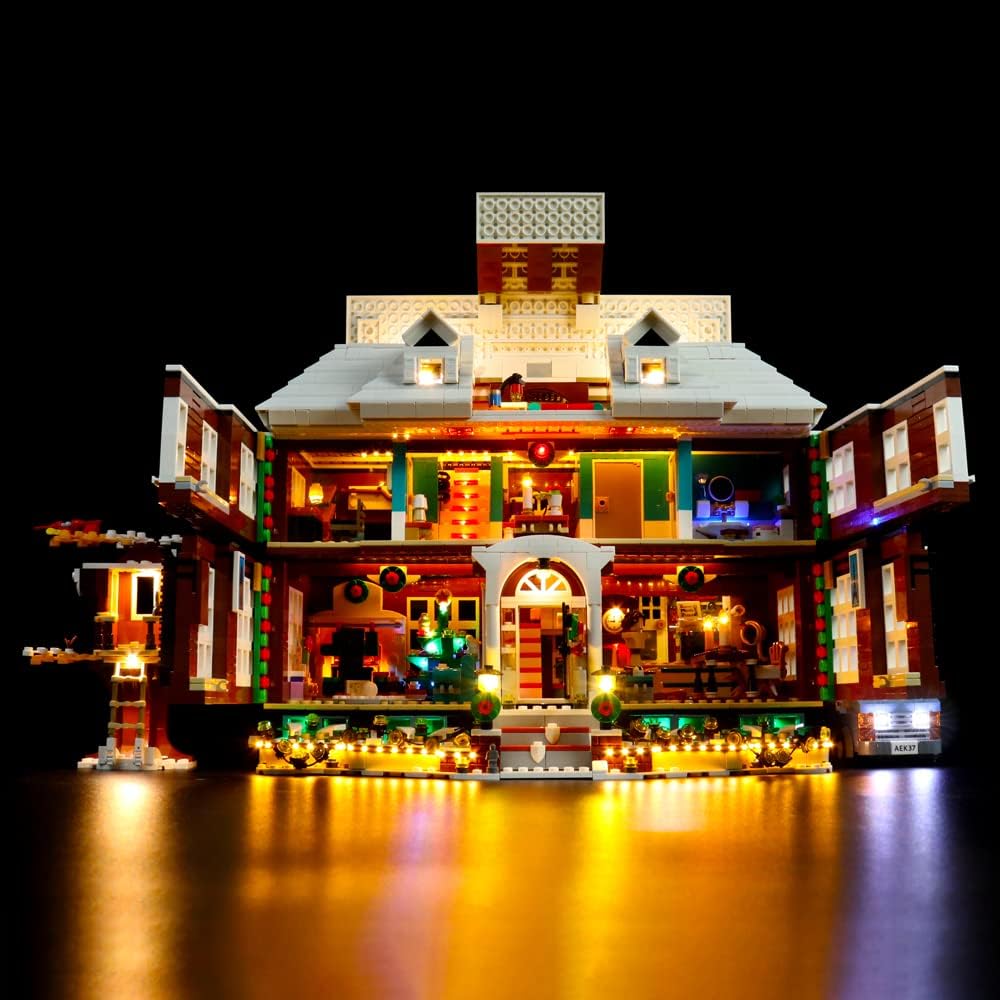
Image 3.2: Interior lighting detail of the LEGO Home Alone 21330 model.

Image 3.3: Close-up of the illuminated front door and porch area.

Image 3.4: Interior detail with illuminated table elements.
4. Gebruiksaanwijzing
Once the lighting kit is installed, you can power and control the lights using the following methods:
4.1 Powering the Lights
- Batterijvermogen: Insert AAA batteries (not included) into the provided battery box. Ensure correct polarity.
- Usb vermogen: Connect the USB power cable to the lighting kit and a compatible USB power source (e.g., power bank, USB wall adapter). The kit operates at a low voltage of no more than 5V for safety.
4.2 Using the Remote Control (if included)
For kits that include a remote control, you can adjust various lighting aspects:
- Aan/Uit: Schakel de verlichting in of uit.
- Helderheidsaanpassing: Verhoog of verlaag de lichtintensiteit.
- Effectmodi: Cycle through different lighting effects or patterns.
5. Onderhoud
To ensure the longevity and optimal performance of your BRICKSHINING LED Lighting Kit, follow these maintenance guidelines:
- Schoonmaak: Gently dust the lights and wires with a soft, dry cloth. Avoid using liquid cleaners directly on the electrical components.
- Draadinspectie: Periodically check wires for any signs of damage, pinching, or fraying. Ensure they remain securely connected.
- Energiebron: If using batteries, replace them when lights dim or cease to function. If using USB, ensure the power source is stable.
- Opslag: If disassembling the LEGO model or storing the lighting kit, carefully disconnect and coil wires to prevent tangling or damage.
6. Probleemoplossing
If you encounter issues with your lighting kit, refer to the following common problems and solutions:
- Lichten gaan niet aan:
- Check if the power source (batteries or USB) is correctly connected and functional.
- Ensure all wire connections to the lights and expansion boards are secure.
- If using batteries, verify they are new or fully charged and inserted with correct polarity.
- Sommige lampen werken niet:
- Inspect the specific non-working lights and their connections for any dislodged wires or damage.
- Ensure wires are not pinched between LEGO bricks, which can cause a short circuit.
- Knipperende lichten:
- Verify the power source is providing consistent power.
- Controleer op losse verbindingen.
- Afstandsbediening reageert niet:
- Ensure the remote control's battery is functional.
- Point the remote directly at the receiver on the lighting kit.
If problems persist after following these steps, please contact BRICKSHINING customer support for further assistance.
7. Specificaties
| Functie | Detail |
|---|---|
| Merk | Brickshining |
| Modelnummer | BRI-P28702 |
| Compatible LEGO Set | LEGO Home Alone 21330 |
| Lichtbrontype | Lichtgevende diode (LED) |
| Materiaal | Acrylonitril-butadieen-styreen (ABS) kunststof |
| Energiebron | Battery Powered (AAA, not included) or USB Power Cord |
| Maximaal compatibele lichtbron Wattage | 5 Watt |
| Laag volumetage Bescherming | Yes (ensures safety with voltage no more than 5V) |
| Artikelgewicht | 5.3 ons |
| Productafmetingen | 4.1 x 1.6 x 6.1 inch |
8. Garantie en ondersteuning
BRICKSHINING is committed to providing high-quality products and customer satisfaction. Your lighting kit is covered by the following:
- 1-Year Worry-Free After-Sales Service: Enjoy comprehensive support for one year from the date of purchase.
- Retourbeleid van 30 dagen: You may return or exchange goods within 30 days of purchase for any reason.
- Kwaliteitsborging: In case of any product quality issues, please contact us immediately. We will respond promptly to resolve the problem.
For support, please visit the official BRICKSHINING store or contact our customer service team through the platform where you made your purchase.


