1. Inleiding
This manual provides instructions for the safe operation, maintenance, and troubleshooting of your FLEX 24V Brushless Cordless 1/2-Inch Hammer Drill Turbo Mode Kit, model FX1271T-2B. Please read this manual thoroughly before using the tool to ensure proper and safe operation.
The FLEX FX1271T-2B is a powerful 24V brushless cordless hammer drill designed for demanding drilling and driving applications. It features a 1/2-inch full-metal ratcheting chuck, two-speed settings, a Turbo Mode for increased speed, and an anti-kickback safety feature. This kit includes the drill, a 2.5Ah Lithium-Ion Battery, a 5.0Ah Lithium-Ion Battery, and a 160W Fast Charger.
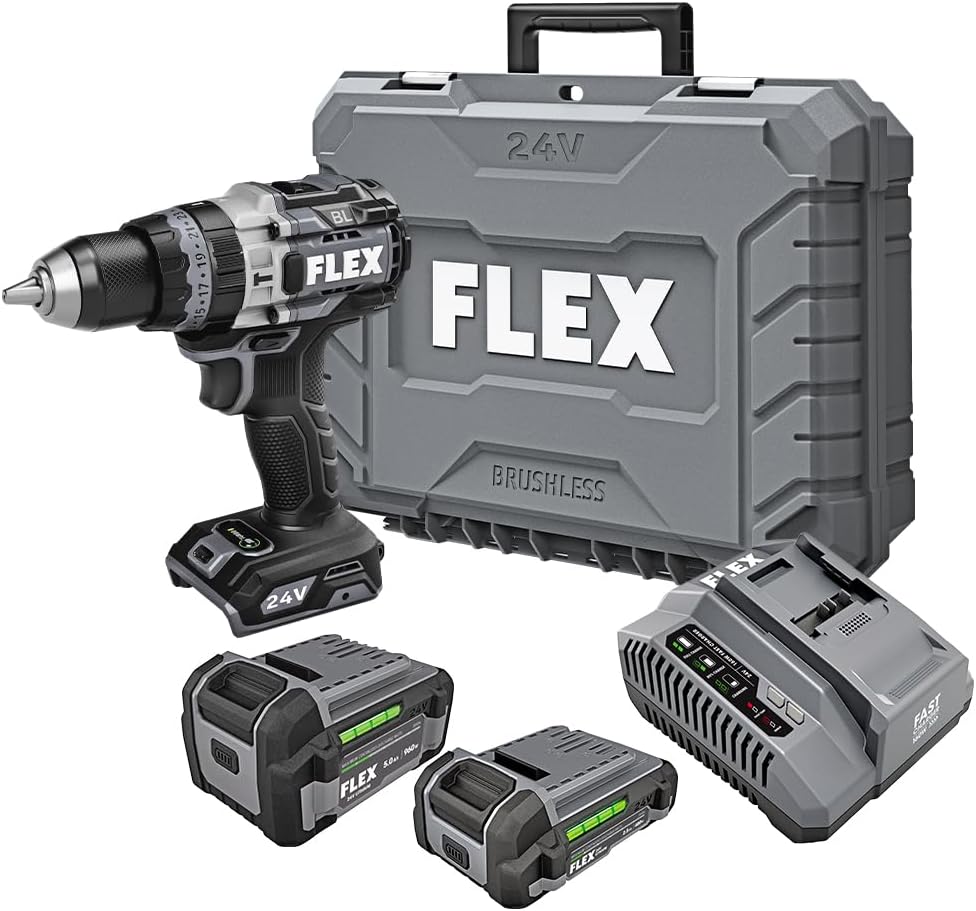
Figure 1: FLEX 24V Brushless Cordless 1/2-Inch Hammer Drill Kit (FX1271T-2B) including drill, two batteries, charger, and carrying case.
2. Algemene veiligheidsinstructies
WAARSCHUWING: Lees alle veiligheidswaarschuwingen, instructies, illustraties en specificaties die bij dit elektrische gereedschap worden geleverd. Het niet opvolgen van alle onderstaande instructies kan leiden tot elektrische schokken, brand en/of ernstig letsel.
2.1 Veiligheid op het werkgebied
- Zorg dat de werkplek schoon en goed verlicht is. Rommelige of donkere plekken zijn een bron van ongelukken.
- Gebruik geen elektrisch gereedschap in explosieve atmosferen, zoals in de aanwezigheid van ontvlambare vloeistoffen, gassen of stof. Elektrisch gereedschap creëert vonken die het stof of de dampen kunnen ontsteken.
- Houd kinderen en omstanders uit de buurt tijdens het bedienen van een elektrisch gereedschap. Afleidingen kunnen ervoor zorgen dat u de controle verliest.
2.2 Elektrische veiligheid
- Stekkers van elektrisch gereedschap moeten passen bij het stopcontact. Wijzig de stekker nooit op enigerlei wijze. Gebruik geen adapterstekkers met geaard elektrisch gereedschap. Ongewijzigde stekkers en bijpassende stopcontacten verminderen het risico op een elektrische schok.
- Vermijd lichamelijk contact met geaarde oppervlakken, zoals leidingen, radiatoren, fornuizen en koelkasten. Er is een verhoogd risico op een elektrische schok als uw lichaam geaard is.
- Stel elektrisch gereedschap niet bloot aan regen of natte omstandigheden. Water dat in een elektrisch gereedschap komt, vergroot het risico op een elektrische schok.
2.3 Persoonlijke veiligheid
- Draag altijd oogbescherming. Gebruik een veiligheidsbril, stofbril of gelaatsscherm.
- Draag gehoorbescherming wanneer u het gereedschap gedurende langere tijd gebruikt.
- Kleed u goed. Draag geen losse kleding of sieraden. Houd uw haar en kleding uit de buurt van bewegende delen.
- Blijf alert, let op wat u doet en gebruik uw gezonde verstand bij het bedienen van elektrisch gereedschap.
2.4 Gebruik en onderhoud van gereedschap
- Forceer het elektrische gereedschap niet. Gebruik het juiste elektrische gereedschap voor uw toepassing.
- Koppel de accu los van het elektrisch gereedschap voordat u aanpassingen maakt, accessoires verwisselt of elektrisch gereedschap opbergt.
- Berg elektrisch gereedschap dat niet wordt gebruikt op buiten het bereik van kinderen. Laat het gereedschap niet bedienen door personen die niet bekend zijn met het gereedschap of deze instructies.
- Onderhoud elektrisch gereedschap en accessoires. Controleer op verkeerde uitlijning of vastlopen van bewegende onderdelen, breuk van onderdelen en andere omstandigheden die de werking van het elektrisch gereedschap kunnen beïnvloeden.
2.5 Gebruik en onderhoud van het batterijgereedschap
- Laad alleen op met de door de fabrikant gespecificeerde lader. Een lader die geschikt is voor één type batterijpakket kan brandgevaar opleveren bij gebruik met een ander batterijpakket.
- Gebruik elektrisch gereedschap alleen met specifiek aangewezen accu's. Het gebruik van andere accu's kan een risico op letsel en brand opleveren.
- Wanneer de batterij niet in gebruik is, houd deze dan uit de buurt van andere metalen voorwerpen, zoals paperclips, munten, sleutels, spijkers, schroeven of andere kleine metalen voorwerpen, die een verbinding kunnen maken van de ene naar de andere pool. Kortsluiting van de batterijpolen kan brandwonden of brand veroorzaken.
- Onder misbruikomstandigheden kan er vloeistof uit de batterij worden gespoten; vermijd contact. Als er per ongeluk contact plaatsvindt, spoel dan met water. Als vloeistof in contact komt met de ogen, zoek dan ook medische hulp. Vloeistof die uit de batterij wordt gespoten, kan irritatie of brandwonden veroorzaken.
3. Meegeleverde componenten
Your FLEX 24V Brushless Cordless 1/2-Inch Hammer Drill Kit (FX1271T-2B) includes the following items:
- FLEX 24V Brushless Cordless 1/2-Inch Hammer Drill
- (1) FLEX 24V 2.5Ah Lithium-Ion Battery (FX0111-1)
- (1) FLEX 24V 5.0Ah Lithium-Ion Battery (FX0121-1)
- FLEX 160W Fast Charger
- Hulphandgreep
- Draagtas

Figure 2: The FLEX Advantage highlights the included 2.5Ah and 5.0Ah Lithium-Ion batteries, emphasizing their power, runtime, and fast charging capabilities.
4. Instellen en eerste gebruik
4.1 De batterij opladen
- Connect the 160W Fast Charger to a standard power outlet.
- Schuif de accu op de lader totdat deze vastklikt.
- The charger's indicator lights will show the charging status. A fully charged battery will be indicated by a solid green light.
- Zodra deze volledig is opgeladen, verwijdert u de batterij uit de oplader.
4.2 De batterij installeren
- Align the battery pack with the battery port on the base of the drill handle.
- Schuif de batterij in de poort totdat deze stevig vastklikt. Zorg ervoor dat de batterij volledig vastzit om te voorkomen dat deze tijdens gebruik per ongeluk losraakt.
- To remove the battery, press the release button(s) on the sides of the battery pack and slide it out.
4.3 Het hulphandvat bevestigen
For improved control and safety, especially during high-torque applications or hammer drilling, attach the auxiliary handle.
- Maak de hulpgreep los clamp door het tegen de klok in te draaien.
- Slide the handle over the front of the drill body, positioning it to your preferred angle.
- Draai de cl vastamp door deze met de klok mee te draaien totdat de hendel stevig vastzit.

Figure 3: The drill with the auxiliary handle attached, providing enhanced control and stability, particularly when the anti-kickback feature engages.
4.4 Boorbits of accessoires installeren
- Zorg er voor de veiligheid voor dat de boormachine is uitgeschakeld en de accu is verwijderd.
- Grip the rear collar of the 1/2-inch full-metal ratcheting chuck and rotate the front collar counter-clockwise to open the chuck jaws.
- Plaats de boor of het accessoire volledig in de klauwen van de boorkop.
- Rotate the front collar clockwise to tighten the chuck jaws firmly around the bit. The ratcheting mechanism will provide an audible click when securely tightened.
- Gently pull on the bit to ensure it is properly secured.

Figure 4: Detail of the 1/2-inch full-metal ratcheting chuck, designed for secure bit retention and durability.
5. Gebruiksaanwijzing
5.1 In-/uitschakelen en snelheidsregeling
- Trekkerschakelaar: Squeeze the trigger switch to turn the drill on. Release it to turn the drill off.
- Variabele snelheid: The trigger switch is pressure-sensitive, allowing for variable speed control. Pressing the trigger further increases the speed.
- Vooruit/achteruit-keuzeschakelaar: Located above the trigger, push the selector left for forward rotation (drilling/driving) and right for reverse rotation (removing screws). Center position locks the trigger for safety.
5.2 Gear Selection (2-Speed)
The drill features a 2-speed gearbox for optimal performance across various applications.
- Versnelling 1 (lage snelheid, hoog koppel): Slide the gear selector switch to position '1'. Ideal for driving screws, drilling large holes, or applications requiring maximum torque.
- Versnelling 2 (hoge snelheid, lager koppel): Slide the gear selector switch to position '2'. Suitable for fast drilling of smaller holes in wood or metal.
NOTE: Always ensure the drill is stopped before changing gear settings to prevent damage to the gearbox.
5.3 Mode Selection (Drill, Drive, Hammer Drill)
Rotate the collar behind the chuck to select the desired operating mode:
- Boormodus (boorpictogram): Voor het boren van gaten in hout, metaal en kunststof.
- Drive Mode (Screw Icon): For driving screws. The clutch settings (numbered ring) allow you to adjust the torque to prevent over-driving screws or damaging materials.
- Klopboormodus (hamerpictogram): For drilling into masonry, brick, and concrete. This mode combines rotary action with a hammering motion.
5.4 Turbo-modus
The Turbo Mode button, located on top of the drill, provides an immediate increase in speed for faster results when needed.
- Druk op de TURBO button during operation to engage maximum speed.
- Release the button to return to the previously selected speed setting.

Figure 5: The Turbo Mode button, when pressed, provides increased speed for rapid task completion.
5.5 Anti-Kickback Feature
The drill is equipped with an advanced anti-kickback braking technology. If the drill bit binds during operation, the system will detect the sudden rotational force and rapidly stop the motor to reduce the risk of kickback and potential injury.
5.6 Geïntegreerd LED-licht
An LED light is integrated into the drill to illuminate the work area, improving visibility in dimly lit conditions. The light activates when the trigger is pressed.

Figure 6: The integrated LED light provides illumination for improved visibility in dark work environments.
5.7 Drilling into Masonry (Hammer Drill Mode)
Bij het boren in metselwerk, baksteen of beton:
- Select Hammer Drill Mode.
- Ensure the auxiliary handle is securely attached and held firmly with both hands.
- Gebruik geschikte steenboren.
- Apply steady, firm pressure to the drill, allowing the hammering action to break up the material.

Figure 7: The FLEX hammer drill in action, demonstrating its capability to drill into tough materials with 1,400 in-lbs of torque.
6. Onderhoud
6.1 Reinigen
- Koppel altijd de accu los voordat u reinigings- of onderhoudswerkzaamheden uitvoert.
- Gebruik een zachte borstel of perslucht om stof en vuil uit de ventilatieopeningen te verwijderen.
- Veeg de gereedschapsbehuizing af met adamp lap. Gebruik geen agressieve chemicaliën of schurende schoonmaakmiddelen.
- Zorg ervoor dat de klauwen schoon en vrij van vuil zijn, zodat de bit goed blijft vastzitten.
6.2 Opslag
- Bewaar het gereedschap, de accu's en de oplader op een koele, droge plaats, uit de buurt van direct zonlicht en vocht.
- Ensure batteries are partially charged (not fully depleted or fully charged for long-term storage) before storing.
- Store the tool in its carrying case to protect it from damage.
7. Probleemoplossing
| Probleem | Mogelijke oorzaak | Oplossing |
|---|---|---|
| De boormachine start niet. | Batterij niet opgeladen of niet goed geplaatst. Forward/Reverse selector in center (locked) position. | Laad de batterij op en zorg ervoor dat deze stevig is geplaatst. Move selector to forward or reverse position. |
| Stroomuitval tijdens bedrijf. | De batterij is bijna leeg. Overbelastingsbeveiliging geactiveerd. | Laad de batterij op. Verminder de druk op het gereedschap en laat het afkoelen. |
| Bit glijdt in de klauw. | De klauw is niet voldoende vastgedraaid. De klauwplaten zijn vuil of versleten. | Retighten chuck firmly. Reinig de spankopbekken. Als het probleem aanhoudt, moet de spankop mogelijk worden vervangen. |
| Overmatige trillingen of lawaai. | Damaged or bent drill bit. Losse componenten. | Replace drill bit. Check for loose screws or parts. If problem persists, discontinue use and contact service. |
8. Specificaties
| Functie | Detail |
|---|---|
| Modelnummer | FX1271T-2B |
| Deeltage | 24 Volt |
| Chuck-maat | 1/2 inch |
| Type boorkop | Full-Metal Ratcheting |
| Maximaal koppel | 1400 inch pond |
| Maximale rotatiesnelheid | 2500 toeren per minuut |
| Aantal snelheden | 2 |
| Batterijcapaciteit (meegeleverd) | 2.5 Ah, 5.0 Ah Lithium-Ion |
| Charger Type (Included) | 160W snellader |
| Speciale kenmerken | Turbo Mode, Anti-Kickback, LED Light, Brushless Motor |
| Artikelgewicht | 15.37 pond (kit) |
| Productafmetingen | 7.2"L x 4"W x 10"H (Tool) |
| Boorcapaciteit (Hout) | 2 inch |
| Boorcapaciteit (metaal) | 2 inch |
9. Garantie en ondersteuning
9.1 FLEX Beperkte levenslange garantie
This FLEX tool is protected by the FLEX Limited Lifetime Warranty. To qualify for this warranty, you must register your new FLEX tool, battery, or charger within 30 days of purchase through December 31, 2025. Registration can be completed at registermyFLEX.com.
Please refer to the official FLEX website or your product packaging for full terms and conditions of the warranty.
9.2 Klantenservice
For technical assistance, replacement parts, or warranty claims, please contact FLEX customer support. Contact information can typically be found on the FLEX official webwebsite of op de verpakking van uw product.
When contacting support, please have your model number (FX1271T-2B) and purchase date available.


