1. Inleiding
This manual provides detailed instructions for the installation, operation, and maintenance of your Jennov JS7015 5MP Dual-Band Wi-Fi Outdoor Security Camera. Please read this manual thoroughly before using the product to ensure correct usage and optimal performance.

Figure 1: Jennov JS7015 Outdoor Security Camera
The Jennov JS7015 is a 5-megapixel outdoor security camera featuring dual-band Wi-Fi connectivity (2.4GHz and 5GHz). It offers 360-degree viewing capabilities, PIR human detection, auto-tracking, 24/7 recording, and two-way audio for comprehensive outdoor surveillance.
2. Inhoud van het pakket
Controleer de inhoud van het pakket bij ontvangst. Als er onderdelen ontbreken of beschadigd zijn, neem dan contact op met de klantenservice.
- Jennov JS7015 5MP Dual-Band Wi-Fi Outdoor Security Camera
- Stroomadapter
- Montageschroeven en ankers
- Gebruikershandleiding (dit document)
3. Product voorbijview
Maak uzelf vertrouwd met de onderdelen van de camera.

Figure 2: Camera Pan and Tilt Mechanism
The camera features a motorized pan and tilt mechanism, allowing for a 355° horizontal rotation (pan) and a 60° vertical rotation (tilt). This enables comprehensive coverage of the surveillance area. The camera body houses the lens, infrared LEDs, white light LEDs, microphone, and speaker. Two external antennas provide enhanced Wi-Fi signal reception.
- Cameralens: Neemt video optage.
- Infrarood LED's: Provide illumination for black and white night vision.
- Witte LED's: Provide illumination for color night vision and act as a spotlight.
- Microfoon: Legt audio vast voor tweewegcommunicatie en opnames.
- Spreker: Geeft audio-uitgangen voor tweewegcommunicatie en alarmen.
- antennes: Voor Wi-Fi-connectiviteit.
- Voedingspoort: Wordt aangesloten op de voedingsadapter.
- Resetknop: Used to reset the camera to factory settings (usually located near the SD card slot or under a cover).
- SD-kaartsleuf: Voor lokale video-opslag (ondersteunt tot 128 GB, niet inbegrepen).
4. Installatiehandleiding
4.1 fysieke installatie
The camera is designed for outdoor use and is IP66 waterproof. Choose a suitable location for mounting, ensuring a clear view of the area you wish to monitor and proximity to a power source.
- Markeer boorposities: Use the mounting template (if provided) or the camera base to mark the screw holes on the wall.
- Gaten boren: Drill holes at the marked positions. Insert wall anchors if mounting on masonry.
- Beveiligde camera: Attach the camera base to the wall using the provided screws.
- Hoek aanpassen: Loosen the adjustment screws (if any) to position the camera for optimal coverage before tightening.

Afbeelding 3: IP66 waterdicht ontwerp
The camera is built with waterproof materials and has an IP66 rating, making it suitable for outdoor installation and resistant to dust and water jets.
4.2 Stroomaansluiting
Connect the provided power adapter to the camera's power port and then plug it into a power outlet. The camera will power on and initiate its startup sequence.
4.3 App downloaden en accountregistratie
The Jennov JS7015 camera uses the EseeCloud application for remote access and control.
- Download app: Zoeken naar "EseeCloud" in your smartphone's app store (Google Play Store for Android or Apple App Store for iOS) and download the application.
- Account Registreren: Open the EseeCloud app and follow the on-screen instructions to register a new account using your email address or phone number.
4.4 De camera toevoegen aan de app
Zorg ervoor dat uw smartphone is verbonden met hetzelfde wifi-netwerk (2.4 GHz of 5 GHz) als waarmee u de camera wilt verbinden.
- Open app: Launch the EseeCloud app and log in.
- Apparaat toevoegen: Tap the "+" icon or "Add Device" option.
- Selecteer apparaattype: Choose "Wi-Fi Camera" or similar option.
- Scan QR-code: The app may prompt you to scan a QR code located on the camera or its packaging.
- Wi-Fi-configuratie: Follow the app's instructions to enter your Wi-Fi network name (SSID) and password. The camera supports both 2.4GHz and 5GHz Wi-Fi bands.
- Verbinden: The camera will attempt to connect to your Wi-Fi network. Once connected, it will appear in your device list within the app.
- Stel een wachtwoord in: Maak voor de beveiliging een sterk wachtwoord aan voor uw camera.
5. Gebruiksaanwijzing
5.1 Levend View en Pan/Tilt-bediening
Selecteer uw camera in de EseeCloud-app om toegang te krijgen tot de live-beelden view.
- Live feed: View real-time video from your camera.
- Pannen/kantelen: Use the directional controls within the app to remotely adjust the camera's horizontal (pan) and vertical (tilt) angles.
5.2 Automatisch volgen
De camera kan automatisch bewegende objecten binnen zijn gezichtsveld volgen view.

Figure 4: Auto Tracking in Action
Enable the auto-tracking feature in the app settings. The camera will then detect and follow moving targets until they leave the camera's view.
5.3 Bewegingsdetectie en alarmen
The camera features advanced PIR (Passive Infrared) human detection to minimize false alarms.

Figure 5: PIR Human Detection and Alarm Options
When a human thermal profile is detected, the camera can trigger various alarms.
- PIR-detectie: Activates recording and sends notifications when a human is detected.
- Geluidsalarm: Configure the camera to emit a siren sound upon detection.
- Spotlight Alarm: The integrated spotlight can be activated to deter intruders.
- Meldingen: Receive instant alerts on your smartphone via the EseeCloud app.
5.4 Tweerichtingsaudio
Communiceer rechtstreeks met personen in de buurt van de camera via de ingebouwde microfoon en luidspreker.

Figuur 6: Tweerichtingsaudiocommunicatie
Tap the microphone icon in the app to speak, and listen through the camera's speaker. This feature is useful for interacting with visitors or deterring unwanted guests.
5.5 Opname en opslag
De camera ondersteunt continu opnemen, 24 uur per dag, 7 dagen per week, en biedt flexibele opslagmogelijkheden.
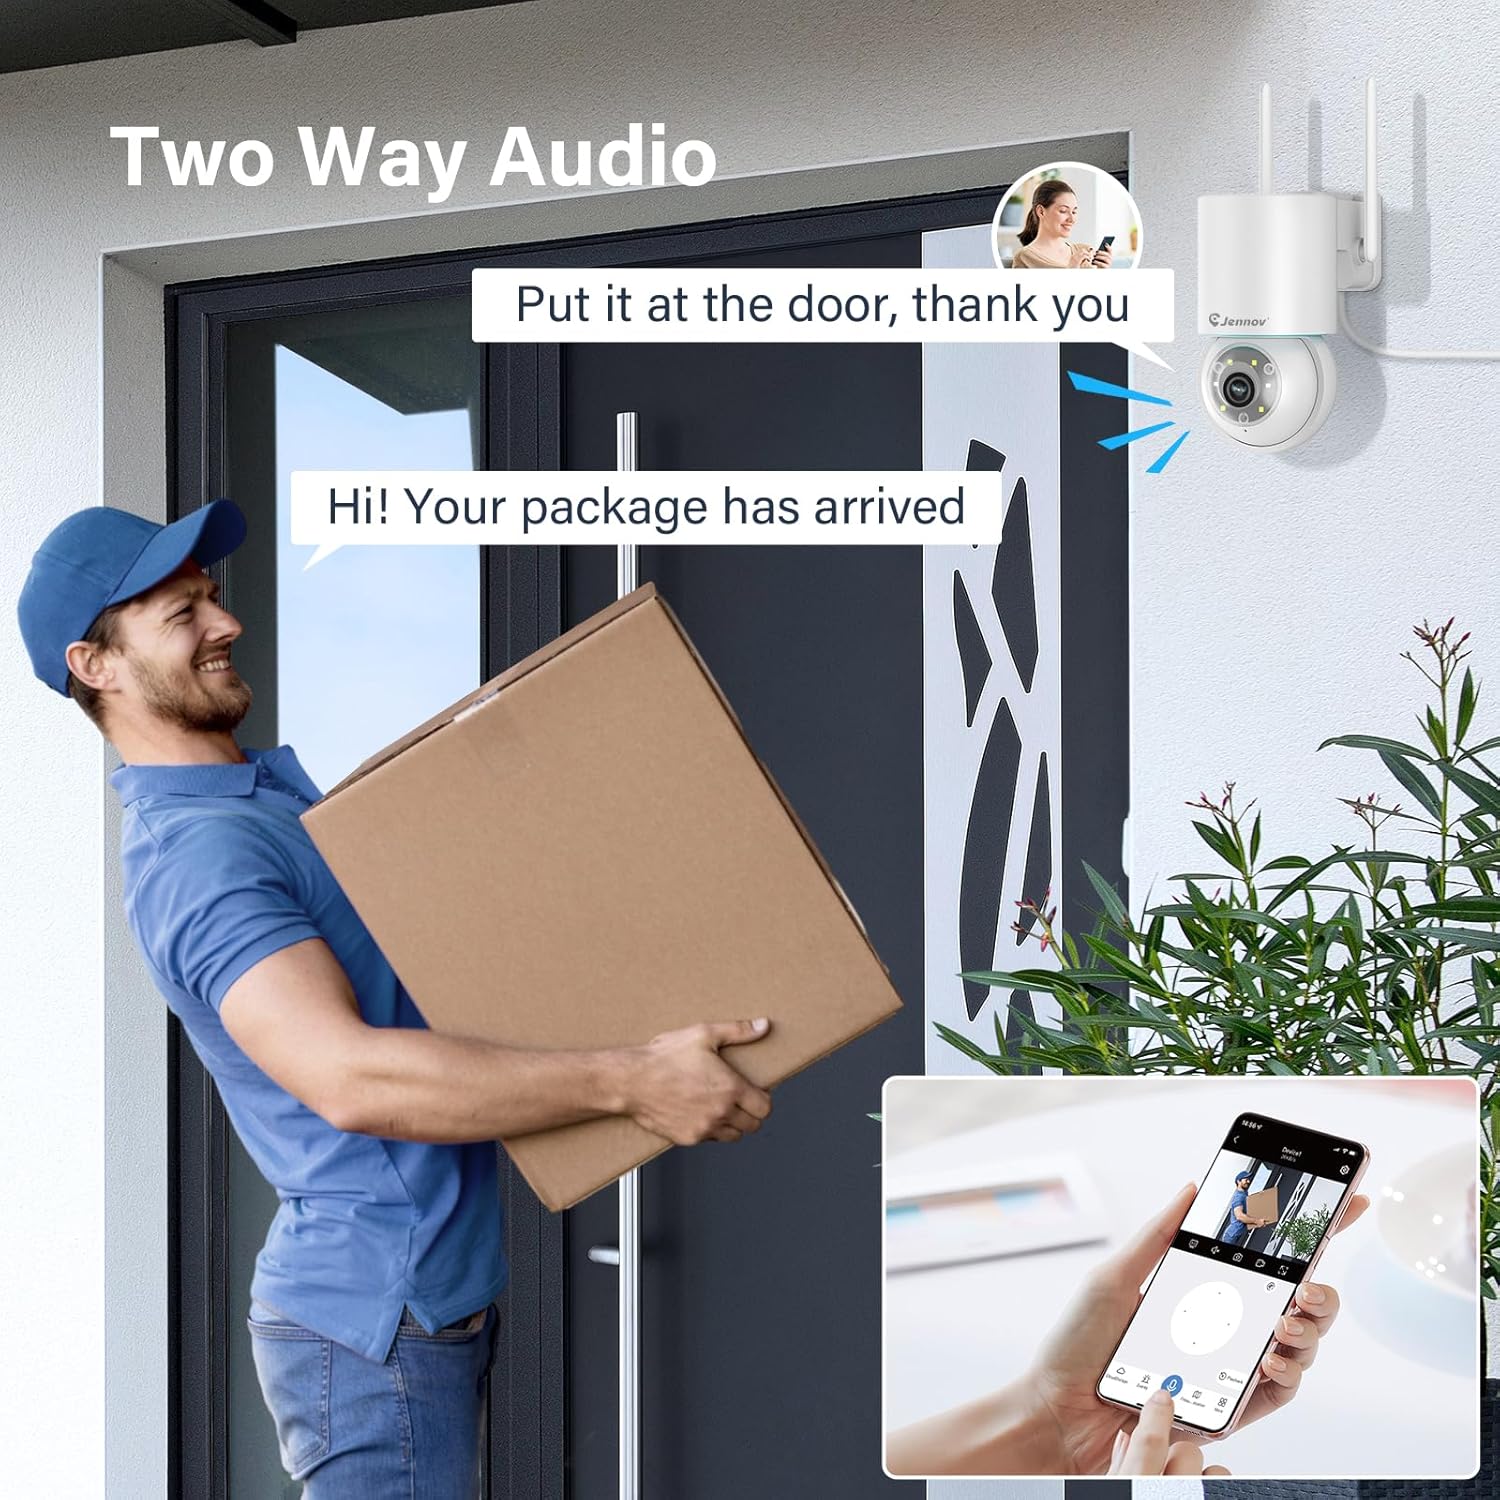
Figure 7: 24/7 Recording and Storage Options
Toegang tot opgenomen footage via the app's playback function.
- 24/7 opname: The camera can continuously record footage, ensuring no vital moments are missed.
- Lokale opslag: Insert a microSD card (up to 128GB, not included) into the camera's SD card slot for local storage.
- Cloudopslag: Optional cloud storage service is available, often with a free trial period (e.g., 7 days). This provides off-site backup of your recordings.
5.6 Nachtzichtmodi
The camera offers three night vision modes for clear visibility in low-light conditions.

Figure 8: 5MP Color Night Vision
The camera provides clear night vision up to 65 feet (20 meters) with 5MP resolution.
- Volledige kleurenmodus: Utilizes white LEDs to provide full-color video at night.
- Zwart-witmodus: Uses infrared LEDs for traditional black and white night vision.
- Slimme modus: Automatically switches between black and white and full color based on detected motion or light conditions.
You can switch between these modes within the EseeCloud mobile application.
5.7 Customized Detection Area
Definieer specifieke gebieden binnen de camera view waar bewegingsdetectie actief moet zijn.

Figure 9: Customized Detection Area Settings
This feature helps reduce unwanted alerts by focusing detection on critical zones. The app typically offers "Area mode" and "Cordon mode" for defining these zones.
6. Onderhoud
- Schoonmaak: Reinig de cameralens regelmatig met een zachte, droge doek om een heldere beeldkwaliteit te garanderen. Gebruik geen agressieve chemicaliën.
- Firmware-updates: Check the EseeCloud app periodically for available firmware updates. Keeping your camera's firmware updated ensures optimal performance and security.
- SD-kaartbeheer: If using local storage, periodically check the SD card's status in the app. Format the card as needed to maintain recording efficiency.
- Voeding: Zorg ervoor dat de stroomadapter en de kabel onbeschadigd zijn en goed zijn aangesloten.
7. Probleemoplossing
- Camera offline:
- Controleer de sterkte van het Wi-Fi-signaal.
- Zorg ervoor dat de camera is ingeschakeld.
- Start de camera en uw Wi-Fi-router opnieuw op.
- If using 5GHz Wi-Fi, ensure your router supports it and the camera is connected to the correct band.
- Try re-adding the camera to the EseeCloud app.
- Slechte beeldkwaliteit:
- Maak de cameralens schoon.
- Ensure sufficient lighting, especially at night.
- Controleer de snelheid van uw internetverbinding.
- Bewegingsdetectie werkt niet:
- Verify motion detection settings in the app are enabled.
- Pas de detectiegevoeligheid aan.
- Zorg ervoor dat er geen obstakels het zicht van de camera belemmeren. view.
- Check if detection areas are correctly configured.
- Problemen met tweerichtingsaudio:
- Ensure microphone and speaker permissions are granted to the EseeCloud app on your smartphone.
- Check volume settings on both the app and your phone.
- Zorg ervoor dat er geen fysieke obstakels zijn die de microfoon of luidspreker van de camera blokkeren.
- Cannot Access SD Card Recordings:
- Zorg ervoor dat de SD-kaart correct is geplaatst.
- Controleer of de SD-kaart correct is geformatteerd (meestal FAT32).
- Verify that continuous recording or event recording to SD card is enabled in the app.
- The SD card might be full; consider formatting it or replacing it.
8. Specificaties
| Functie | Specificatie |
|---|---|
| Modelnummer | JS7015 |
| Merk | Jennov |
| Oplossing | 5 Megapixel (1920p video recording) |
| Pan / tilt hoek | Pan 355 °, Tilt 60 ° |
| Nachtzicht | Color Night Vision, Black & White Night Vision, Smart Mode (up to 65ft/20m) |
| Wi-Fi-connectiviteit | Dual-band (2.4 GHz / 5 GHz) |
| Geluid | Tweerichtingsaudio (ingebouwde microfoon en luidspreker) |
| Bewegingsdetectie | PIR-sensor voor persoonsdetectie, automatische tracking |
| Opslagopties | MicroSD-kaart (tot 128 GB), cloudopslag |
| Waterdichtheidsclassificatie | IP66 |
| Stroomverbruik | 5 Volt |
| Stroomverbruik | 24 Watt |
| Afmetingen (L x B x H) | 12x8x16cm |
| Materiaal | Plastic |
| Montagetype | Muurbevestiging |
| Compatibele apparaten | Smartphone, tablet, computer |
| Controle-app | EseeCloud |
9. Garantie en ondersteuning
For warranty information and technical support, please refer to the warranty card included with your product or visit the official Jennov webplaats.
- Klantenservice: Contact Jennov customer support for assistance with product issues, technical questions, or warranty claims.
- Online bronnen: Check the Jennov webWebsite met veelgestelde vragen, bijgewerkte handleidingen en softwaredownloads.


