Invoering
Thank you for choosing the Auronic Electric Air Dehumidifier. This appliance is designed to effectively remove excess moisture from the air, creating a more comfortable and healthier indoor environment. It is ideal for use in various spaces such as bathrooms, basements, and living areas, helping to prevent issues like mold, mildew, and dampness. Please read this manual thoroughly before operation to ensure proper use, maintenance, and safety.

Figure 1: Auronic Electric Air Dehumidifier (Model AU3129 12L)
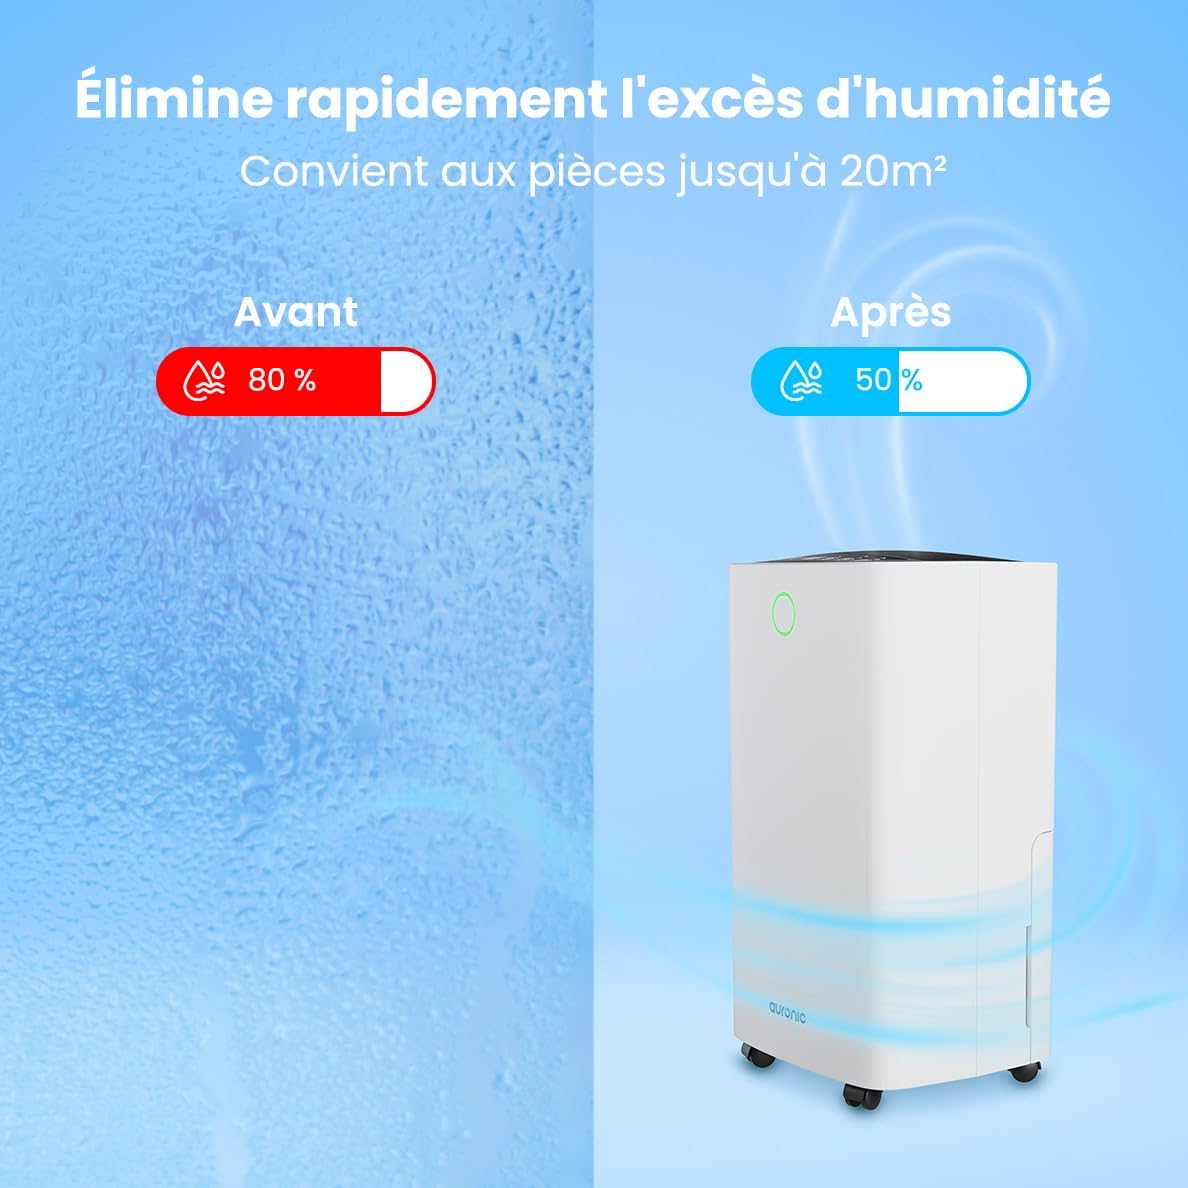
Figure 2: Humidity Reduction Effectiveness
Veiligheidsinformatie
Om het risico op brand, elektrische schokken of letsel te verminderen, dient u altijd de volgende basisveiligheidsmaatregelen te volgen:
- Lees alle instructies voordat u het apparaat gebruikt.
- Zorg ervoor dat de voeding overeenkomt met de voltagzoals vermeld op het classificatielabel.
- Gebruik de luchtontvochtiger niet als het netsnoer of de stekker beschadigd is.
- Plaats het apparaat altijd op een stabiele, vlakke ondergrond.
- Houd het apparaat op minimaal 20 cm afstand van muren of andere objecten om een goede luchtcirculatie te garanderen.
- Steek geen vingers of vreemde voorwerpen in de luchtinlaat of -uitlaat.
- Haal de stekker van de luchtontvochtiger uit het stopcontact voordat u deze reinigt, verplaatst of onderhoudt.
- Gebruik het apparaat niet in natte of damp environments where water may splash.
- Buiten bereik van kinderen houden.
- If the unit has been tilted, allow it to stand upright for at least 24 hours before plugging it in.
Product voorbijview
Familiarize yourself with the components of your Auronic Dehumidifier.

Figure 3: Dehumidifier Dimensions and Included Accessories

Figure 4: Easy Portability with Wheels and Handle
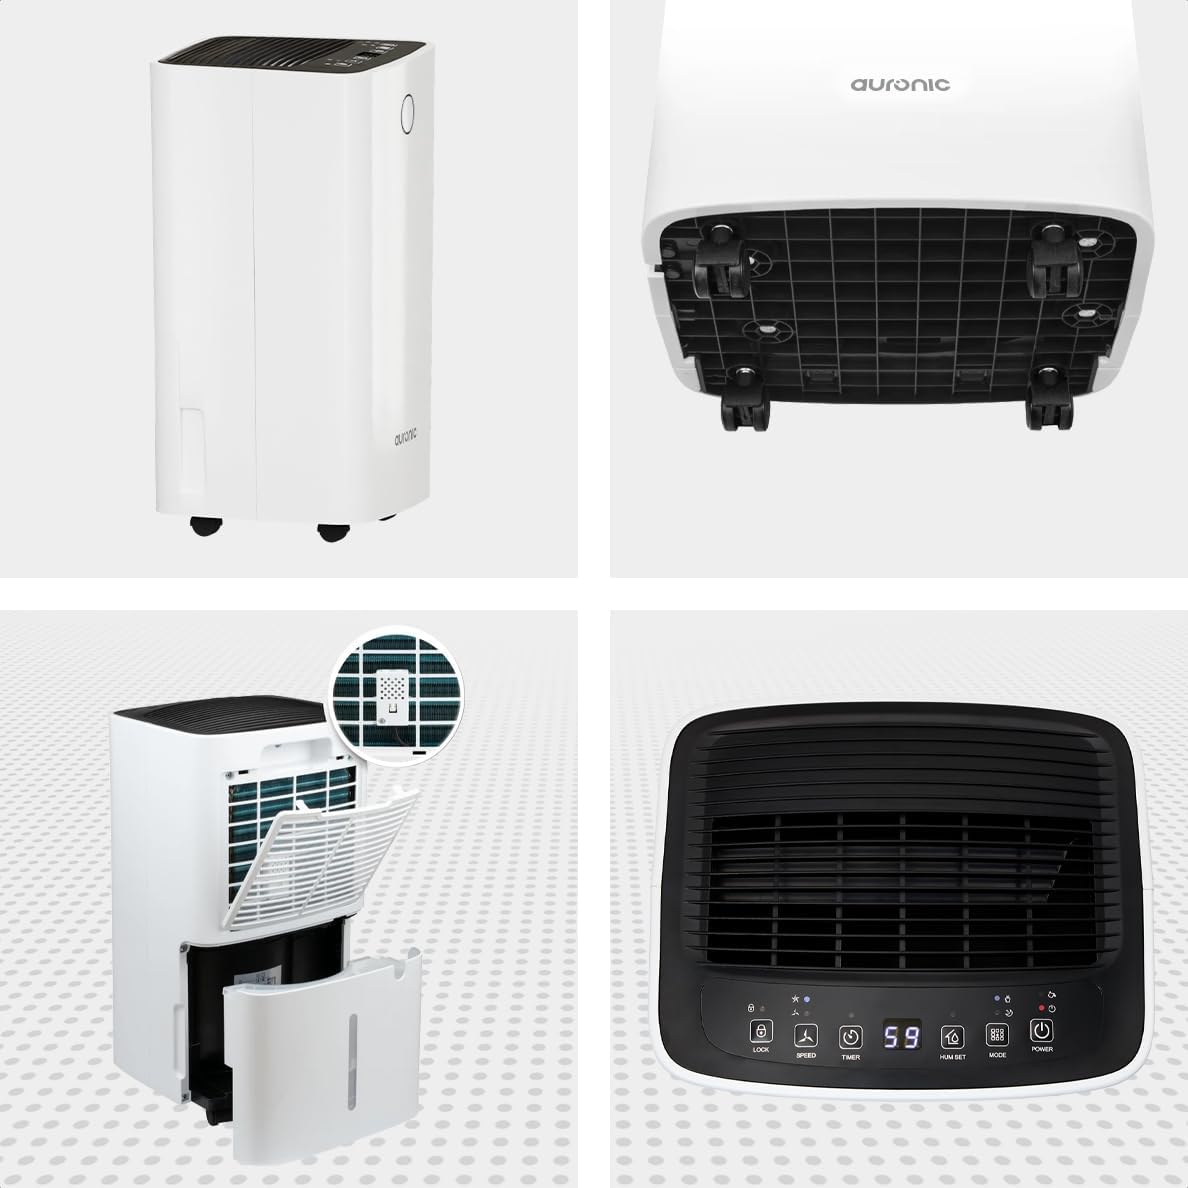
Figuur 5: Meerdere hoeken View of the Dehumidifier

Figuur 6: Bedieningspaneel overview
Belangrijkste componenten:
- Configuratiescherm: Intuitive interface for setting modes, humidity levels, and timer.
- Luchtinlaat/uitlaat: Where air enters and exits the unit. Ensure these are not obstructed.
- Waterreservoir: Removable 2-liter tank for collecting condensed water.
- Continue afvoeruitlaat: Port for attaching a hose for continuous drainage.
- Wielen en handvat: Voor gemakkelijke draagbaarheid.
- Luchtfilter: Located at the back, helps filter dust from the air.
Instellen
- Uitpakken: Haal de luchtontvochtiger voorzichtig uit de verpakking. Bewaar de verpakking voor toekomstige opslag of transport.
- Plaatsing: Place the unit upright on a firm, level surface in the desired location. Ensure there is at least 20 cm of clear space around all sides for proper air circulation.
- Initiële standby: If the unit was tilted during transport, let it stand upright for a minimum of 24 hours before plugging it in. This allows the refrigerant to settle.
- Stroomaansluiting: Sluit het netsnoer aan op een geaard stopcontact.
- Waterreservoir: Zorg ervoor dat het waterreservoir correct in het apparaat is geplaatst. De luchtontvochtiger werkt niet als het reservoir vol is of niet goed vastzit.
Gebruiksaanwijzing
Functies van het bedieningspaneel:
| Knop/indicator | Functie |
|---|---|
| Aan/uit-knop | Hiermee schakelt u het apparaat AAN of UIT. |
| Modusknop | Cycles through operating modes (e.g., Dehumidify, Laundry Drying, Sleep). |
| Hum Set Button | Hiermee kunt u het gewenste vochtigheidsniveau instellen (bijv. 40% - 80% RH). |
| Timer-knop | Hiermee stelt u de timer voor automatisch in- of uitschakelen in (tot 12 uur). |
| Snelheidsknop | Adjusts fan speed (e.g., High, Low). |
| Vergrendelknop | Vergrendelt het bedieningspaneel om onbedoelde wijzigingen te voorkomen. |
| Humidity Indicator LED | Changes color based on current humidity level (e.g., Blue: <45%, Green: 45-65%, Red: >65%). Figure 7: Humidity Indicator LED Explained |
Algemene werking:
- Inschakelen: Druk op de Stroom button. The display will show the current room humidity.
- Gewenste luchtvochtigheid instellen: Druk op de Hum Set button repeatedly to select your desired humidity level. The unit will operate until this level is reached, then cycle on and off to maintain it.
- Selecteer modus: Druk op de Modus button to choose between different operating modes.
- Ontvochtigingsmodus: Standard operation to reduce ambient humidity.
- Wasdroogmodus: Increases fan speed and continuous operation to assist in drying clothes.

Figure 8: Using the Dehumidifier for Laundry Drying
- Slaapstand: Operates at a lower fan speed and reduced noise level for quiet nighttime use.

Figure 9: Silent Operation for Nighttime Use
- Timer instellen: Druk op de Tijdklok button to set an auto-off time (when the unit is on) or an auto-on time (when the unit is off).

Figure 10: Integrated Timer Function
- Ventilatorsnelheid: Gebruik de Snelheid button to adjust the fan speed as desired.
- Kinderslot: Houd de Slot button for 3 seconds to activate/deactivate the child lock function.
Continue drainage:
For continuous operation without emptying the water tank, you can connect the included drain hose to the continuous drain outlet. Ensure the hose is sloped downwards to allow gravity drainage into a suitable receptacle or drain.

Figure 11: Continuous Drainage Setup
Onderhoud
Regelmatig onderhoud zorgt voor optimale prestaties en verlengt de levensduur van uw luchtontvochtiger.
Het waterreservoir legen:
When the water tank is full, the unit will automatically stop operating and an indicator light will illuminate. Carefully remove the tank, empty the collected water, and reinsert it firmly until it clicks into place.

Figure 12: Removing the 2-Liter Water Tank
Het luchtfilter reinigen:
Het luchtfilter moet elke twee weken of vaker worden schoongemaakt, afhankelijk van het gebruik en de luchtkwaliteit.
- Schakel de luchtontvochtiger uit en haal de stekker uit het stopcontact.
- Zoek het luchtfilter aan de achterkant van het apparaat en verwijder het.
- Clean the filter with warm, soapy water or use a vacuum cleaner to remove dust.
- Spoel het filter grondig af en laat het volledig aan de lucht drogen voordat u het terugplaatst.
Reinigen van de buitenkant van het apparaat:
Veeg de buitenkant van de luchtontvochtiger schoon met een zachte, damp lap. Gebruik geen agressieve chemicaliën of schurende schoonmaakmiddelen.
Probleemoplossing
Voordat u contact opneemt met de klantenservice, raadpleeg dan de volgende veelvoorkomende problemen en oplossingen:
| Probleem | Mogelijke oorzaak | Oplossing |
|---|---|---|
| Luchtontvochtiger gaat niet aan. | No power, power cord loose, water tank full or improperly seated. | Check power connection, empty and reinsert water tank correctly. |
| Er is geen water verzameld. | Room humidity too low, temperature too low, air filter clogged, continuous drain hose connected. | Check room humidity/temperature, clean air filter, ensure continuous drain hose is not connected if tank collection is desired. |
| Eenheid maakt lawaai. | Het apparaat staat niet op een vlakke ondergrond, het luchtfilter is verstopt of er is een probleem met een intern onderdeel. | Place on a level surface, clean air filter. If noise persists, contact support. |
| Dehumidification is slow or ineffective. | Room size too large, doors/windows open, air inlets/outlets blocked, air filter dirty. | Ensure room is sealed, clear obstructions, clean air filter. |
Specificaties
| Functie | Detail |
|---|---|
| Merk | Auronisch |
| Modelnaam | Auronic Silent Low Consumption Dehumidifier |
| Productafmetingen (L x B x H) | 21.5x47x25.5cm |
| Artikelgewicht | 11 kilogram |
| Capaciteit (Ontvochtiging) | 12 liter per dag |
| Watertankvolume | 2 liter |
| Stroom | 185 Watt |
| Kleur | Wit |
| Speciale kenmerken | Easy to use, Laundry Drying function, Prevents and effectively eliminates humidity, 2-liter tank, Automatic shut-off. |
| Aanbevolen gebruik | Huiselijk |
Garantie en ondersteuning
Auronic products are manufactured to the highest quality standards. For warranty information, technical support, or service inquiries, please refer to the contact details provided on your purchase receipt or visit the official Auronic website. Please have your model number (AU3129 12L) and purchase date ready when contacting support.


