1. Belangrijke veiligheidsinformatie
Lees alle instructies aandachtig door voordat u de luchtontvochtiger in gebruik neemt. Bewaar deze handleiding voor toekomstig gebruik.
- Zorg ervoor dat het apparaat op een vlakke, stabiele ondergrond staat om morsen van water te voorkomen.
- Maintain adequate clearance (at least 20 cm) around the unit for proper airflow.
- Do not operate the unit with a damaged power cord. Contact customer support for replacement.
- Haal de stekker van de luchtontvochtiger uit het stopcontact voordat u deze reinigt of onderhoudt.
- Steek geen voorwerpen in de luchtinlaat of -uitlaat.
- Houd het apparaat uit de buurt van warmtebronnen en direct zonlicht.
- Dit apparaat is niet bedoeld voor gebruik door personen (inclusief kinderen) met beperkte fysieke, sensorische of mentale vermogens, of met een gebrek aan ervaring en kennis, tenzij zij onder toezicht staan of instructies hebben gekregen over het gebruik van het apparaat door een persoon die verantwoordelijk is voor hun veiligheid.
2. Product voorbijview
The Waykar 80 Pints Dehumidifier is designed to efficiently remove excess moisture from your environment, improving air quality and comfort. It is suitable for spaces up to 5,000 square feet.

Figuur 2.1: Voorzijde view of the Waykar 80 Pints Dehumidifier.

Figure 2.2: Dehumidifier operating in a room, illustrating its coverage capability and adjustable humidity range (30-80% RH).
Belangrijkste kenmerken zijn:
- Inhoud van 80 pint: Verwijdert tot 80 liter vocht per dag.
- Energy Star-gecertificeerd: Designed for high energy efficiency.
- Wide-Angle Swing: Automatic 30°-90° swing function for improved air circulation.
- Stille werking: Werkt bij een geluidsniveau van slechts 42 dB.
- Slimme aanraakbediening: Intuitive panel for easy settings adjustment.
- 24-uurstimer: Schedule operations for convenience.
- Auto Defrost & Memory Restart: Ensures stable performance and resumes settings after power interruption.
- Flexibele afwatering: Options for manual tank emptying or continuous drainage.
- Wasbaar luchtfilter: Gemakkelijk schoon te maken en te onderhouden.
- 360° Swivel Wheels & Integrated Handle: Voor gemakkelijke mobiliteit.
3. Installatie en installatie
3.1 Uitpakken
Carefully remove the dehumidifier from its packaging. Inspect the unit for any signs of damage. If any damage is found, do not operate the unit and contact customer support.
3.2 Plaatsing
Place the dehumidifier on a firm, level surface in a location where the ambient temperature will not fall below 5°C (41°F). Ensure there is at least 20 cm (8 inches) of space around the unit for proper air circulation. Avoid placing the unit near heat-generating appliances or in direct sunlight.

Figure 3.1: The dehumidifier features 360° swivel wheels and an integrated handle for easy movement, along with tidy cable storage.
3.3 Stroomaansluiting
Sluit het netsnoer aan op een geaard stopcontact. Zorg ervoor dat het volumetage and frequency of the power supply match the specifications on the unit's rating label.
4. Gebruiksaanwijzing
Via het bedieningspaneel kunt u alle functies van de luchtontvochtiger beheren.
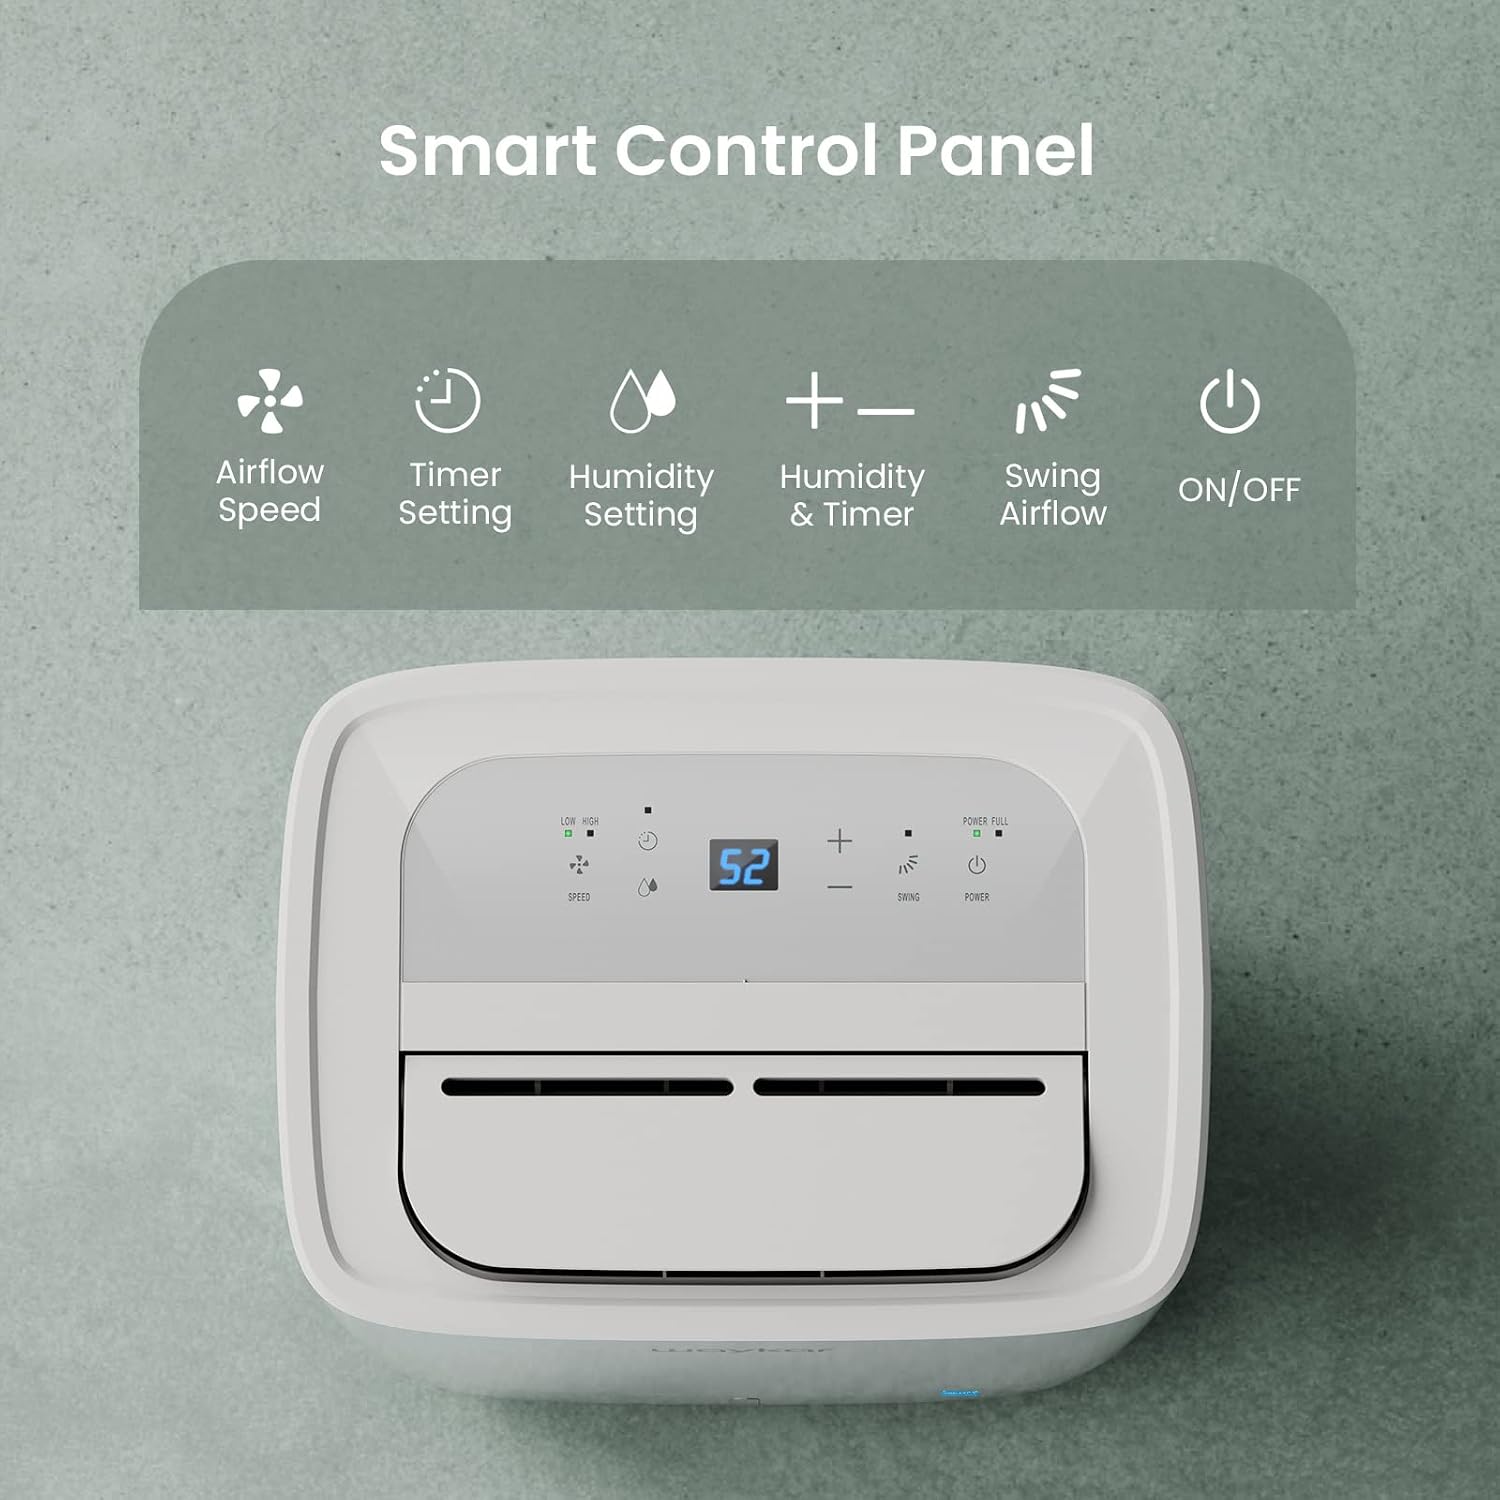
Figure 4.1: Smart Control Panel with buttons for Airflow Speed, Timer Setting, Humidity Setting, Swing Airflow, and ON/OFF.
4.1 Aan/uit zetten
- Druk op de Stroom knop om het apparaat AAN of UIT te zetten.
4.2 Instellen van de luchtvochtigheid
- Druk op de + or - buttons to adjust the desired humidity level between 30% and 80% Relative Humidity (RH). The unit will operate until the set humidity level is reached, then cycle ON/OFF to maintain it.
4.3 Ventilatorsnelheden
- Druk op de Snelheid button to toggle between Low and High fan speeds.
4.4 Timerfunctie
- Druk op de Tijdklok button to set a delay for the unit to turn ON or OFF. The timer can be set from 0.5 to 24 hours.
4.5 Swing Airflow
- Druk op de Schommel button to activate the automatic 30°-90° airflow oscillation. This helps distribute dehumidified air more evenly.
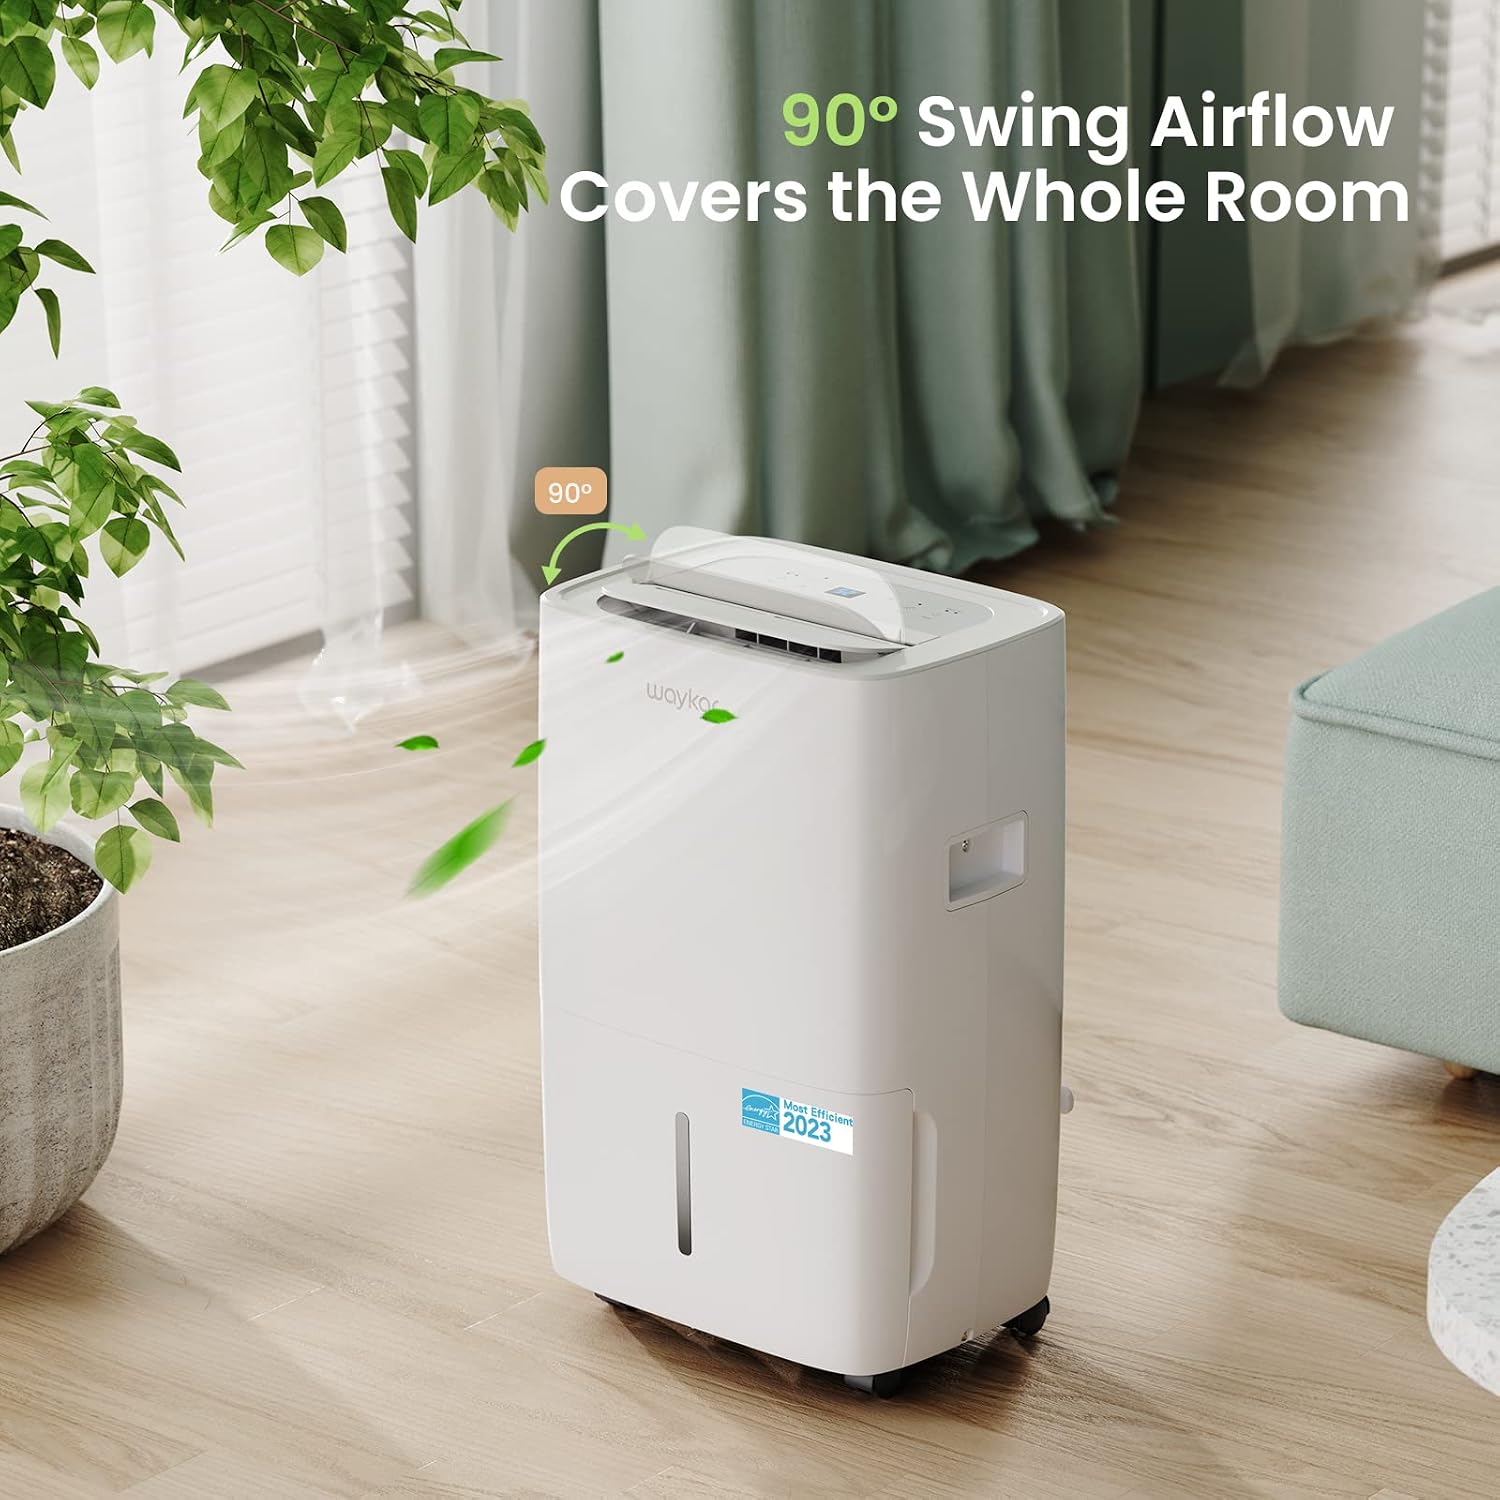
Figure 4.2: The 90° swing airflow feature helps cover the entire room for efficient dehumidification.
4.6 Kinderslot
- Om het kinderslot te activeren, houdt u de knop ingedrukt. Tijdklok button for 3 seconds. The control panel will be locked to prevent accidental changes. Repeat to unlock.
4.7 Auto Defrost and Memory Restart
- The unit features an automatic defrost function that activates when frost builds up on the evaporator coils, ensuring efficient operation in cooler environments.
- In geval van een stroomstoringtage, the Memory Restart function will automatically resume the previous settings once power is restored.
5. Afvoeropties
The Waykar dehumidifier offers two convenient drainage methods:
5.1 Handmatige afvoer (watertank)
- When the 1.14-gallon (4.3L) water tank is full, the unit will automatically shut off and an indicator light will illuminate on the control panel.
- Trek het waterreservoir voorzichtig uit de voorkant van het apparaat.
- Leeg het verzamelde water.
- Slide the empty tank back into the unit until it clicks into place. The unit will then resume operation.
5.2 Continuous Drainage (Drain Hose)
- For continuous operation without needing to empty the tank, attach the included 3.3 ft (1 m) drain hose to the drainage outlet at the back of the unit.
- Ensure the hose is securely tightened to prevent leaks.
- Direct the other end of the hose to a suitable drain (e.g., floor drain, sink). Ensure the hose is sloped downwards to allow gravity drainage.

Figure 5.1: Illustration of both manual drainage (left) and continuous drainage (right) options.
6. Onderhoud
Regelmatig onderhoud zorgt ervoor dat uw luchtontvochtiger optimaal presteert en lang meegaat.
6.1 Het luchtfilter reinigen
The washable air filter should be cleaned regularly (approximately every 250 hours of operation or when the filter indicator light illuminates) to maintain efficiency.
- Schakel het apparaat uit en haal de stekker uit het stopcontact.
- Verwijder het luchtfilter aan de achterkant van het apparaat.
- Was het filter met warm zeepsop. Spoel het grondig af.
- Laat het filter volledig aan de lucht drogen voordat u het terugplaatst in het apparaat.
- Once the filter is reinstalled, press and hold the Filter button for 3 seconds to reset the filter indicator.

Figure 6.1: The detachable and washable water tank, featuring a visible water level indicator.
6.2 De watertank reinigen
Clean the water tank periodically to prevent mold and bacteria growth.
- Verwijder het waterreservoir uit het apparaat.
- Reinig de tank met warm water en een mild reinigingsmiddel.
- Spoel grondig af en droog voordat u het terug in de luchtontvochtiger plaatst.
6.3 Buitenreiniging
- Veeg de buitenkant van het apparaat af met een zachte, damp lap. Gebruik geen agressieve chemicaliën of schurende schoonmaakmiddelen.
7. Probleemoplossingsgids
Voordat u contact opneemt met de klantenservice, raadpleeg dan de volgende veelvoorkomende problemen en oplossingen:
| Probleem | Mogelijke oorzaak | Oplossing | ||||||||||
|---|---|---|---|---|---|---|---|---|---|---|---|---|
| Dehumidifier does not turn ON | Geen stroomvoorziening; netsnoer niet aangesloten; watertank vol of verkeerd geïnstalleerd. | Check power outlet; Plug in power cord securely; Empty and correctly reinstall water tank. | ||||||||||
| Unit is running but not dehumidifying | Luchtfilter verstopt; kamertemperatuur te laag; luchtvochtigheid te hoog ingesteld. | Reinig het luchtfilter; zorg ervoor dat de kamertemperatuur hoger is dan 5°C (41°F); verlaag de gewenste luchtvochtigheidsinstelling. | ||||||||||
| Eenheid maakt lawaai | Apparaat staat niet op een vlakke ondergrond. Luchtfilter verstopt. | Plaats het apparaat op een vlakke, stabiele ondergrond; reinig het luchtfilter. | ||||||||||
| Er lekt water uit het apparaat | Water tank incorrectly installed; Drain hose not securely attached (continuous drainage). | Reinstall water tank correctly; Securely tighten drain hose connection. | ||||||||||
Foutcode
Gerelateerde documenten - JD025CE-80-CA
|


