1. Belangrijke veiligheidsinstructies
Please read all instructions carefully before using the CREATE Thera Classic Espresso Machine. Retain this manual for future reference. Incorrect operation may result in damage to the appliance or personal injury.
- Zorg ervoor dat het apparaat is aangesloten op een geaard stopcontact met het juiste voltage.tage (240 V).
- Dompel het apparaat, het netsnoer en de stekker niet onder in water of andere vloeistoffen.
- Houd uw handen en snoeren uit de buurt van hete oppervlakken en stoom. De stoompijp en de portafilter kunnen tijdens gebruik erg heet worden.
- Always turn off the machine and unplug it before cleaning or when not in use.
- Gebruik het apparaat niet met een beschadigd snoer of stekker, of als het apparaat defect is of op enigerlei wijze beschadigd is.
- Dit apparaat is alleen voor huishoudelijk gebruik. Niet buitenshuis gebruiken.
- Kinderen moeten onder toezicht staan om te voorkomen dat ze met het apparaat spelen.
2. Product voorbijview en componenten
Familiarize yourself with the parts of your CREATE Thera Classic Espresso Machine.

Afbeelding 2.1: Voorkant view of the CREATE Thera Classic Espresso Machine, showing the control panel, portafilter, and drip tray with two espresso cups.

Afbeelding 2.2: All removable components of the espresso machine laid out, including the portafilter, single and double shot filter baskets, measuring spoon with tamper, and the water tank.
Hoofd onderdelen:
- Configuratiescherm: Power button, single shot button, double shot button, pressure gauge, steam knob.
- Waterreservoir: Verwijderbaar reservoir voor vers water. Inhoud: 1.25 liter.
- Portafilter: Handle with filter basket holder.
- Filtermanden: For single and double espresso shots, or ESE pods.
- Stoompijpje: Voor het opschuimen van melk en het afgeven van heet water.
- Afdruiprek: Uitneembaar lekbakje voor het opvangen van overtollig vocht.
- Maatlepel/Tampeh: For measuring ground coffee and tamping it into the filter basket.
3. Instellen en eerste gebruik
3.1 Uitpakken
- Verwijder voorzichtig alle verpakkingsmaterialen en controleer of alle onderdelen aanwezig zijn.
- Clean the water tank, portafilter, filter baskets, and drip tray with warm water and mild detergent. Rinse thoroughly.
- Veeg de buitenkant van de machine schoon met adamp lap.
3.2 Het waterreservoir vullen
- Verwijder het waterreservoir van de achterkant van de machine.
- Fill the tank with fresh, cold water up to the MAX level indicator. Do not exceed the MAX line.
- Plaats het waterreservoir terug op zijn plek en zorg ervoor dat het goed vastzit.
3.3 Priming the Machine (First Use or After Extended Storage)
Priming ensures the water system is filled and ready for operation.
- Zorg ervoor dat het waterreservoir gevuld is.
- Place a large container under the portafilter head and another under the steam wand.
- Plug in the machine and press the power button (usually indicated by a power symbol or a light). The indicator light will illuminate.
- Once the machine has heated up (indicator light stops flashing or turns solid), press the double shot button to run water through the portafilter head until water flows steadily.
- Turn the steam knob to release steam/hot water through the steam wand until water flows steadily. Close the steam knob.
- De machine is nu klaar voor gebruik.
4. Gebruiksaanwijzing
4.1 Espresso maken met gemalen koffie
- Bereid de machine voor: Ensure the water tank is filled and the machine is powered on and preheated.
- De portafilter voorbereiden: Plaats het gewenste filtermandje (enkel of dubbel) in de filterhouder.
- Koffie toevoegen: Use the measuring spoon to add freshly ground espresso coffee to the filter basket. For a single shot, use one level spoon; for a double, use two.
- Tamp de koffie: Gebruik de tamper end of the measuring spoon to press the coffee grounds firmly and evenly. Ensure the surface is level.
- Portafilter bevestigen: Align the portafilter with the group head (INSERT position) and twist it firmly to the right until it is securely locked (LOCK position).
- Plaats bekers: Plaats een of twee espressokopjes op het lekbakje direct onder de tuitjes van de portafilter.
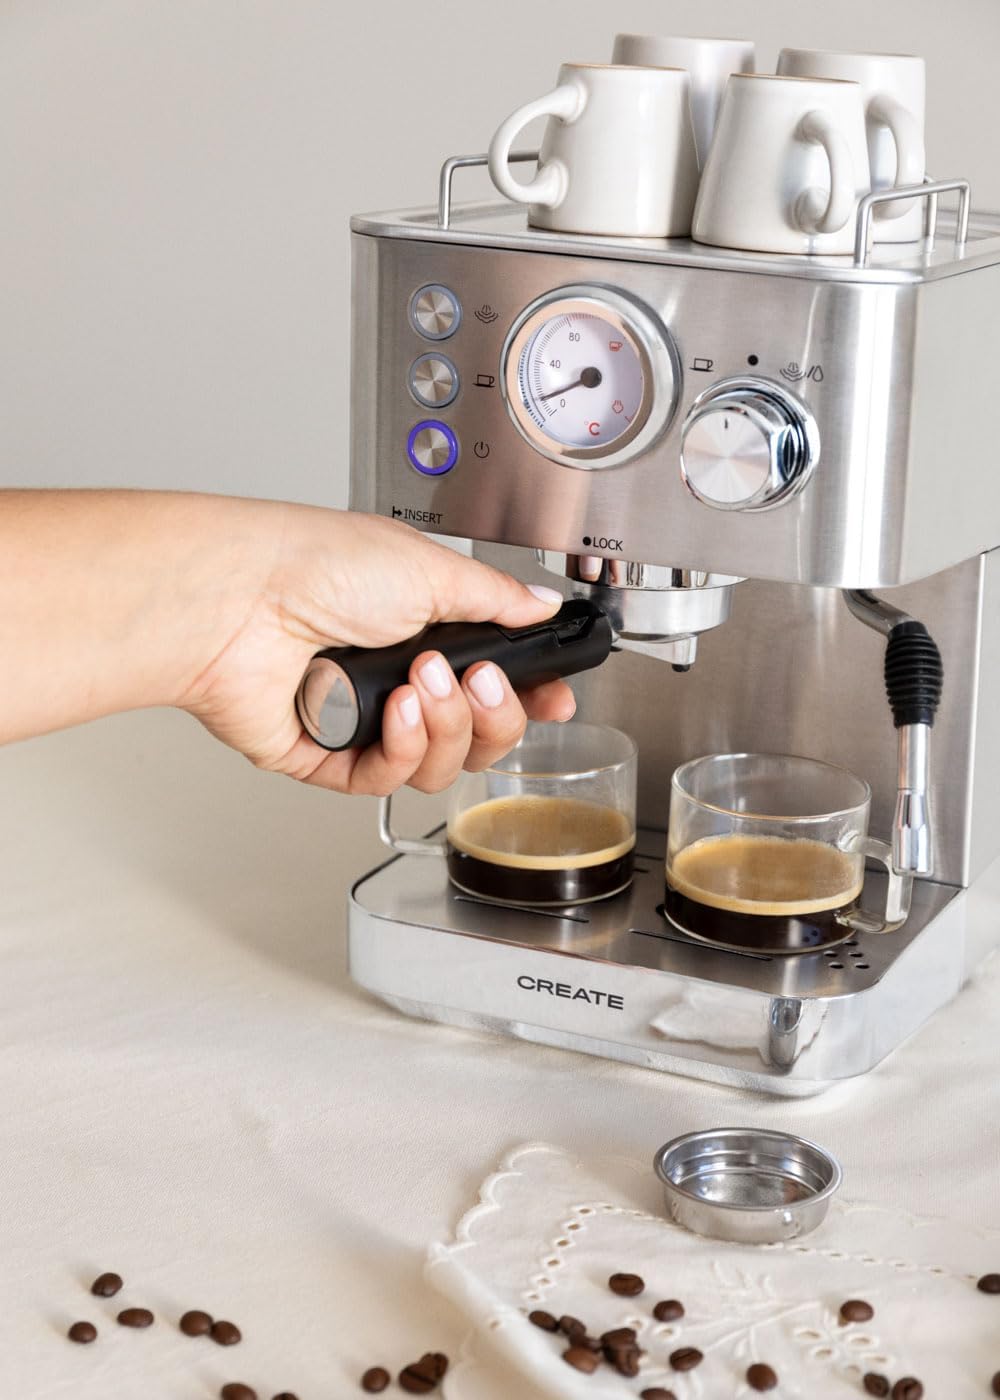
- Espresso zetten: Press the single shot or double shot button. The machine will begin brewing. The pressure gauge will indicate the brewing pressure.
- Stop met brouwen: The machine may stop automatically, or you can press the button again to stop brewing manually when the desired volume is reached.
- Portafilter verwijderen: Draai de portafilter voorzichtig naar links om hem te verwijderen. Gooi de gebruikte koffieprut weg.
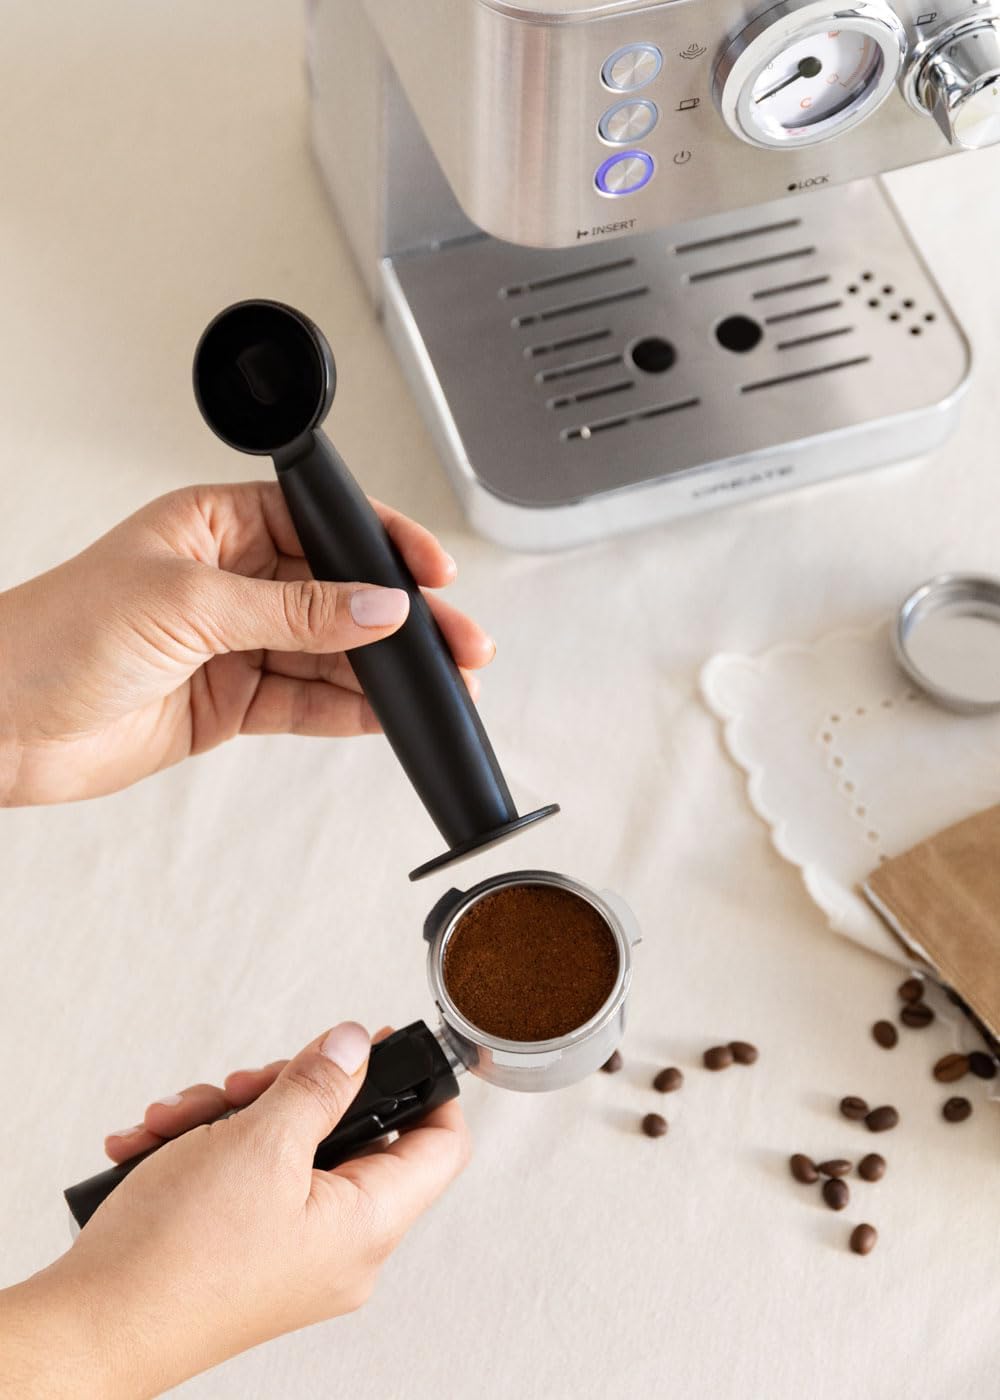
Afbeelding 4.1: Een hand tamping ground coffee into the portafilter for espresso preparation.
Afbeelding 4.2: A hand inserting the portafilter into the group head of the espresso machine.

Afbeelding 4.3: Espresso being brewed into two clear glass cups, showing the rich crema.
4.2 Making Espresso with ESE Single-Dose Pods
- Follow steps 1-2 from 'Making Espresso with Ground Coffee'. Use the specific filter basket designed for ESE pods if provided.
- Place one ESE pod into the filter basket. Do not tamp.
- Follow steps 5-9 from 'Making Espresso with Ground Coffee'.
4.3 Melk stomen
- Melk bereiden: Vul een roestvrijstalen melkopschuimkannetje met koude melk (melkvrij of zuivelvrij) tot net onder de tuit.
- Stoom activeren: Ensure the machine is preheated. Turn the steam knob to the steam position. Wait for the steam indicator light to illuminate steadily, indicating the machine has reached steaming temperature.
- Stoompijpje reinigen: Briefly open the steam knob to release any condensed water from the wand into the drip tray, then close it.
- Melk opschuimen: Insert the steam wand tip just below the surface of the milk. Open the steam knob fully. Move the pitcher up and down slightly to create foam.
- Melk verwarmen: Once desired foam is achieved, lower the wand deeper into the milk to heat it without adding more air. Continue until the pitcher is hot to the touch.
- Stop met stomen: Sluit de stoomkraan en verwijder vervolgens de kan.
- Stoompijpje schoonmaken: Veeg de stoompijp onmiddellijk af met adamp Veeg met een doekje om eventuele melkresten te verwijderen. Open de stoomknop even kort om alle melkresten uit het stoompijpje te verwijderen en sluit hem daarna weer.

Afbeelding 4.4: A hand holding a frothing pitcher while the steam wand froths milk.
5. Onderhoud en reiniging
Regelmatig schoonmaken zorgt voor optimale prestaties en verlengt de levensduur van uw espressomachine.
5.1 Dagelijkse schoonmaak
- Portafilter en filtermandjes: Verwijder na elk gebruik het filter, gooi de koffiedik weg en spoel het filter en het filtermandje af onder heet water.
- Stoompijpje: As described in section 4.3, clean immediately after each use.
- Afdruiprek: Leeg en spoel de lekbak dagelijks of wanneer de indicator omhoog komt.
- Buitenkant: Veeg de buitenkant van de machine af met een zachte, damp lap. Gebruik geen schuurmiddelen of schuursponsjes.
5.2 Ontkalken
Na verloop van tijd kan er zich minerale afzetting (kalkaanslag) in het apparaat ophopen, wat de prestaties beïnvloedt. Ontkalk uw apparaat elke 2-3 maanden, of vaker als u hard water heeft.
- Use a commercially available descaling solution specifically designed for espresso machines. Follow the manufacturer's instructions for mixing the solution with water.
- Vul het waterreservoir met de ontkalkingsoplossing.
- Plaats een grote bak onder het filter en het stoompijpje.
- Run half of the solution through the portafilter by pressing the double shot button.
- Open the steam knob to run the remaining solution through the steam wand.
- Zet het apparaat uit en laat het 15-20 minuten staan.
- Leeg en spoel de watertank grondig. Vul hem met vers water.
- Herhaal stap 3-5 met schoon water om de machine volledig te spoelen.
6. Probleemoplossing
If you encounter issues with your machine, refer to the following common problems and solutions.
| Probleem | Mogelijke oorzaak | Oplossing |
|---|---|---|
| Er wordt geen koffie uitgedeeld | Geen water in de tank; filter verstopt; apparaat niet ontlucht. | Fill water tank; Clean filter basket; Prime the machine. |
| De koffie zet te langzaam of helemaal niet. | Koffiedik te fijn of teampTe hard gepompt; filter verstopt. | Gebruik een grovere maling; Tamp less firmly; Clean filter. |
| Coffee brews too quickly, weak coffee | Coffee grounds too coarse or not enough coffee; Not tamped genoeg. | Use finer grind; Use more coffee; Tamp steviger. |
| Geen stoom uit de toverstaf | De stoompijp is verstopt; het apparaat is niet op stoomtemperatuur. | Clean steam wand; Wait for steam indicator light to be solid. |
| Lekkage van water uit de machine | Water tank not seated correctly; Drip tray full; Portafilter not secured. | Reseat water tank; Empty drip tray; Secure portafilter firmly. |
Als het probleem blijft bestaan nadat u deze oplossingen hebt geprobeerd, neem dan contact op met de klantenservice.
7. Specificaties
Technical details for the CREATE Thera Classic Espresso Machine.

Afbeelding 7.1: Dimensional drawing of the espresso machine, indicating height, width, and depth measurements.
- Merk: CREËREN
- Modelnummer: AXleftj (also 59225_115714)
- Stijl: KLASSIEK
- Stroom: 1100 W
- Deeltage: 240V
- Druk: 20 staven
- Capaciteit watertank: 1.25 liter
- Productafmetingen: 30.1 x 20.2 x 31.3 cm (L x B x H)
- Gewicht: 4.5 kg
- Materiaal: Roestvrij staal
- Verenigbaarheid: Ground coffee and ESE single-dose pods
8. Garantie en ondersteuning
For warranty information, please refer to the documentation provided at the time of purchase. This typically includes details on coverage period and terms.
For technical support, spare parts, or service inquiries, please visit the official CREATE webwebsite of neem contact op met hun klantenservice. Contactgegevens vindt u meestal op de productverpakking of op de website van de fabrikant. webplaats.


