1. Inleiding
Thank you for choosing the Onforu 55W 5000 LM LED Motion Sensor Floodlight. This manual provides essential information for the safe installation, operation, and maintenance of your floodlight. Please read these instructions carefully before installation and retain them for future reference.

Voorkant view of the Onforu 3-head LED motion sensor floodlight.
2. Veiligheidsinformatie
- Elektrische veiligheid: Installation must be performed by a qualified electrician in accordance with all local and national electrical codes. Ensure the power supply is disconnected before installation or maintenance.
- Aarding: This product must be properly grounded to prevent electric shock.
- Deeltage: Zorg ervoor dat het toevoervolumetage voldoet aan de eisen van de schijnwerper (230 Volt).
- Montage: Mount the floodlight securely on a stable surface. Do not install on unstable or vibrating surfaces.
- Bedrijfstemperatuur: Gebruik de schijnwerper niet buiten het aangegeven temperatuurbereik.
- Waterbestendigheid: The floodlight is IP65 rated, suitable for outdoor use in rain, hail, and snow. However, do not submerge the unit in water. The sensor is IP44 rated.
- Lichtbron: Kijk niet rechtstreeks in de LED-lichtbron als deze brandt. Dit kan oogvermoeidheid of oogschade veroorzaken.
3. Product voorbijview
The Onforu 55W LED Motion Sensor Floodlight features a robust design with three adjustable heads and an integrated PIR motion sensor. It is designed for outdoor security lighting, providing bright, cool white illumination.
Belangrijkste kenmerken:
- Hoge helderheid: 5000 Lumens output with 120 LED beads.
- Energiezuinig: 55W power consumption, saving up to 80% energy.
- Verstelbare koppen: Three light heads can be adjusted vertically (90°) and side heads horizontally (270°) for wide coverage.
- Bewegingssensor (PIR): Detects movement with adjustable sensitivity, lighting duration, and ambient light settings.
- Duurzaam en waterdicht: IP65 rated aluminum housing and tempered glass for outdoor use.
- Efficiënte warmteafvoer: Die-cast aluminum construction ensures extended lifespan.

Internal components showing LED beads and light transmission design.
4. Specificaties
| Functie | Specificatie |
|---|---|
| Merk | Onforu |
| Modelnummer | BDB55G-3 |
| Stroomverbruik | 55 Watt |
| Lichtstroom | 5000 Lumen |
| Kleurtemperatuur | 6500 Kelvin (koel wit) |
| Deeltage | 230 Volt |
| Materiaal | Gegoten aluminium, gehard glas |
| Ingress Protection (IP)-classificatie | IP65 (Floodlight), IP44 (Sensor) |
| Detectiehoek bewegingssensor | 180° |
| Detectieafstand bewegingssensor | 6-12 meters (adjustable) |
| Verlichtingsduur (TIJD) | 10 seconden tot 7 minuten (instelbaar) |
| Gemiddelde levensduur | 50,000 uur |
| Productafmetingen | 27.2x14.8x12cm |
| Artikelgewicht | 840 gram |
| Energie-efficiëntieklasse | F |

EU Energy Label. For more details, scan the QR code or visit eprel.ec.europa.eu/qr/2366865.
5. Installatie
Voordat u met de installatie begint, moet u ervoor zorgen dat de hoofdvoeding is uitgeschakeld bij de stroomonderbreker om elektrische schokken te voorkomen.
5.1 Montagelocatie
- Choose a mounting location that provides the desired coverage area and is within reach of the electrical wiring.
- The ideal mounting height is between 3 to 5 meters (9.84 ft - 16.4 ft) for optimal motion detection and light distribution.
- Avoid mounting near heat sources or objects that could cause false triggers for the motion sensor.
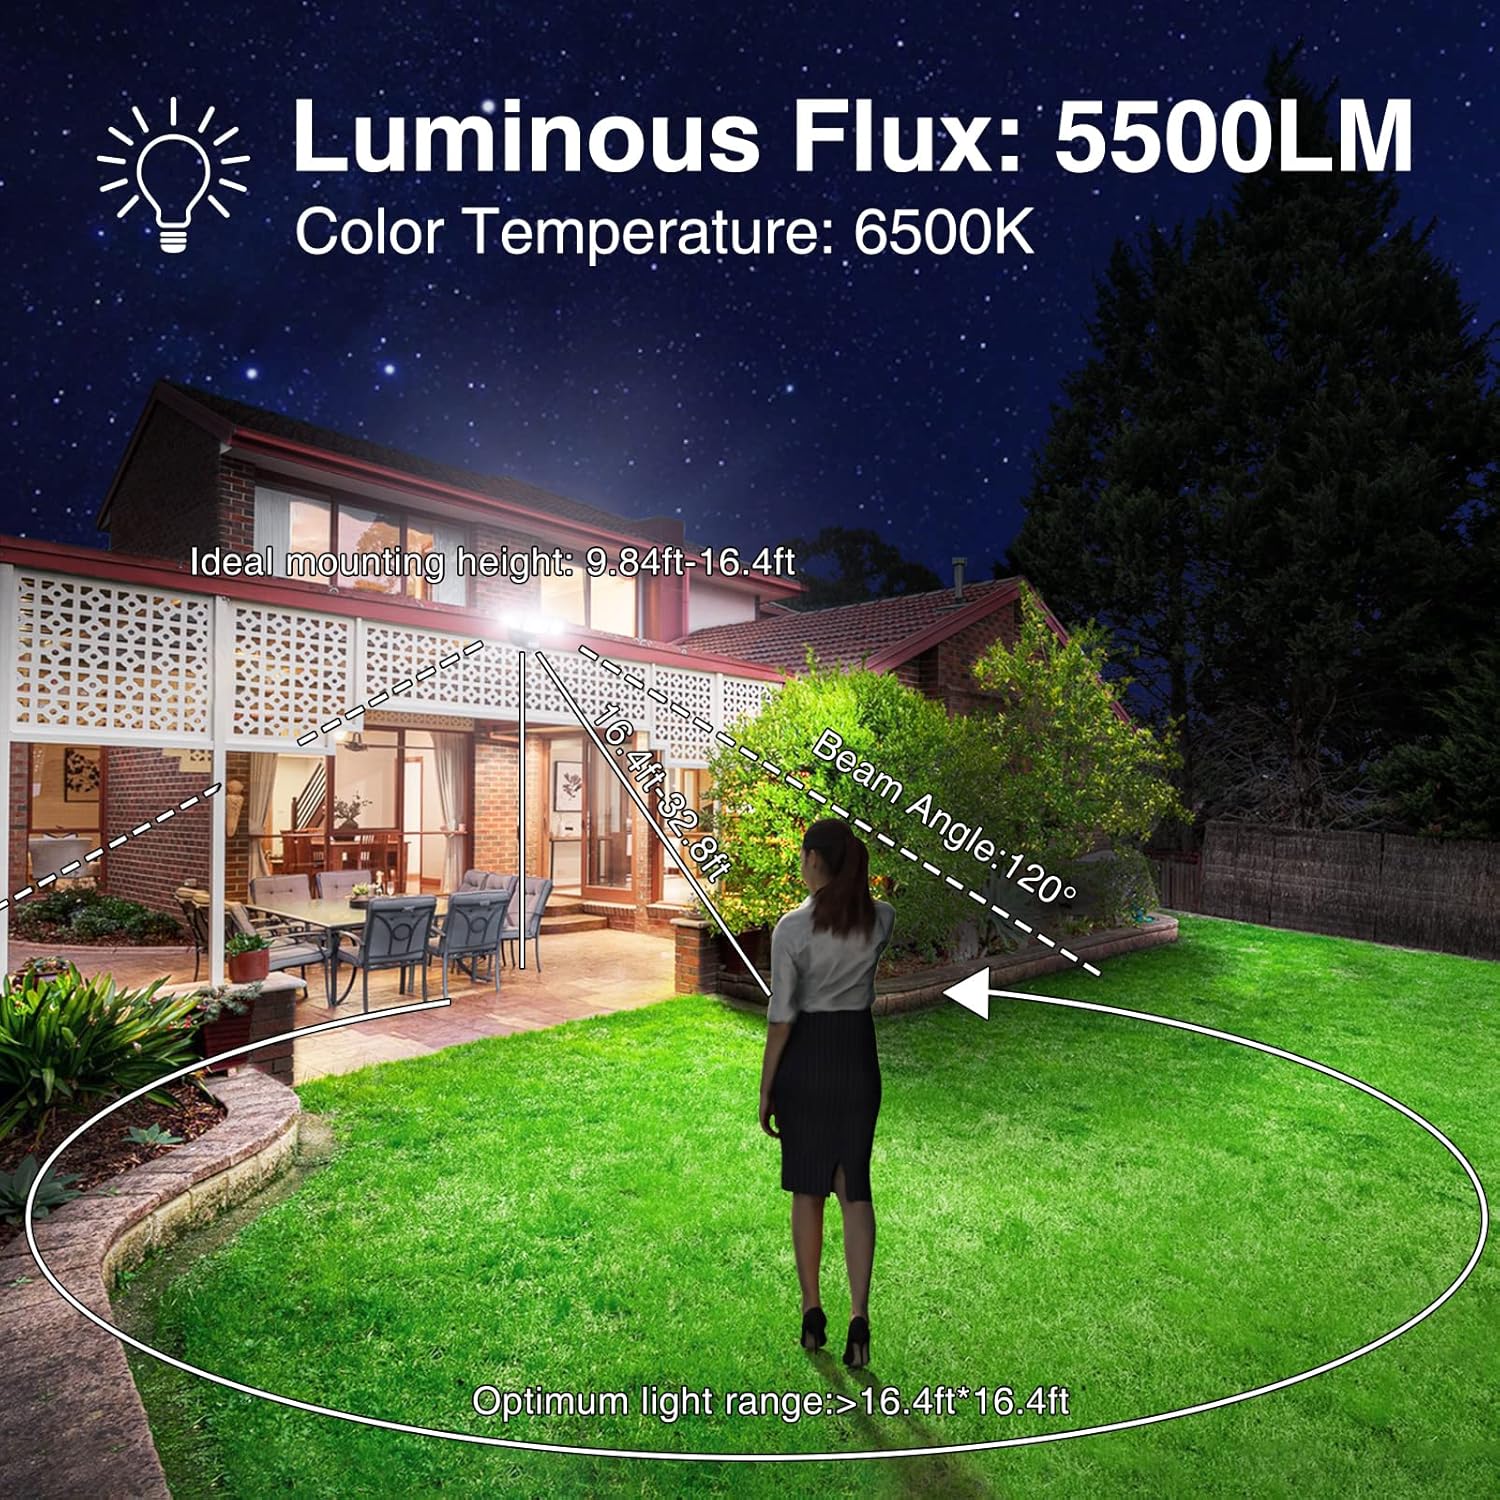
Ideal mounting height and light coverage.
5.2 Bedradingsinstructies
The floodlight comes with pre-stripped wires for connection. Follow the standard electrical wiring color codes:
- Bruine draad: Leef (L)
- Blauwe draad: Neutraal (N)
- Groen/gele draad: Ground (⍃)
Connect these wires to your household electrical circuit accordingly. Ensure all connections are secure and insulated. It is recommended to use a waterproof junction box for outdoor connections.

Wiring diagram and product dimensions.
5.3 Montagestappen
- Mark the drilling points on the wall or eave using the mounting bracket as a template.
- Boor gaten en plaats de juiste pluggen (indien nodig).
- Bevestig de montagebeugel met schroeven aan het oppervlak.
- Connect the electrical wires as described in Section 5.2.
- Attach the floodlight fixture to the mounting bracket and secure it.
- Adjust the angle of the light heads and the motion sensor to cover the desired areas.

Wall and eave mounting options.
6. Bediening
The floodlight features a PIR motion sensor with three adjustable settings: TIME, LUX, and SENS.

Motion sensor adjustment knobs for TIME, LUX, and SENS.
6.1 De lichtkoppen afstellen
The three light heads can be independently adjusted to direct light where needed:
- The central head can be moved vertically up or down (90°).
- The two side heads can be moved vertically up or down (90°) and rotated horizontally left or right (270°).
6.2 Instellingen van de bewegingssensor
Use the three rotary knobs on the motion sensor to configure its behavior:
- TIJD (Duur van de verlichting): Adjusts how long the light stays on after motion is detected. The duration can be set from 10 seconds to 7 minutes. Rotate the knob clockwise to increase the duration and counter-clockwise to decrease it.
- LUX (Omgevingslichtgevoeligheid): Bepaalt het omgevingslichtniveau waarbij de sensor actief wordt.
- Rotate towards the 'sun' symbol for 24-hour operation (day and night).
- Rotate towards the 'moon' symbol for night-only operation (activates only in darkness).
- SENS (Detectiegevoeligheid): Adjusts the motion detection distance. Rotate the knob to increase or decrease the detection range, typically from 6 to 12 meters.

Motion sensor detection range (180°) and distance (6-12m).
6.3 Toepassing Exampde
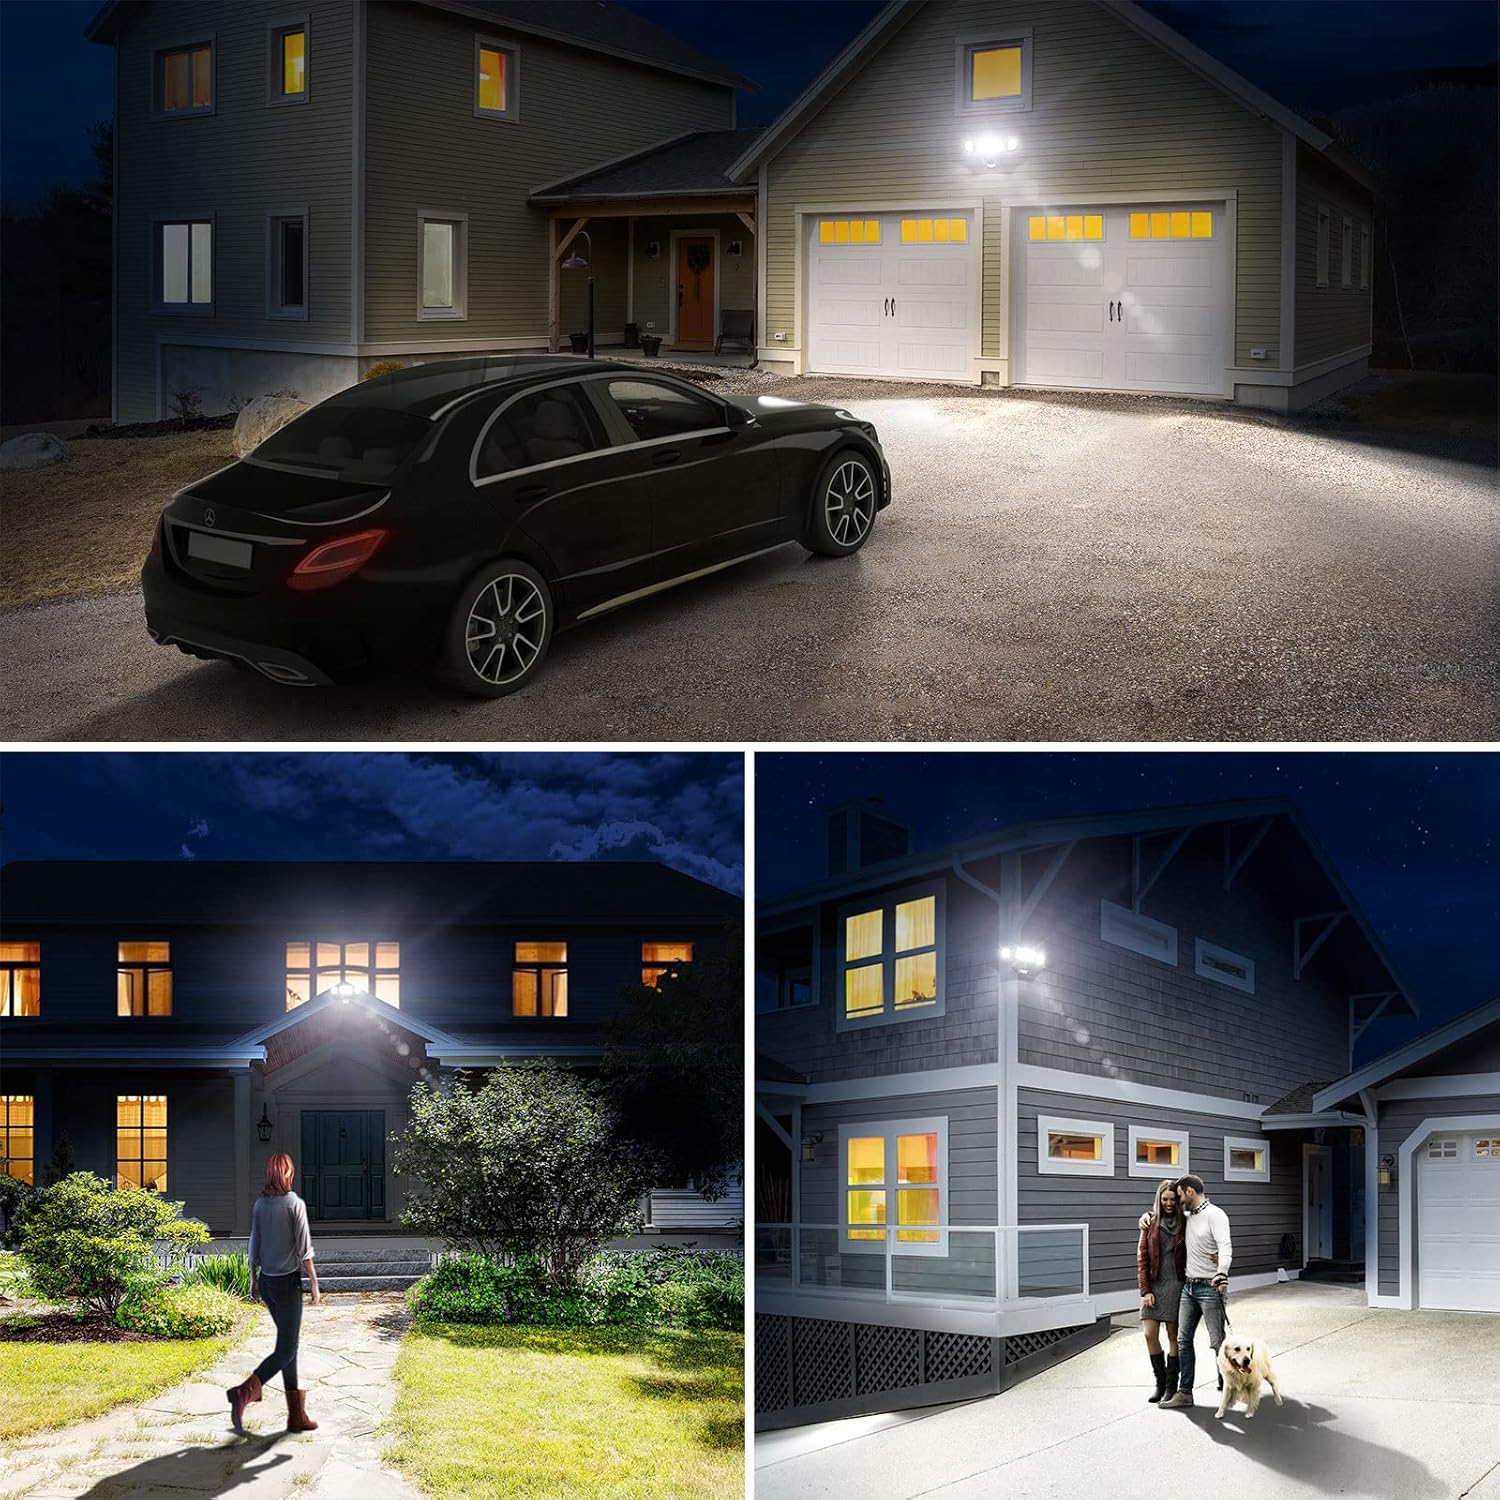
The floodlight effectively illuminates outdoor areas such as driveways and entrances.
7. Onderhoud
- Schoonmaak: Reinig het oppervlak en de sensorlens van de schijnwerper periodiek met een zachte, droge doek.amp Gebruik een doek. Gebruik geen schurende reinigingsmiddelen of oplosmiddelen. Zorg ervoor dat de stroom is uitgeschakeld voordat u begint met schoonmaken.
- Inspectie: Regularly check for any signs of damage to the housing, wiring, or mounting. If damage is found, disconnect power and have it inspected by a qualified technician.
- Geen door de gebruiker te onderhouden onderdelen: The LED light source is not replaceable. Do not attempt to open or repair the floodlight yourself.

Robust metal housing with heat sink fins for durability.

Efficient heat dissipation mechanism.
8. Probleemoplossing
| Probleem | Mogelijke oorzaak | Oplossing |
|---|---|---|
| Licht gaat niet aan. | No power supply; LUX setting too low; Sensor not detecting motion. | Check power connection; Adjust LUX setting towards 'sun' for testing; Verify sensor is aimed correctly and SENS is adequate. |
| Licht blijft continu branden. | Continuous motion detected; LUX setting too high (always 'sun'); Wiring error. | Check for obstructions or constant movement in detection zone; Adjust LUX setting towards 'moon'; Consult an electrician to check wiring. |
| Overdag gaat het licht aan. | LUX setting too high (towards 'sun'). | Adjust LUX setting towards 'moon' to activate only in darkness. |
| Het licht gaat te snel/te langzaam uit. | TIME setting incorrect. | Adjust TIME knob to desired duration (10 seconds to 7 minutes). |
| Het bereik van de bewegingssensor is te kort/te lang. | De SENS-instelling is onjuist. | Adjust SENS knob to increase or decrease detection distance. |
| Licht flikkert. | Unstable power supply; Loose wiring connection. | Check power source stability; Ensure all wiring connections are tight. |
9. Garantie en ondersteuning
Onforu products are manufactured to high-quality standards. For warranty information, please refer to the terms and conditions provided at the time of purchase or contact Onforu customer support.
For technical assistance or inquiries, please contact Onforu customer service through their official webwebsite of de winkel waar het product is gekocht.


