1. Belangrijke veiligheidsinformatie
Please read all instructions carefully before installing or using this Eiko Halogen A19 bulb. Failure to follow these instructions may result in electric shock, fire, or other hazards.
- Risico op elektrische schokken: Schakel altijd de stroom naar het armatuur uit via de stroomonderbreker of de zekeringkast voordat u het armatuur installeert, verwijdert of inspecteert.
- Risico op brandwonden: Halogen bulbs operate at high temperatures. Do not touch the bulb while it is operating or immediately after it has been turned off. Allow the bulb to cool completely before handling.
- Correcte verwijdering: Gooi gebruikte lampen weg volgens de plaatselijke voorschriften.
- Alleen voor gebruik binnenshuis: Deze lamp is ontworpen voor gebruik binnenshuis in geschikte armaturen.
- Do Not Exceed Wattage: Ensure the fixture's maximum wattage rating is not exceeded. This bulb is 43W.
- Voorzichtig behandelen: Avoid touching the glass portion of the bulb with bare hands, as oils can reduce bulb life. Use a clean cloth or gloves if necessary.
2. Installatie en installatie
Follow these steps to safely install your Eiko Halogen A19 bulb:
- Schakel de stroom uit: Locate the light fixture's power switch and turn it to the "OFF" position. For added safety, turn off the power at the main circuit breaker or fuse box.
- Koeling toestaan: If replacing an existing bulb, ensure it has cooled down completely before touching it.
- Oude lamp verwijderen: Carefully unscrew the old bulb counter-clockwise from the socket.
- Inspecteer het armatuur: Controleer de fitting van de lamp op beschadigingen of vuil. Zorg ervoor dat deze schoon en droog is.
- Nieuwe lamp installeren: Gently screw the Eiko Halogen A19 bulb clockwise into the socket until it is snug. Do not overtighten.
- Herstel de stroom: Turn the power back on at the circuit breaker or fuse box, then turn on the light switch.
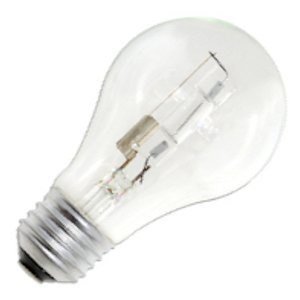
Image 1: Eiko Halogen A19 43W Clear 120V Bulb. This image shows the clear glass bulb with a standard screw-in base, typical of an A19 shape.
3. Gebruiksaanwijzing
The Eiko Halogen A19 bulb operates like a standard incandescent bulb. Once installed, simply use the light fixture's switch to turn the bulb on or off.
- Direct aan: De lamp geeft direct na inschakeling de volle helderheid.
- Lichtkwaliteit: This halogen bulb produces a brighter, whiter light compared to traditional incandescent bulbs, enhancing visibility and color rendition.
- dimmen: If used in a dimmable fixture with a compatible dimmer switch, this bulb can be dimmed. Ensure your dimmer is rated for halogen or incandescent loads.
4. Onderhoud
Minimal maintenance is required for your Eiko Halogen A19 bulb. However, following these guidelines can help ensure optimal performance and longevity:
- Schoonmaak: Als de lamp stoffig wordt, zorg er dan voor dat de stroom is uitgeschakeld en dat de lamp is afgekoeld. Veeg het glas voorzichtig schoon met een schone, droge, pluisvrije doek. Gebruik geen vloeibare schoonmaakmiddelen.
- Vervanging: Halogen bulbs, like all light sources, will dim over time and eventually burn out. For consistent light output, consider replacing bulbs when a noticeable decrease in brightness occurs. It is often recommended to replace bulbs in multi-bulb fixtures at the same time for uniform light.
- Behandeling: When replacing, avoid touching the new bulb's glass with bare hands. Oils from your skin can create hot spots and reduce bulb life. Use a clean cloth or gloves.
5. Probleemoplossing
If your Eiko Halogen A19 bulb is not functioning as expected, refer to the following common issues and solutions:
| Probleem | Mogelijke oorzaak | Oplossing |
|---|---|---|
| Lampje brandt niet. |
|
|
| Lamp flikkert. |
|
|
| De lamp brandt snel door. |
|
|
6. Productspecificaties
Detailed specifications for the Eiko Halogen A19 43W Clear 120V bulb:
- Merk: Eiko
- Modelnummer: 43A/CL/H-120V
- Lichttype: Halogeen
- Wattage: 43 Watt
- Bolvorm Maat: A19
- Deeltage: 120 Volt
- Kleurtemperatuur: 2900 Kelvin
- Finish: Duidelijk
- Materiaal: Tungsten (filament)
- Productafmetingen: Ongeveer 1 x 1 x 2.7 inch
- Artikelgewicht: Ongeveer 3.2 gram
- Specifieke toepassingen: General purpose lighting, lamps
7. Garantie en ondersteuning
7.1. Beperkte garantie
Eiko products are manufactured to high-quality standards. This product is covered by a limited warranty against defects in materials and workmanship under normal use. The specific duration and terms of the warranty may vary. Please retain your proof of purchase for warranty claims.
7.2. Klantenservice
For technical assistance, warranty inquiries, or further information regarding your Eiko Halogen A19 bulb, please contact Eiko customer support. Refer to the official Eiko webBezoek onze website of productverpakking voor de meest actuele contactgegevens.


