SPH-P500242-031
Clarion 1 Light Black Clear Glass Transitional Pendant
Model: SPH-P500242-031
Belangrijke veiligheidsinformatie
Please read and understand all instructions before beginning installation. Failure to do so may result in electric shock, fire, or other injuries that could be fatal or cause property damage. All wiring connections must be in accordance with local codes and ordinances. If you are unsure about any part of these instructions, consult a qualified electrician.
- Turn off electricity at the main fuse box or circuit breaker before installation.
- Installeer dit armatuur niet op natte plaatsen.
- Zorg ervoor dat alle elektrische aansluitingen goed vastzitten en goed geïsoleerd zijn.
- Gebruik alleen het aangegeven type lamp en wattagetage.
- Dit armatuur is uitsluitend ontworpen voor gebruik binnenshuis.
Inhoud van het pakket
Pak uw nieuwe armatuur voorzichtig uit en leg alle onderdelen op een vrije ruimte neer. Controleer of alle onderstaande onderdelen aanwezig zijn voordat u het verpakkingsmateriaal weggooit.
- Montageplaat
- Overkapping
- Downrod(s)
- Fixture Body with Socket
- Heldere glazen kap
- Montagemateriaal (schroeven, draadmoeren)
Benodigde gereedschappen (niet inbegrepen)
- Kruiskopschroevendraaier
- Platte schroevendraaier
- Draadstrippers
- Tang
- Elektrische tape
- Ladder
Instellen en installeren
This section provides step-by-step instructions for installing your pendant light. It is recommended to have a second person assist with installation.
Stap 1: Bereid u voor op installatie
- Schakel de stroom uit: Locate the circuit breaker or fuse box and turn off the power to the junction box where you will be installing the fixture.
- Verwijder het bestaande armatuur: If replacing an old fixture, carefully remove it and disconnect all wiring.
- Unpack components: Remove all parts from the packaging and inspect for any damage.
Stap 2: Bevestig de montageplaat
- Bevestig de montageplaat aan de aansluitdoos met behulp van de meegeleverde montageschroeven. Zorg ervoor dat de plaat stevig vastzit.
Step 3: Assemble Downrod and Fixture Body
- Determine the desired hanging height. Connect the appropriate downrod(s) to the fixture body and then to the canopy. Thread the fixture wires through the downrod(s) and canopy.
Stap 4: Maak elektrische aansluitingen
Refer to the image below for a visual guide to the pendant's design. Note that the actual product features a black finish, while the image illustrates the overall structure.
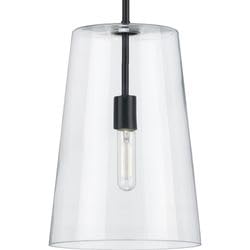
Afbeelding: Illustratief voorbeeldample of the Clarion 1 Light Pendant design. The actual product features a black finish.
- Sluit de zwart draad van het armatuur naar de zwart (hete) draad van de aansluitdoos met behulp van een draadmoer.
- Sluit de wit draad van het armatuur naar de wit (neutrale) draad van de aansluitdoos met behulp van een draadmoer.
- Sluit de grond wire from the fixture (usually bare copper or green) to the grond wire from the junction box and to the mounting plate's ground screw.
- Steek alle draden voorzichtig in de aansluitdoos.
Step 5: Secure Canopy and Glass Shade
- Align the canopy with the mounting plate and secure it with the provided screws.
- Carefully attach the clear glass shade to the fixture body according to the design. Ensure it is stable and secure.
Stap 6: Lamp installeren
- Screw in one A19 medium base bulb (not included) into the socket. Do not exceed the maximum wattage van 60 Watt.
Stap 7: Herstel de stroomvoorziening
- Return to the main fuse box or circuit breaker and turn the power back on. Test the light fixture.
Gebruiksaanwijzing
This pendant light is designed for simple operation.
- Aan/uit: Bedien de verlichting met een standaard wandschakelaar die is aangesloten op het circuit van het armatuur.
- Type lamp: Uses one A19 medium base bulb.
- Wattage: Maximum 60 Watts.
- Dimbaar: The fixture is dimmable when used in conjunction with a dimmable bulb and a compatible dimmer switch (both sold separately).
Onderhoud
Regelmatig onderhoud helpt om het uiterlijk en de functionaliteit van uw hanglamp te behouden.
- Schoonmaak: Schakel altijd de stroom uit voordat u gaat schoonmaken. Veeg het armatuur af met een zachte, droge doek. Gebruik geen schurende reinigingsmiddelen, oplosmiddelen of poetsmiddelen, omdat deze de afwerking kunnen beschadigen.
- Glazen kap: The clear glass shade can be gently wiped with a damp cloth and then dried with a soft, lint-free cloth.
- Lamp vervangen: Ensure the power is off and the bulb has cooled before attempting to replace it. Screw in a new A19 medium base bulb, not exceeding 60 Watts.
Probleemoplossing
If you experience issues with your pendant light, refer to the following common problems and solutions.
| Probleem | Mogelijke oorzaak | Oplossing |
|---|---|---|
| Het licht gaat niet aan | Geen stroom naar het armatuur Losse draadverbindingen Defecte lamp | Controleer stroomonderbreker/zekering. Zorg ervoor dat alle draadverbindingen goed vastzitten (schakel eerst de stroom uit). Vervang de lamp door een nieuwe. |
| Licht flikkert | Losse draadverbindingen Verkeerd lamptype Incompatibele dimmerschakelaar | Controleer de draadverbindingen (schakel eerst de stroom uit). Ensure bulb is correct type and wattage. If using a dimmer, ensure it is compatible with LED/dimmable bulbs. |
| Glazen kap zit los | Shade not properly secured | Carefully re-secure the glass shade to the fixture body. |
Als het probleem blijft bestaan nadat u deze oplossingen hebt geprobeerd, neem dan contact op met de klantenservice.
Specificaties
| Functie | Detail |
|---|---|
| Modelnummer | SPH-P500242-031 |
| Merk | Algemeen |
| Kleur | Black (with Clear Glass) |
| Lamp Type | A19 (Medium Base) |
| Max Watttage | 60 Watt |
| Dimbaar | Yes (with dimmable bulb and compatible dimmer) |
| Energy Star-classificatie | Nee |
| Afmetingen | 10.5 inch (diameter) x 15.87 inch (hoogte) |
Garantie en ondersteuning
Dit product wordt geleverd met een 1 jaar fabrieksgarantie vanaf de aankoopdatum, met dekking voor materiaal- en fabricagefouten.
For warranty claims, technical assistance, or replacement parts, please contact the retailer or manufacturer directly. Keep your proof of purchase for warranty validation.
Ask a question about this manual
Ask about setup, troubleshooting, compatibility, parts, safety, or missing instructions. Manuals+ will review the question and use this page’s manual context to help answer it.