ACROMA 12-Light 40In Wagon Wheel Chandelier
Handleiding voor de ACROMA 12-lichts 40-inch moderne boerderijstijl kroonluchter in de vorm van een wagenwiel
Invoering
Thank you for choosing the ACROMA 12-Light 40-Inch Modern Farmhouse Wagon Wheel Chandelier. This manual provides essential information for the safe installation, operation, and maintenance of your new lighting fixture. Please read these instructions thoroughly before beginning installation and retain them for future reference.

Image: The ACROMA 12-Light 40-Inch Chandelier elegantly suspended in a modern farmhouse living room setting, showcasing its design and scale.
Veiligheidsinformatie
- WAARSCHUWING: To avoid electric shock, ensure power is turned off at the circuit breaker before installation or servicing.
- All electrical connections must be in accordance with local codes, ordinances, and the National Electric Code (NEC). Consult a qualified electrician if you are unfamiliar with electrical wiring.
- Dit armatuur is uitsluitend bedoeld voor gebruik binnenshuis. Niet blootstellen aan water of vocht.
- Gebruik alleen het aangegeven type lamp en wattagetage to prevent fire or electrical hazard.
- Ga voorzichtig om met het armatuur. Laat het armatuur niet vallen en stoot er niet tegenaan, want dit kan schade veroorzaken.

Image: The ACROMA 12-Light Chandelier shown with a UL Certified logo, indicating compliance with safety standards.
Inhoud van het pakket
Carefully unpack all components and check for any damage. Ensure all parts are present before discarding packaging materials. If any parts are missing or damaged, contact ACROMA customer support.
- Chandelier Frame (Wagon Wheel)
- Canopy and Mounting Hardware
- Verstelbare ketting
- Candle Sleeves / Sockets (12 units)
- Bedradingsconnectoren
- Gebruiksaanwijzing
Benodigde gereedschappen (niet inbegrepen)
- Kruiskopschroevendraaier
- Platte schroevendraaier
- Draadstrippers
- Tang
- Elektrische tape
- Ladder
- Veiligheidsbril
Instellen en installeren
Before beginning installation, ensure the power is disconnected at the circuit breaker. It is recommended to have two people for installation.
Stap 1: Bereid u voor op installatie
- Schakel de stroom uit via de hoofdschakelaar.
- Carefully remove the old fixture (if applicable) and disconnect all wiring.
- Unpack your new chandelier and lay out all parts on a clean, flat surface.
Step 2: Install Mounting Plate and Canopy
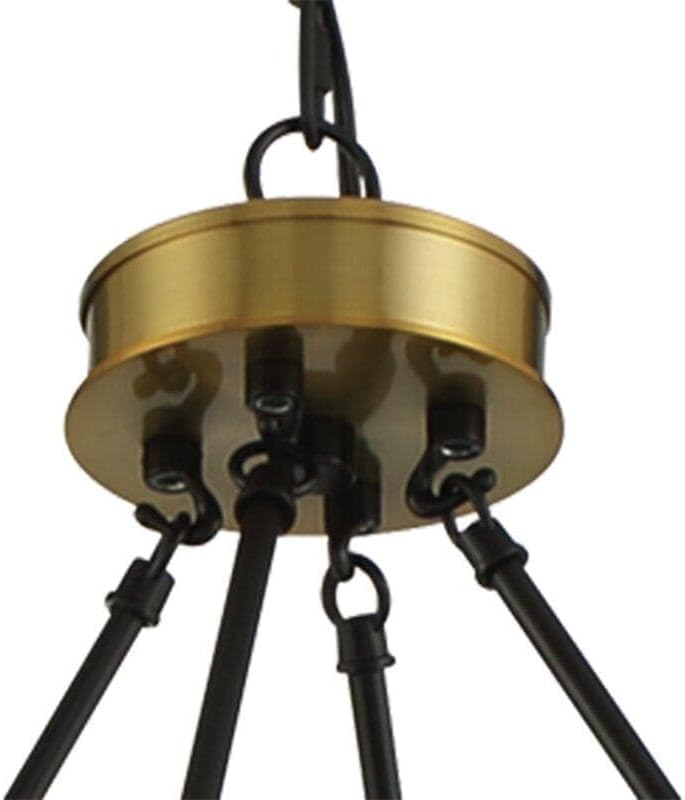
Afbeelding: Een gedetailleerde view of the chandelier's brass-finished canopy and the black mounting plate with wiring connections.
- Bevestig de montageplaat met de meegeleverde schroeven aan de aansluitdoos in het plafond. Zorg ervoor dat deze stevig vastzit.
- Determine the desired hanging height for your chandelier. The fixture offers an adjustable height from 40 inches to 138 inches. Adjust the chain length accordingly by removing links if necessary.
- Thread the fixture wires through the chain and canopy.

Image: A diagram illustrating the key dimensions of the chandelier, including a 40-inch width, a minimum hanging height of 40 inches, and a maximum hanging height of 138 inches.
Stap 3: Bedradingsverbindingen
- Connect the fixture's ground wire (usually bare copper or green) to the house supply ground wire using a wire connector.
- Connect the fixture's neutral wire (usually white) to the house supply neutral wire (white) using a wire connector.
- Connect the fixture's hot wire (usually black) to the house supply hot wire (black) using a wire connector.
- Steek alle draden voorzichtig in de aansluitdoos.
Stap 4: Bevestig het armatuur
- Raise the canopy to the ceiling and secure it to the mounting plate with the provided screws.
- Ensure the fixture is firmly attached and stable.
Stap 5: installeer lampen

Afbeelding: Een close-up view of the chandelier's candle-style light sockets, showing the detail of the black candle sleeves and brass accents with clear bulbs installed.
- Screw in 12 E12 base (candelabra) bulbs (not included) into the sockets. Do not exceed the maximum wattage gespecificeerd in het specificatiegedeelte.
- Schakel de stroom naar de stroomonderbreker weer in en test het apparaat.
Gebruiksaanwijzing
Once installed and powered, the ACROMA Chandelier operates like any standard lighting fixture. Use a wall switch to turn the lights on and off.
- Type lamp: Requires 12 E12 Candelabra base bulbs.
- Dimbaar: This fixture is dimmable when used with dimmable bulbs and a compatible dimmer switch (both sold separately).
Onderhoud
- Schoonmaak: To clean the fixture, turn off the power and allow it to cool. Wipe with a soft, dry cloth. Do not use abrasive cleaners or solvents, as they may damage the finish.
- Lamp vervangen: Ensure power is off and bulbs are cool before replacing. Unscrew old bulbs and screw in new ones of the correct type and wattage.
- Inspectie: Controleer regelmatig alle verbindingen en bevestigingsmaterialen om er zeker van te zijn dat ze nog goed vastzitten.
Probleemoplossing
| Probleem | Mogelijke oorzaak | Oplossing |
|---|---|---|
| Licht gaat niet aan. |
|
|
| Flikkerende lichten. |
|
|
Specificaties
- Model: ACROMA 12-Light 40-Inch Wagon Wheel Chandelier
- Merk: ACROMA
- ASIN: B0DN66272K
- Afmetingen: 40 inches (Diameter), Adjustable Height (Min 40 inches, Max 138 inches)
- Aantal lampen: 12
- Lampvoet: E12 Kandelaar
- Max Watttage per Bol: 60W (Incandescent equivalent, LED recommended)
- Deeltage: 120V
- Materiaal: Metaal
- Finish: Zwart met gouden accenten
- Certificering: UL-gecertificeerd
Garantie en ondersteuning
ACROMA products are manufactured to high-quality standards. For specific warranty information or technical support, please refer to the warranty card included with your purchase or visit the official ACROMA website. If you have any questions or require assistance, please contact ACROMA customer service.
Contactgegevens: Please refer to your purchase documentation or the ACROMA brand store on Amazon for the most current contact details.
Ask a question about this manual
Ask about setup, troubleshooting, compatibility, parts, safety, or missing instructions. Manuals+ will review the question and use this page’s manual context to help answer it.