1. Inleiding
The Hello Kitty Sunrise Alarm Clock is designed to provide a gentle and natural waking experience with its sunrise simulation feature. This digital alarm clock includes multicolor lights, an LED display showing time, date, and temperature, a USB charging port, and a convenient snooze function. Its charming Cinnamoroll design adds a whimsical touch to any room.

Image 1: Hello Kitty Cinnamoroll Sunrise Alarm Clock with multicolor lighting.
2. Veiligheidsinformatie
- Stel het apparaat niet bloot aan extreme temperaturen, direct zonlicht of hoge luchtvochtigheid.
- Use only the provided USB power cable or a certified equivalent.
- Houd het apparaat uit de buurt van water of andere vloeistoffen.
- Probeer het apparaat niet zelf te demonteren of te repareren. Neem contact op met gekwalificeerd servicepersoneel.
- Zorg ervoor dat het apparaat op een stabiel, vlak oppervlak wordt geplaatst.
3. Inhoud van het pakket
Controleer het pakket op de volgende items:
- Hello Kitty Sunrise Alarm Clock (Cinnamoroll design)
- USB-voedingskabel
- Gebruikershandleiding (dit document)
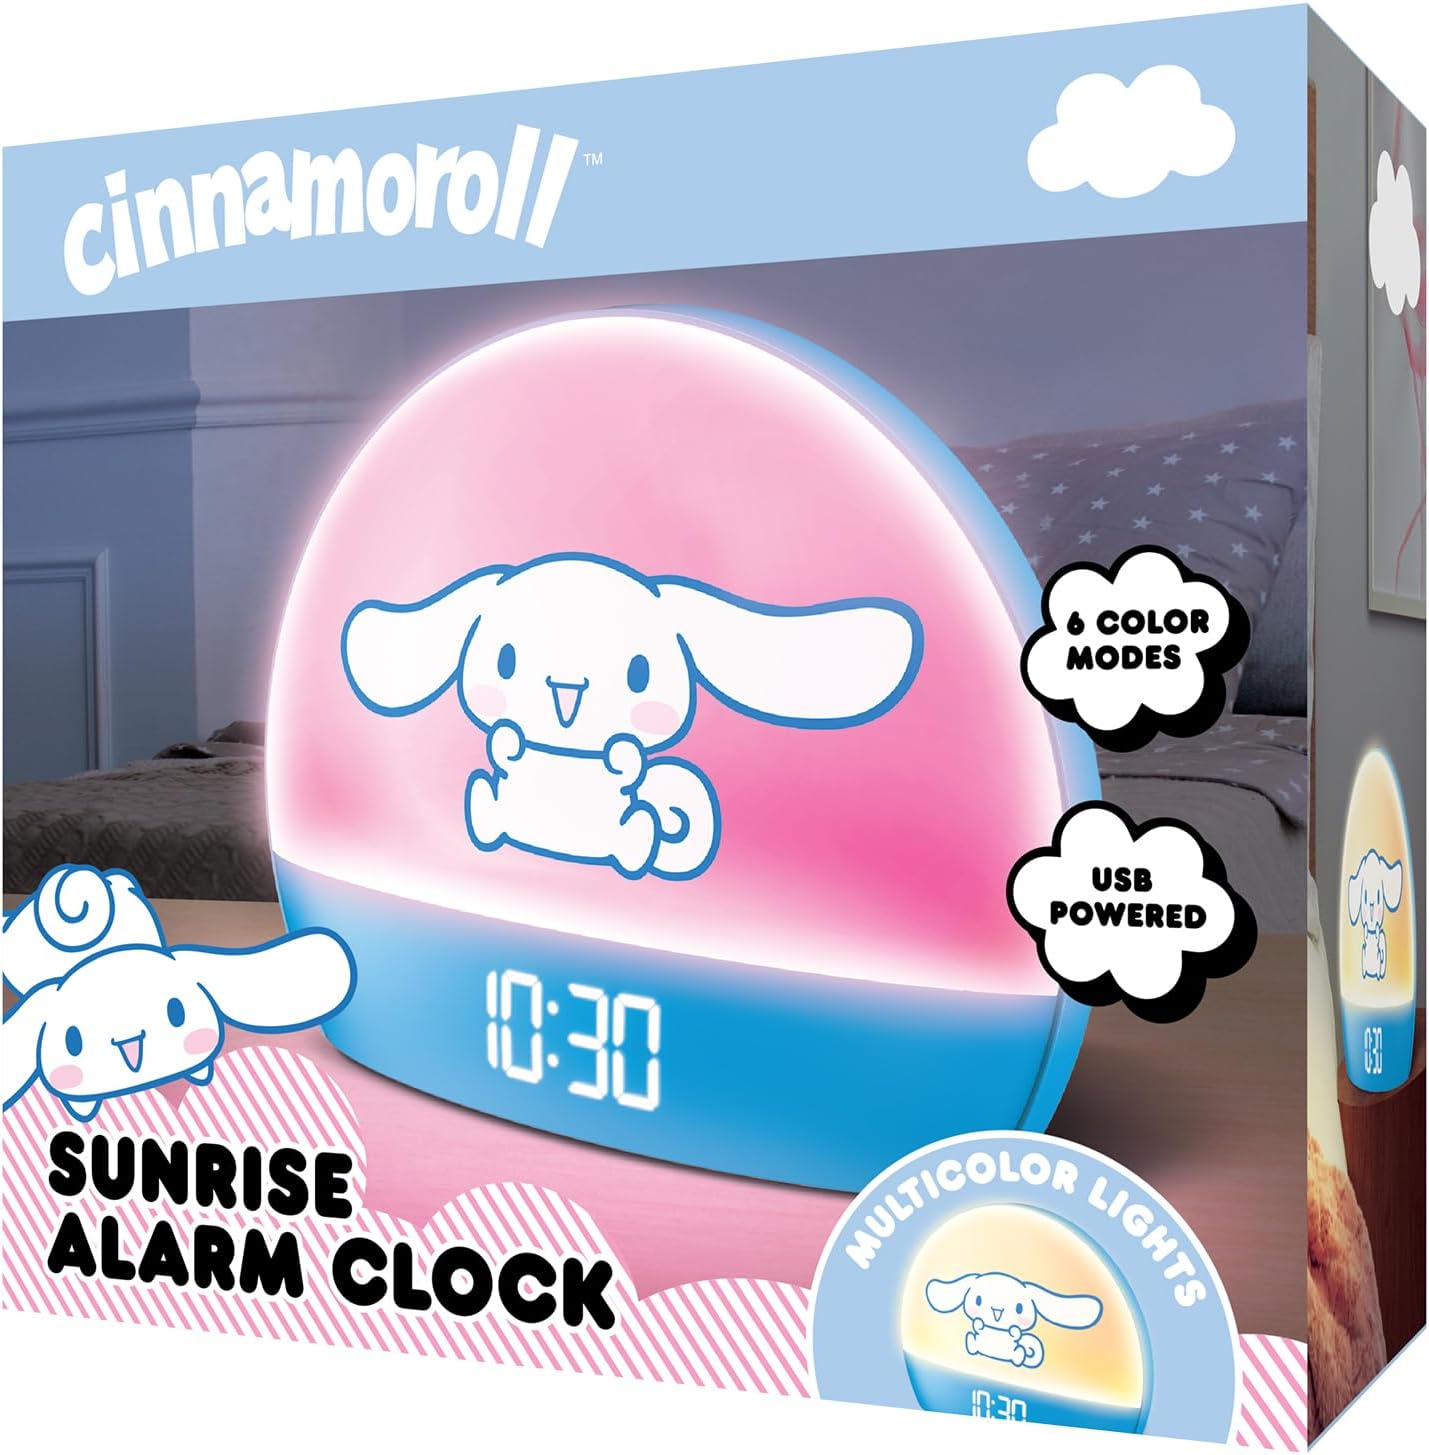
Image 2: Front packaging of the Hello Kitty Cinnamoroll Sunrise Alarm Clock.
4. Product voorbijview
Maak uzelf vertrouwd met de belangrijkste onderdelen van uw wekker.
- Led scherm: Toont tijd, datum en temperatuur.
- Licht paneel: Emits multicolor and sunrise simulation lights.
- Bedieningsknoppen: Located on the back or bottom for setting time, alarm, and light functions.
- USB-laadpoort: For powering the device and charging external devices.
- Snooze knop: Typically a prominent button on the top or front.

Image 3: Hello Kitty Cinnamoroll Sunrise Alarm Clock in a bedroom setting.
5. Instellen
5.1 Stroomaansluiting
- Sluit de meegeleverde USB-voedingskabel aan op de USB-poort aan de achterkant van de wekker.
- Sluit het andere uiteinde van de USB-kabel aan op een compatibele USB-stroomadapter (niet meegeleverd) of op een actieve USB-poort.
- Het LED-scherm licht op, wat aangeeft dat het apparaat is ingeschakeld.
5.2 Tijd en datum instellen
Specific button names are not provided, so general instructions are given. Refer to the physical device for exact button labels.
- Press the "SET" or "TIME" button to enter time setting mode.
- Use the "UP" and "DOWN" buttons to adjust the hour. Press "SET" again to confirm.
- Adjust the minute using "UP" and "DOWN" buttons. Press "SET" to confirm.
- Ga zo door om het jaar, de maand en de dag in te stellen.
- The clock may offer 12-hour or 24-hour format selection. Follow on-screen prompts or consult the device's specific button functions.
6. Gebruiksaanwijzing
6.1 Het alarm instellen
- Press the "ALARM" button to enter alarm setting mode.
- Use "UP" and "DOWN" buttons to set the desired alarm hour. Press "ALARM" to confirm.
- Adjust the alarm minute. Press "ALARM" to confirm.
- Some models may allow setting alarm volume or sound. Follow prompts if available.
- To activate/deactivate the alarm, look for an "ALARM ON/OFF" button or a toggle within the alarm setting menu.
6.2 Simulatie van de zonsopgang
The sunrise simulation feature gradually increases light intensity before your set alarm time, mimicking a natural sunrise.
- This feature is typically linked to the alarm function. When the alarm is active, the light will begin to brighten a set period (e.g., 30 minutes) before the alarm sounds.
- Consult the device's specific controls for adjusting the duration or intensity of the sunrise simulation, if applicable.
6.3 veelkleurige lichten
The clock offers various color modes for ambient lighting.
- Press the "LIGHT" or "COLOR" button to cycle through different color options or activate a color-changing mode.
- Press and hold the "LIGHT" button to turn off the ambient light.
- Brightness of the display and ambient light can often be adjusted using dedicated buttons or by holding the "LIGHT" button.
6.4 Snooze-functie
When the alarm sounds, press the large "SNOOZE" button (usually on top) to temporarily pause the alarm. The alarm will sound again after a short interval (e.g., 5-10 minutes).
6.5 USB-oplaadpoort
The integrated USB port can be used to charge small electronic devices like smartphones or tablets. Simply connect your device's charging cable to the USB port on the alarm clock.
6.6 Temperatuurweergave
The LED display shows the current room temperature. No specific action is usually required to view this, as it cycles with time and date or is displayed continuously.
7. Onderhoud
- Maak de klok schoon met een zachte, droge doek. Gebruik geen schurende reinigingsmiddelen of oplosmiddelen.
- Zorg ervoor dat de USB-poort vrij is van stof en vuil.
- Store the clock in a cool, dry place when not in use for extended periods.
8. Probleemoplossing
| Probleem | Mogelijke oorzaak | Oplossing |
|---|---|---|
| De klok gaat niet aan. | De USB-kabel is niet goed aangesloten of er is een probleem met de stroomvoorziening. | Check USB cable connection. Try a different USB power adapter or port. Ensure the cable is securely inserted. |
| Time is incorrect or drifts. | Time not set correctly or internal clock issue. | Re-set the time following Section 5.2. If the issue persists, try disconnecting and reconnecting power. |
| Het alarm gaat niet af. | Alarm niet geactiveerd of verkeerd ingesteld. | Verify the alarm is set and activated (check for an alarm icon on the display). Ensure the volume is not set to zero if adjustable. |
| Knoppen reageren niet. | Temporary software glitch or physical button issue. | Disconnect power for a few seconds and reconnect to reset the device. If buttons remain unresponsive, contact support. |
| De USB-oplaadpoort werkt niet. | Cable issue, device not fully powered, or port malfunction. | Ensure the clock is properly powered. Try a different USB charging cable. Check if the port is clean and free of debris. |
9. Specificaties
| Merk | Hallo Kitty |
| Modelnummer | HKCLK01CR-MFN |
| Kleur | Kaneelrol |
| Weergavetype | Digitaal |
| Speciale kenmerken | Adjustable Brightness, Alarm, Charging Port, LED Display, Temperature Display, Sunrise Simulation, Multicolor Lights |
| Productafmetingen | 7"B x 6"H |
| Energiebron | Elektrisch met snoer (USB) |
| Materiaal | Plastic |
| Artikelgewicht | 0.4 kilogram (14 ounces) |
| Connectiviteitstechnologie | USB |
| Fabrikant | Zuidelijke Telecom |
10. Garantie en ondersteuning
For warranty information or technical support, please refer to the contact details provided on the product packaging or visit the official Hello Kitty product support website. Bewaar uw aankoopbon voor garantieclaims.