
Invoering
Thank you for choosing the Cuifati Mini Body Camera. This manual provides detailed instructions for the proper use, setup, and maintenance of your device. Please read this manual thoroughly before operating the camera to ensure optimal performance and longevity.
Inhoud van het pakket
- 1 x Wearable Camera
- 1 x draagtas
- 1 x Gebruikershandleiding
- 1 x koord
- 1 x Back Shell Bracket
- 1 x Statief
- 1 x USB-kabel
- 1 x Reinigingsdoek

Figure 1: Cuifati Mini Body Camera and included accessories.

Figuur 2: Toepassing met meerdere scenario'samples for the body camera.
Product voorbijview
Familiarize yourself with the components and controls of your Cuifati Mini Body Camera.
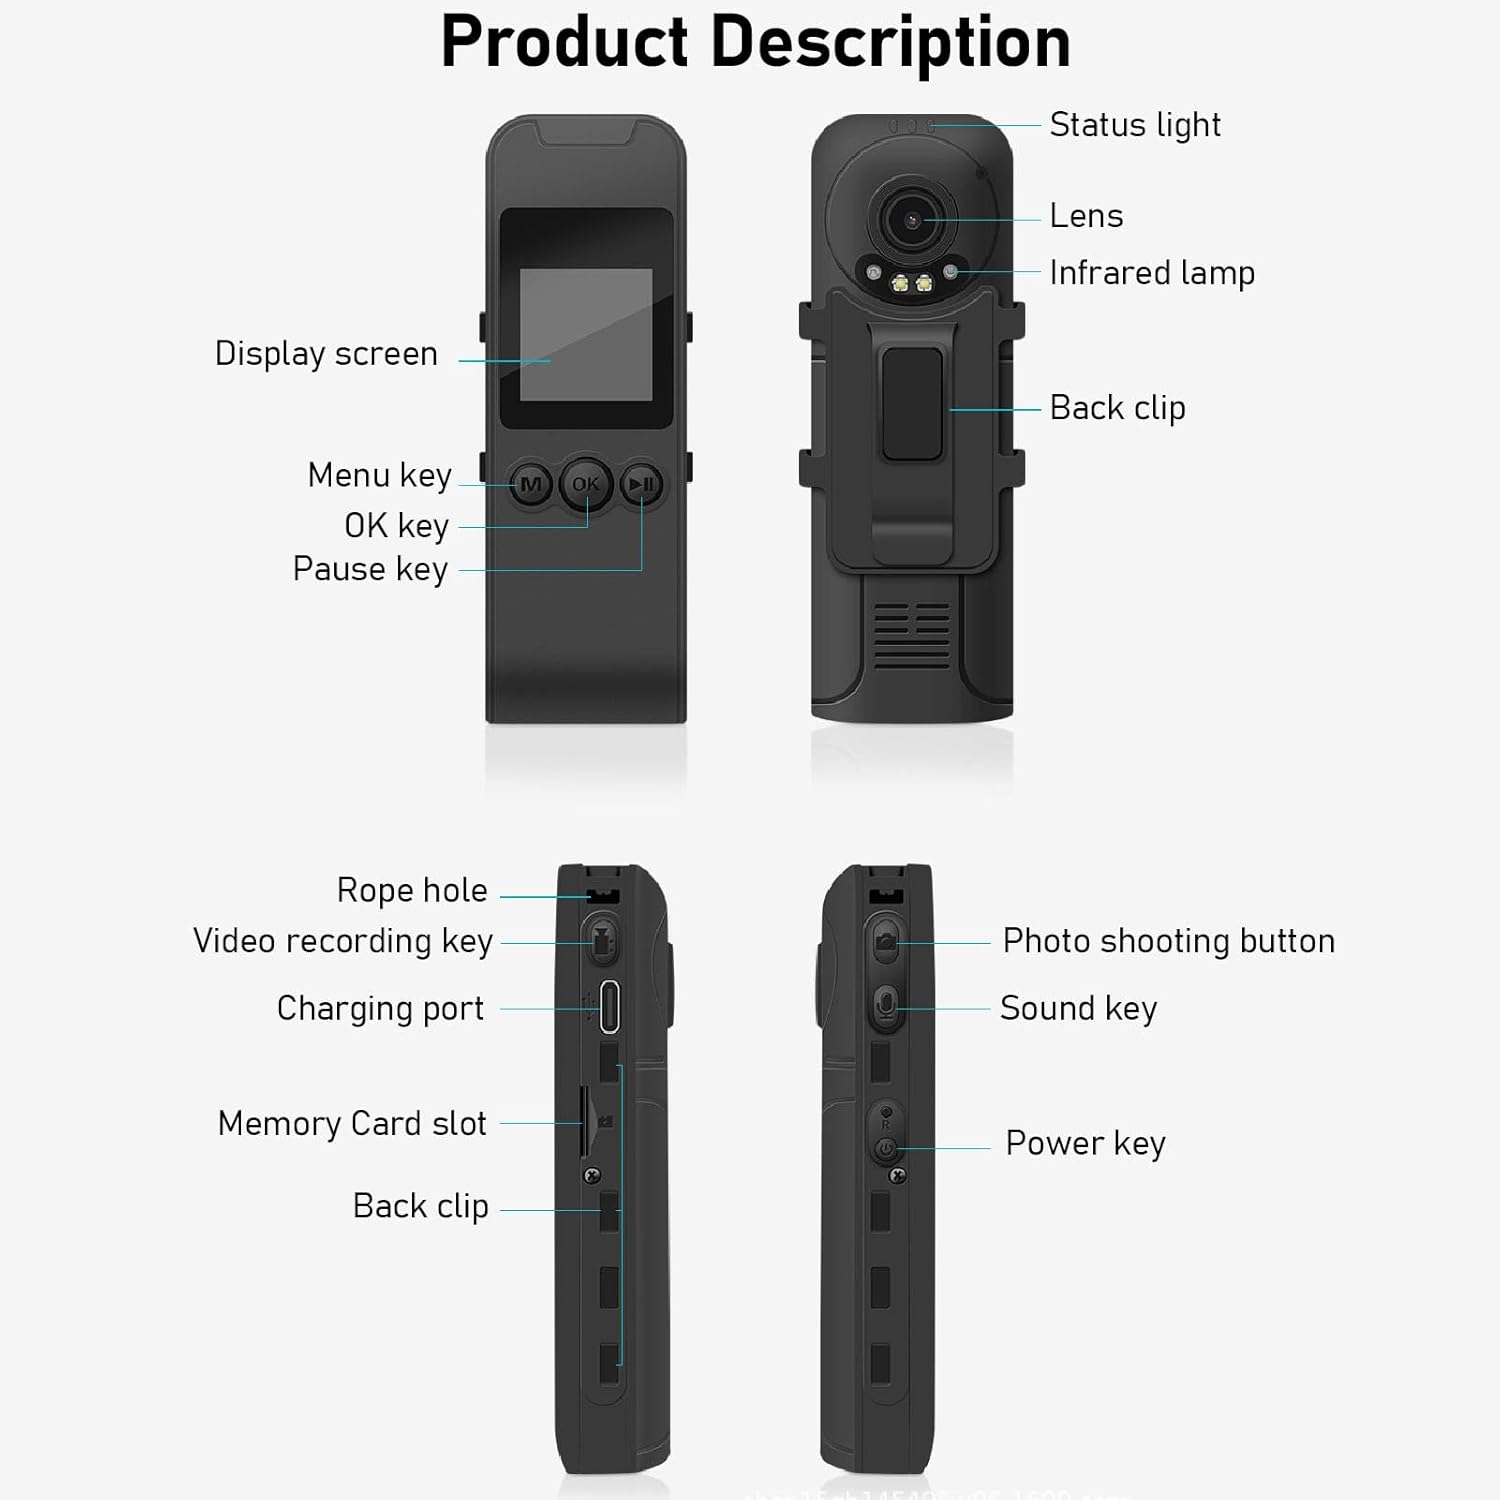
Figure 3: Labeled components of the Cuifati Mini Body Camera.
- Statuslampje: Indicates device status (e.g., recording, charging).
- Lens: Hoofdcameralens voor het maken van video- en foto-opnames.
- Infrarood Lamp: Biedt verlichting voor nachtzicht.
- Terug Clip: Voor het bevestigen van de camera aan kleding of andere oppervlakken.
- Beeldscherm: 1.3-inch LCD-scherm voor live-weergave view, afspelen en menunavigatie.
- Menu Key (M): Geeft toegang tot apparaatinstellingen.
- OK-toets: Confirms selections or starts/stops functions.
- Pauzetoets: Pauzeert het afspelen of de opname.
- Touwgat: Attachment point for the lanyard.
- Video Recording Key: Start en stopt video-opname.
- Oplaadpoort (Type-C): Voor het opladen van het apparaat en het aansluiten op een computer.
- Geheugenkaartsleuf: Plaats een microSD-kaart voor opslag.
- Photo Shooting Button: Legt stilstaande beelden vast.
- Sound Key: Controls audio recording.
- Aan/uit-toets: Hiermee schakelt u het apparaat in of uit.
Instellen
1. De batterij opladen
Before first use, fully charge the camera's built-in lithium-ion battery. Connect the camera to a power source using the provided Type-C USB cable. The status light will indicate charging status. A full charge provides approximately 20 hours of work time and 10 hours of video recording.
Figure 4: Built-in 1200mAh battery for extended use.
2. Een geheugenkaart plaatsen
The camera supports up to a 256GB memory card (not included). Locate the memory card slot on the side of the camera. Gently insert the microSD card with the gold contacts facing down until it clicks into place. To remove, push the card in slightly until it springs out.

Figure 5: Memory card slot for storage expansion.
Gebruiksaanwijzing
1. In-/uitschakelen
- Inschakelen: Press and hold the Power Key until the display screen illuminates.
- Uitschakelen: Press and hold the Power Key until the device shuts down.
2. Video-opname
The camera records in 1440P HD at 30 frames per second with a 120° wide-angle lens and infrared night vision.
- Om te beginnen met opnemen: Press the Video Recording Key. The status light will change, and a recording indicator will appear on the screen.
- Om de opname te stoppen: Press the Video Recording Key again.
- Loop-opname: De camera ondersteunt lusopname, waarbij de oudste opname automatisch wordt overschreven. files wanneer de geheugenkaart vol is.
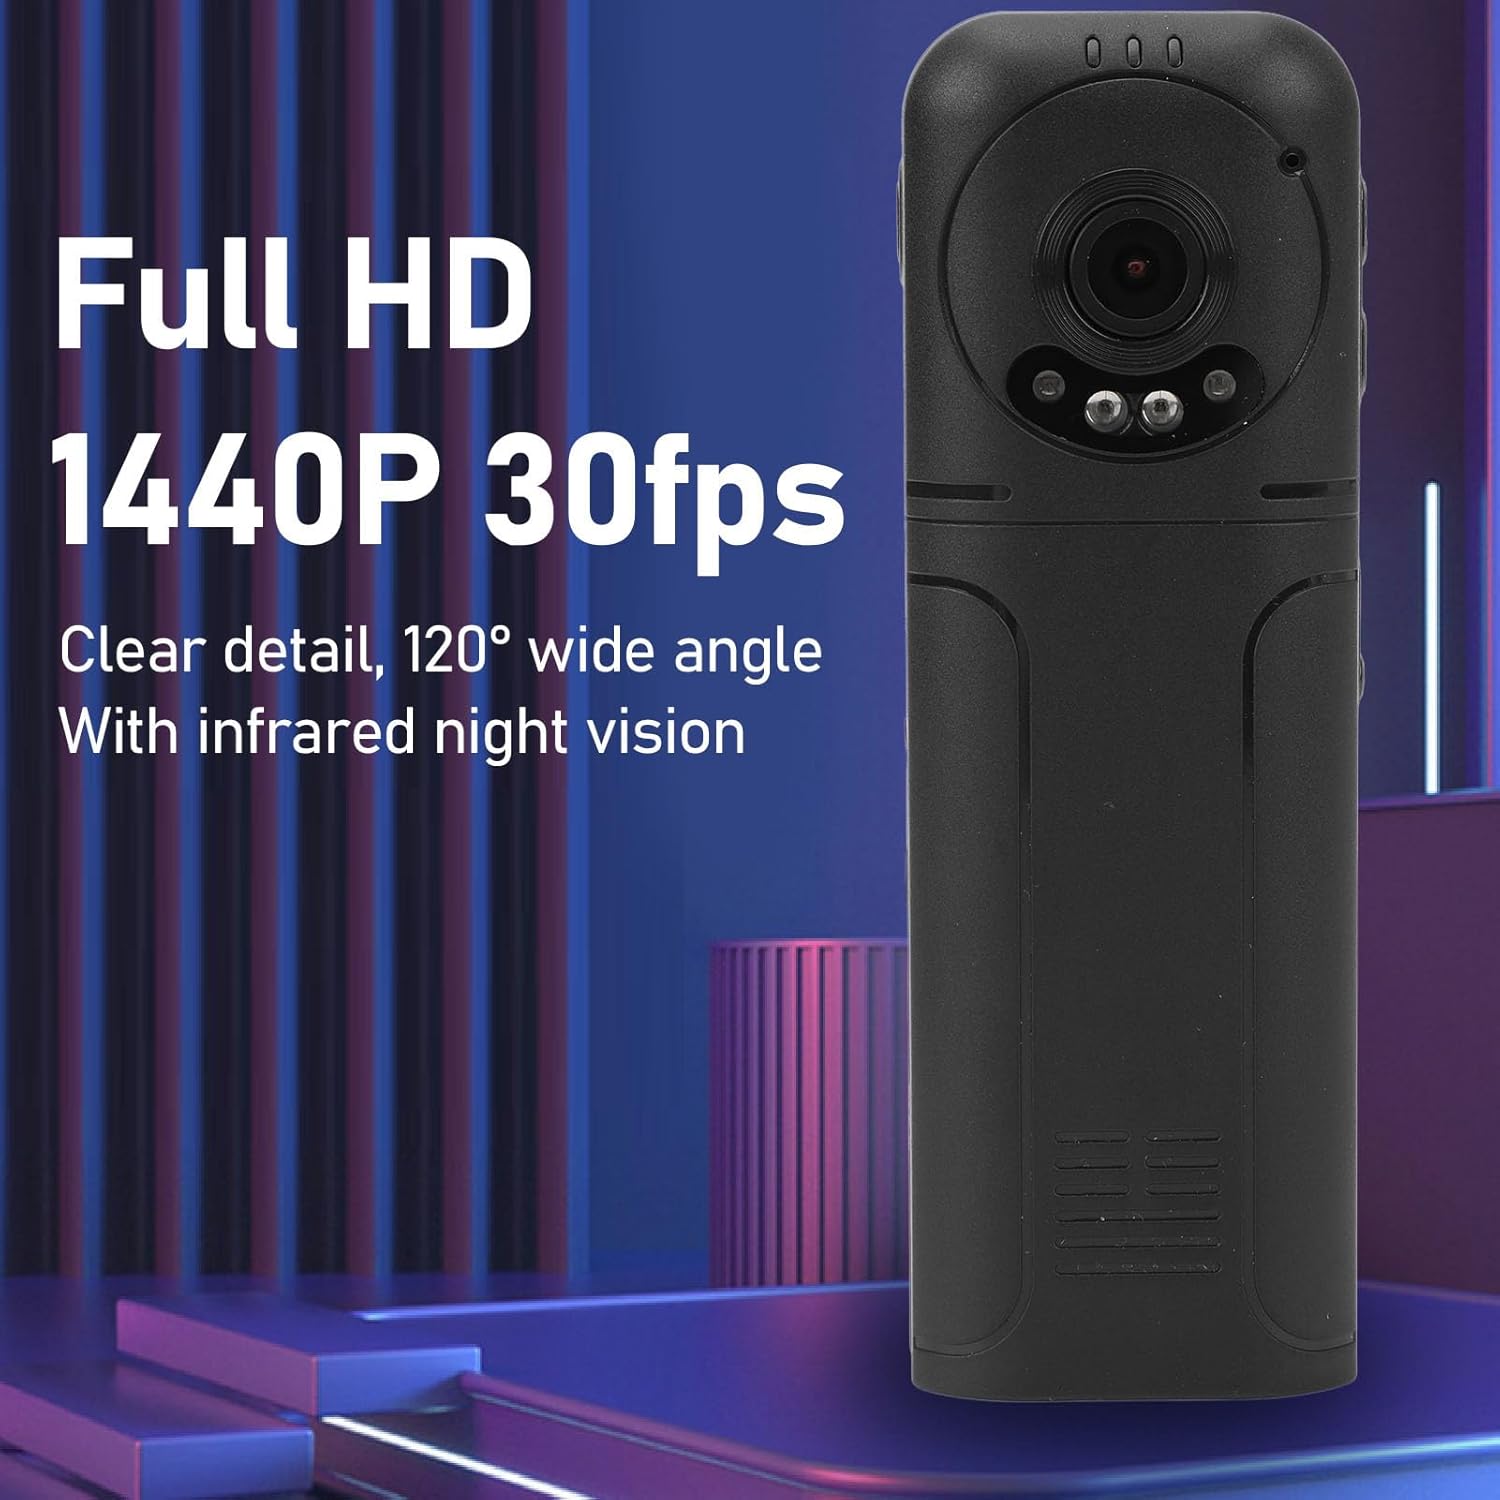
Figure 6: 1440P HD video recording with night vision.
3. Foto's maken
- Een foto nemen: In standby mode, press the Photo Shooting Button.
4. Audio-opname
- To Start Audio Recording: Press the Sound Key.
- To Stop Audio Recording: Press the Sound Key again.

Figure 7: Audio recording functionality.
5. Afspelen en File Beheer
The 1.3-inch LCD screen supports live playback, browsing, and pausing of videos, photos, and recordings directly on the device.

Figure 8: 1.3-inch color screen for on-device playback.
- Afspelen op apparaat: Use the Menu, OK, and Pause keys to navigate and play files op het scherm.
- Verbinding maken met een computer: Connect the camera to a computer via the Type-C USB cable to transfer, view, or delete files.
- OTG-functie: If your mobile phone supports OTG, you can connect the camera directly to your phone for playback and file beheer.
Onderhoud
1. Schoonmaken
- Use the provided cleaning cloth or a soft, dry cloth to wipe the camera body and lens.
- Gebruik geen vloeibare reinigingsmiddelen of oplosmiddelen, aangezien deze het apparaat kunnen beschadigen.
2. Opslag
- Bewaar de camera op een koele, droge plaats, uit de buurt van direct zonlicht en extreme temperaturen.
- Remove the memory card if storing for extended periods.
Probleemoplossing
Als u problemen ondervindt met uw camera, raadpleeg dan de volgende veelvoorkomende problemen en oplossingen:
| Probleem | Oplossing |
|---|---|
| De camera gaat niet aan. | Zorg ervoor dat de batterij is opgeladen. Sluit het apparaat aan op een stroombron en probeer het opnieuw. |
| Kan geen video/foto opnemen. | Controleer of de geheugenkaart correct is geplaatst en voldoende vrije ruimte heeft. Formatteer de geheugenkaart indien nodig (hierdoor worden alle gegevens gewist). |
| Geheugenkaart niet herkend. | Ensure the memory card is inserted correctly. Try a different compatible memory card. Format the card using the camera's menu or a computer. |
| Slechte video-/audiokwaliteit. | Ensure the lens is clean. Check lighting conditions. For audio, ensure the microphone is not obstructed. |
| Apparaat loopt vast of reageert niet meer. | Houd de aan/uit-knop 10-15 seconden ingedrukt om de computer geforceerd opnieuw op te starten. |
Specificaties
Below are the technical specifications for the Cuifati Mini Body Camera (Model CUIFATI2vg0ri8moa):
- Artikeltype: Wearable Camera
- Materiaal: ABS
- Nachtzicht: 2pcs Night Vision Light Beads
- Videoresolutie: 1440P (Maximum)
- Framesnelheid: 30 FPS
- Batterijtype: Lithium-ionbatterij
- Batterijcapaciteit: 1200 mAh (ingebouwd)
- Opslag Ondersteuning: Geheugenkaart van maximaal 256 GB (niet inbegrepen)
- Oplaadpoort: Type-C
- APP-naam: For RoadCam (if applicable for advanced features)
- Modelnaam: CUIFATI2vg0ri8moa
- Fabrikant: CUIFATI
Garantie en ondersteuning
For warranty information or technical support, please refer to the documentation provided at the time of purchase or contact Cuifati customer service directly. Keep your purchase receipt as proof of purchase.