Product voorbijview
This high-back replacement seat is designed for various lawn mowers and lawn tractors. It features high-density foam construction, durable vinyl, and a drain hole for longevity and comfort. The seat is equipped with multiple bolt hole configurations to accommodate a wide range of equipment. It also accepts an operator presence switch for enhanced safety.
Belangrijkste kenmerken
- High Density Foam Cushion: Provides comfort during extended use.
- Heavy Duty Vinyl: Ensures durability and resistance to wear.
- Drain Hole: Prevents water accumulation, extending seat life.
- Accepts Operator Presence Switch: Enhances safety by allowing integration of a safety switch (switch not included).
Wat zit er in de doos?
- 1 x Replacement Seat
- 1 x Hardware Pack (for assembly and mounting)
Specificaties
| Merk | Algemeen |
| Modelnummer | SU-143000BK-3 |
| Kleur | Zwart |
| Materiaal | Vinyl |
| Zithoogte | 18.9 inch |
| Zitlengte | 20.4 inch |
| Zitbreedte | 17.95 inches (26.5 inches with armrests) |
| Artikelgewicht | 10 pond |
| Compatibel voertuigtype | Lawn Mower, Zero Turn Mower |
Verenigbaarheid
This seat is designed with multiple bolt hole configurations to ensure broad compatibility. Please verify your equipment's bolt pattern and seat dimensions against the specifications below to ensure proper fit. Some modifications, such as drilling, may be required for certain models.
Bolt Hole Patterns
- 7.5" X 3"
- 7.5" X 4"
- 7.5" X 7"
- 8" X 11.5"
- 8.2" X 5"
- 10.63" X 7.68"
- 11.25" X 11.5"
The images below illustrate the various bolt patterns and the seat's dimensions for detailed comparison.

Afbeelding: Onderkant view of the seat highlighting the diverse bolt hole configurations for mounting.

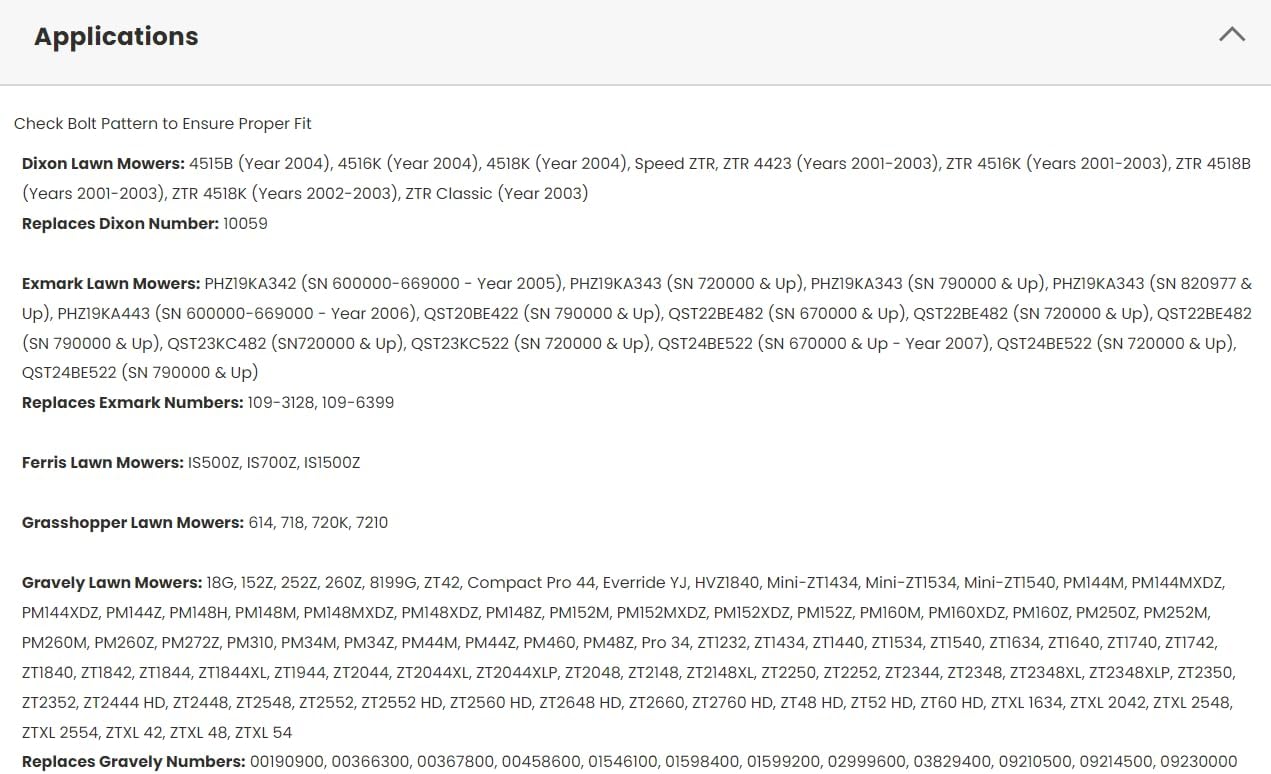
Image: Partial list of compatible lawn mower models from various brands, including AGCO, Allis Chalmers, Ariens, and Cub Cadet, with specific model numbers.

Image: Partial list of compatible lawn mower models from various brands, including Dixon, Exmark, Ferris, and Grasshopper, with specific model numbers and replacement part numbers.

Image: Partial list of compatible lawn mower models from various brands, including Dixie Chopper and Gravely, with specific model numbers and replacement part numbers.
Installatiehandleiding
The replacement seat is designed for straightforward installation. However, due to the universal nature of the seat, some minor modifications to your equipment's mounting plate may be necessary. Always ensure the equipment is turned off and the battery is disconnected before beginning installation.
Algemene stappen:
- Oude stoel verwijderen: Carefully detach and remove your existing lawn mower seat. Note the current bolt pattern and any wiring for safety switches.
- Montageoppervlak voorbereiden: Clean the mounting surface on your lawn mower. Compare the seat's bolt patterns with your equipment's mounting holes. If patterns do not align perfectly, minor drilling on your equipment's mounting plate may be required.
- Install Safety Switch (Optional): If your equipment uses an operator presence switch, install it into the designated hole on the underside of the new seat. This seat is compatible with bolt-on style Delta switches.
- Mount New Seat: Align the new seat with the desired bolt pattern on your equipment's mounting plate. Secure the seat using the provided hardware. Ensure all bolts are tightened securely.
- Bedrading aansluiten: If an operator presence switch is installed, connect its wiring to your equipment's electrical system as per your equipment's manual.
Visual Installation Aids:
Video: Overview of the E-LMS2002-B Riding Lawn Mower Garden Tractor Seat, discussing compatibility and installation considerations, including bolt patterns and operator presence switch acceptance.
Video: A general forklift seat installation guide, demonstrating the process of attaching a seat to a mounting plate and connecting a safety switch. This video provides visual context for seat assembly and mounting.
Video: Installation process for a VEVOR universal forklift seat, showing how to assemble the seat components and secure them to a base. This video illustrates the general assembly steps for a similar type of seat.

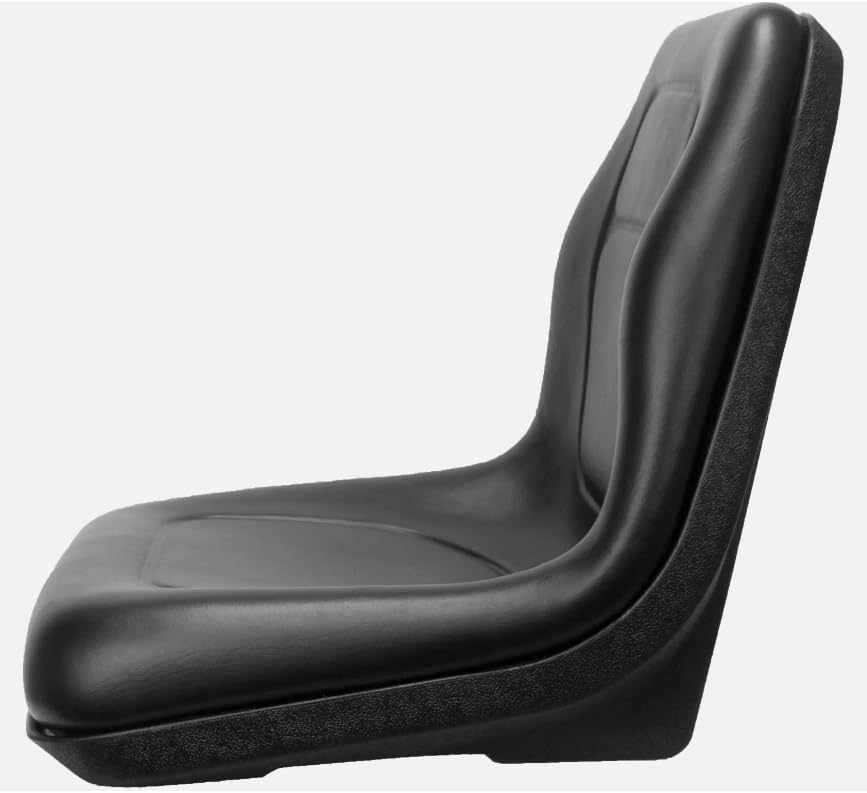
Afbeelding: Side profile of the black vinyl lawn mower seat, showcasing its high-back design and contoured shape.
Afbeelding: Voorzijde view of the black vinyl lawn mower seat, highlighting the seat cushion and backrest design.
Afbeelding: Achterkant view of the black vinyl lawn mower seat, showing the smooth, durable vinyl finish.
Gebruiksaanwijzing
Once installed, the seat provides a comfortable and secure operating position. If an operator presence switch is connected, ensure it is functioning correctly before operating your equipment. The switch is designed to prevent accidental operation when the operator is not seated.
Onderhoud
To ensure the longevity and appearance of your seat, follow these simple maintenance guidelines:
- Schoonmaak: Wipe the vinyl surface with a damp cloth and mild soap. Avoid harsh chemicals or abrasive cleaners that can damage the material.
- Inspectie: Periodically check all mounting hardware for tightness. Re-tighten any loose bolts to ensure the seat remains securely attached.
- Opslag: If possible, store equipment with the seat in a covered area to protect it from prolonged exposure to direct sunlight and extreme weather conditions, which can degrade vinyl over time.
Probleemoplossing
If you encounter issues with your new seat, consider the following:
- Onjuiste pasvorm: Double-check the bolt patterns and dimensions against your equipment. If the existing mounting holes do not match, drilling new holes in your equipment's mounting plate may be necessary. Refer to the 'Compatibility' section for bolt pattern details.
- Losse zitting: Ensure all mounting bolts are securely tightened. Over time, vibrations can cause bolts to loosen.
- Operator Presence Switch Malfunction: If your equipment is not starting or operating correctly after installing a safety switch, verify the wiring connections and ensure the switch is properly engaged when seated.
Garantie en ondersteuning
Dit product wordt geleverd met een 1 jaar fabrieksgarantie. For any questions regarding installation, compatibility, or warranty claims, please contact the manufacturer or your retailer for assistance. Provide your model number (SU-143000BK-3) for quicker service.