Invoering
Bedankt voor uw aankoopasing the efperfect Modern 3 Lights Glass Pendant Light, model EF1408736001. This manual provides essential information for the safe installation, operation, and maintenance of your new lighting fixture. Please read these instructions thoroughly before beginning installation and retain them for future reference.
This pendant light features three distinct smoky gray glass lampshades, designed to enhance various indoor spaces with a blend of modern and vintage esthetiek.

Figure 1: The efperfect Modern 3 Lights Glass Pendant Light, showcasing its design in a bright room.

Figure 2: The pendant light enhancing a dining room setting.

Figure 3: The pendant light providing illumination in a bedroom.
Veiligheidsinformatie
- WAARSCHUWING: To avoid electric shock, always disconnect power at the main circuit breaker or fuse box before installation or servicing.
- Alle elektrische aansluitingen moeten voldoen aan de plaatselijke voorschriften, verordeningen of de National Electric Code (NEC). Raadpleeg een gekwalificeerde elektricien als u niet bekend bent met elektrische bedrading.
- Zorg ervoor dat het armatuur stevig is bevestigd aan een structureel onderdeel van het plafond.
- Overschrijd het maximale wattage niet.tagzoals aangegeven voor de lampen.
- Ga voorzichtig om met glazen onderdelen om breuk te voorkomen.
- Dit armatuur is uitsluitend ontworpen voor gebruik binnenshuis.
Inhoud van het pakket
Controleer of alle onderdelen aanwezig en onbeschadigd zijn voordat u met de installatie begint.
- Ceiling Canopy with integrated wiring
- 3 Glas Lampshades (various shapes and sizes)
- Mounting Hardware (crossbar, mounting screws, wire connectors)
- Adjustable Hanging Wires (pre-attached to canopy and lamp houders)
- Gebruiksaanwijzing
Let op: E26-lampen zijn niet inbegrepen en moeten apart worden aangeschaft.
Specificaties
| Functie | Detail |
|---|---|
| Merk | efperfect |
| Modelnummer | EF1408736001 |
| Kleur | Smoke Gray (Shades), Black (Canopy) |
| Materiaal | Glas, Metaal |
| Stijl | Modern, Vintage |
| Lichtpunt formulier | Hanger |
| Productafmetingen | 12"L x 12"W x 45"H (Adjustable height) |
| Deeltage | 110-120 Volt (wisselstroom) |
| Lampvoet | E26 |
| Aantal lichtbronnen | 3 |
| Max Watttage per lamp | 60W |
| Dimbaar | Yes (with compatible dimmable bulbs and dimmer switch, not included) |
| Installatietype | Semi Flush Mount (Ceiling Mount) |
| Schaduwmateriaal | Glas |
| Artikelgewicht | 9.43 pond |
Instellen en installeren
Professionele installatie wordt aanbevolen. Zorg ervoor dat de stroom bij de stroomonderbreker is uitgeschakeld voordat u verdergaat.
1. Bereid de installatie voor
- Turn off electricity at the main fuse box or circuit breaker.
- Pak alle onderdelen voorzichtig uit en controleer ze op eventuele schade.
- Gather necessary tools (screwdriver, wire strippers, electrical tape, ladder).
2. Mount the Crossbar
Attach the mounting crossbar to the junction box in your ceiling using the provided screws. Ensure it is securely fastened.

Figure 4: Installation diagram illustrating the mounting process and electrical connections.
3. Draadverbindingen
- Sluit de aardingsdraad van het armatuur (meestal blank koper of groen) aan op de aardingsdraad van het huis.
- Sluit de nuldraad van het armatuur (meestal wit) aan op de nuldraad van het huis (wit).
- Connect the fixture's live wire (usually black) to the house live wire (black).
- Secure all connections with wire connectors and wrap with electrical tape for added safety.
Afbeelding 5: Gedetailleerd view of the ceiling canopy and wiring points before final installation.
4. Secure the Ceiling Canopy
Carefully tuck all wires into the junction box. Align the ceiling canopy with the mounting screws on the crossbar and secure it with the provided decorative nuts or screws.
5. Adjust Hanging Wires
The hanging wires for each glass globe are adjustable. To adjust the length, gently push the small pin on the canopy where the wire enters, then pull or push the wire to the desired length. Release the pin to lock the wire in place. Ensure the wires are taut and the globes hang evenly or as desired.

Figure 6: The three distinct glass shades with adjustable hanging wires, allowing for customized arrangement.
6. Installeer gloeilampen
Screw E26 base bulbs (not included) into each lamp holder. Ensure bulbs are fully seated. The fixture supports incandescent, LED, CFL, and halogen bulbs up to 60W each. For dimming functionality, use dimmable E26 bulbs and a compatible dimmer switch (not included).

Figure 7: Detail of an E26 bulb correctly installed within a glass shade.
7. Attach Glass Shades
Carefully attach each glass lampshade to its respective lamp holder according to the design. Ensure they are securely fastened but do not overtighten.

Figure 8: The efperfect pendant light installed, demonstrating its aesthetic appeal in a living space.
Gebruiksaanwijzing
- Aan/uitzetten: Once installed and power is restored, operate the light fixture using your wall switch.
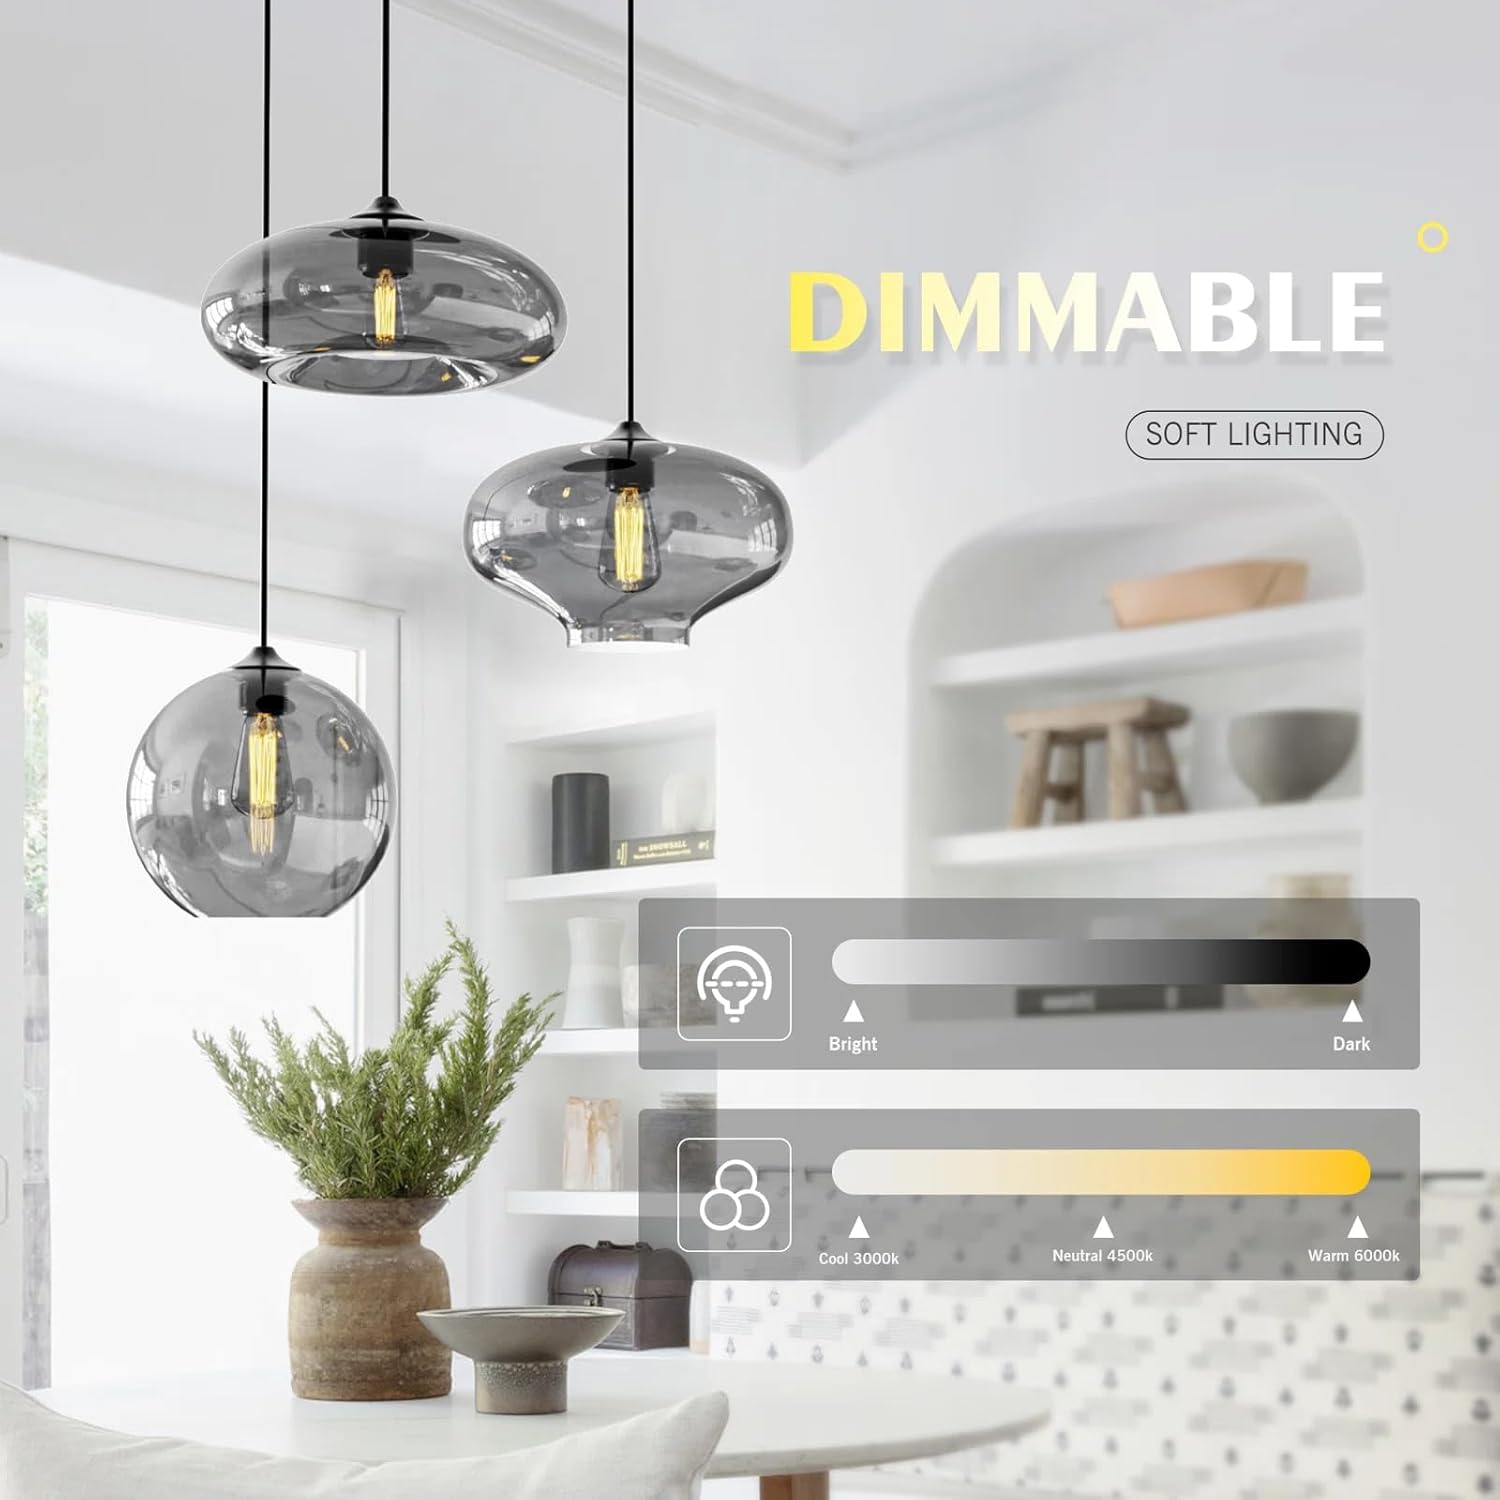
- Dimfunctionaliteit: If you have installed dimmable E26 bulbs and a compatible dimmer switch, you can adjust the light intensity by using the dimmer switch.

Figure 9: Visual representation of the dimmable feature and potential light color temperatures when using compatible bulbs.
Onderhoud
- Schoonmaak: Disconnect power before cleaning. Wipe the fixture and glass shades with a soft, dry, or slightly damp doek. Gebruik geen schuurmiddelen of oplosmiddelen, aangezien deze de afwerking of het glas kunnen beschadigen.
- Lamp vervangen: Ensure power is off. Allow bulbs to cool completely before attempting to replace them. Unscrew the old bulb and screw in a new E26 bulb of the appropriate wattage (maximaal 60W).
Probleemoplossing
| Probleem | Mogelijke oorzaak | Oplossing |
|---|---|---|
| Licht gaat niet aan. |
|
|
| Licht flikkert. |
|
|
| De glazen lampenkap zit los. | Het zonnescherm is niet goed bevestigd. | Gently tighten the shade onto the lamp houder. Niet te vast aandraaien. |
Garantie-informatie
efperfect offers a 60-day return service for any damaged or defective product. Additionally, free replacement is provided for any non-working or broken part within five years of purchase. Please retain your proof of purchase for warranty claims.
Klantenservice
If you encounter any issues or have questions regarding your efperfect Modern 3 Lights Glass Pendant Light, please contact our customer support team. We aim to respond to inquiries within 24 hours.
For support, please refer to the contact information provided with your purchase or visit the official efperfect store online.
Thank you for choosing efperfect.