1. Inleiding
This manual provides detailed instructions for the proper setup, operation, and maintenance of your Radioddity QT40 10 Meter SSB Ham Radio. Please read this manual thoroughly before using the device to ensure safe and optimal performance.
2. Veiligheidsinformatie
- Gebruik de radio niet zonder een correct aangesloten antenne.
- Zorg ervoor dat de voeding voltage voldoet aan de eisen van de radio.
- Stel de radio niet bloot aan extreme temperaturen, direct zonlicht of vocht.
- Probeer de radio niet te demonteren of te modificeren. Laat alle onderhoudswerkzaamheden uitvoeren door gekwalificeerd personeel.
- Houd tijdens het zenden een veilige afstand tot de antenne om blootstelling aan RF-energie te voorkomen.
3. Inhoud van het pakket
Controleer of alle artikelen in uw pakket aanwezig zijn:
- QT40 Radio x 1
- Microfoon x 1
- USB Programming Cable x 1
4. Product voorbijview
The Radioddity QT40 is a 10-meter SSB ham radio designed for reliable communication. It features 40 watts of transmission power, digital noise reduction, and a frequency range of 28.000-29.695MHz.
4.1 Bedieningselementen op het voorpaneel

This image displays the front panel of the Radioddity QT40, highlighting the various controls and indicators. Key elements include the S-Meter, NB/ANL control, NRC function control, Monitor/10K on/off switch, Echo function control, H/L/WX band switch, TX/RX indicator, Channel Display, 4-Pin Mic Connector, Power/Volume control, Squelch Level control, SSB Frequency FINE function, RF Gain Level, PA/FM/AM/USB/LSB Mode selector, Working Band Selection, Mic Gain Level control, Power Level control, and Channel Switch.
- S-Meter: Indicates signal strength and output power.
- NB/ANL Control: Noise Blanker and Automatic Noise Limiter.
- NRC Function Control: Digital Noise Reduction activation.
- Control Monitor/10K on/off: Monitor function and 10KHz step switch.
- ECHO Function Control: Activates and adjusts echo effect.
- H/L/WX Band Switch: High/Low power and Weather band selection.
- TX/RX-indicator: Shows transmit (TX) or receive (RX) status.
- Kanaalweergave: Geeft het huidige werkingskanaal weer.
- 4-Pin Mic Connector: Voor het aansluiten van de meegeleverde microfoon.
- Aan/uit-/volumeregeling: Hiermee kunt u de radio aan- en uitzetten en het audiovolume aanpassen.
- Squelch Level Control: Hiermee wordt de squelch-drempel aangepast.
- SSB Frequency FINE Function: Fine-tunes SSB frequency.
- RF Gain Level: Adjusts receiver RF gain.
- PA/FM/AM/USB/LSB Mode: Selects the operating modulation mode.
- Working Band Selection: Hiermee selecteert u de werkfrequentieband.
- Mic Gain Level Control: Hiermee wordt de gevoeligheid van de microfooningang aangepast.
- Power Level Control: Adjusts transmit power output.
- Kanaal wisselen: Selects operating channels.
4.2 Aansluitingen op het achterpaneel

This image illustrates the rear panel connections of the Radioddity QT40. These include the SO-239 Antenna Connector, External PA Jack, PC Programming Port, 3.5MM External Speaker Jack, and Power Supply Jack.
- SO-239 Antenna Connector: For connecting your external antenna.
- External PA Jack: For connecting an external Public Address speaker.
- PC Programming Port: For connecting the USB programming cable to a computer.
- 3.5MM External Speaker Jack: Voor het aansluiten van een optionele externe luidspreker.
- Voedingsaansluiting: For connecting the DC power cable.
4.3 Microfoon

The included microphone features Channel Up/Down buttons, a Push-To-Talk (PTT) button, the microphone element, and a 4-Pin Microphone Connector for connection to the radio.
- Channel Up: Verhoogt het kanaalnummer.
- Channel Down: Verlaagt het kanaalnummer.
- PTT (Push-To-Talk): Activeert de transmissie wanneer ingedrukt.
- Mic: Microphone element.
- Microfoonkabel: Connects the microphone to the radio.
- 4-pins microfoonaansluiting: Connects to the radio's front panel.
5. Instellen
5.1 Antenneaansluiting
Connect a suitable 10-meter antenna to the SO-239 Antenna Connector on the rear panel of the radio. Ensure the connection is secure. An improperly connected or mismatched antenna can damage the radio.
5.2 Stroomaansluiting
Connect the DC power cable to the Power Supply Jack on the rear panel. Connect the other end of the power cable to a compatible 13.8V DC power source. Observe correct polarity (red to positive, black to negative).
5.3 Microfoonaansluiting
Plug the 4-Pin Microphone Connector into the corresponding jack on the front panel of the radio.
6. Gebruiksaanwijzing
6.1 Basisbediening
- Aan/uit: Draai de Stroom-/volumeregeling clockwise to turn the radio on. Continue rotating to adjust the audio volume.
- Squelch-aanpassing: Draai de Squelch-niveauregeling clockwise until background noise disappears. Rotate counter-clockwise to hear weaker signals.
- Kanaalselectie: Gebruik de Kanaal wisselen: knop op het voorpaneel of de Kanaal omhoog/omlaag buttons on the microphone to select your desired operating channel.
6.2 Modulation Modes (AM/FM/SSB)
Gebruik de PA/FM/AM/USB/LSB Mode selector to choose your desired modulation mode:
- BEN (Ampamplitudemodulatie): Common for local communication.
- FM (Frequentiemodulatie): Offers clearer audio over shorter distances.
- USB (Upper Sideband) / LSB (Lower Sideband): Used for long-distance SSB communication. Fine-tune with the SSB Frequency FINE Function.
- PA (Public Address): Outputs audio to an external PA speaker.

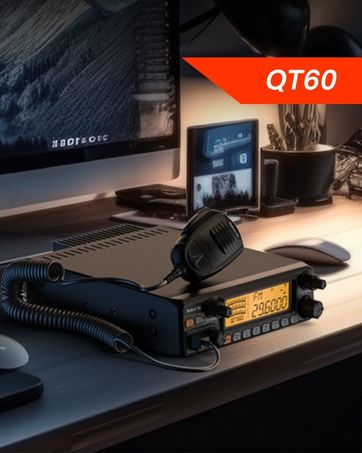
This image shows the Radioddity QT40 radio in a vehicle, illustrating its capability for AM/FM/SSB modulation, crucial for various communication needs.
6.3 Digital Noise Reduction (NRC)
The QT40 features TX and RX digital noise reduction technology. Activate the NRC Function Control to reduce background noise during transmission and reception, improving audio clarity.
This image depicts the Radioddity QT40 radio installed in a vehicle, emphasizing its digital noise reduction feature for clearer communication in noisy environments.
6.4 Weather Channel and NOAA Alert
To access weather channels and NOAA alerts, use the H/L/WX Band Switch to select the WX band. This feature provides timely weather information and alerts.
6.5 CTCSS/DCS
The radio supports CTCSS (Continuous Tone-Coded Squelch System) and DCS (Digital Coded Squelch) for selective calling. These features can be configured via the programming software.
6.6 VOX-functie
The VOX (Voice Operated Transmit) function allows for hands-free operation. When activated, the radio will transmit automatically when it detects your voice. Adjust VOX sensitivity via the programming software.

This image shows the Radioddity QT40 microphone mounted in a vehicle, demonstrating the convenience of the VOX hands-free function for drivers.
6.7 PC-programmering
The Radioddity QT40 can be customized using PC programming software and the included USB programming cable. This allows for advanced settings adjustments, including CTCSS/DCS codes, VOX levels, and other features. Software and drivers are typically available on the manufacturer's webplaats.
7. Onderhoud
- Schoonmaak: Gebruik een zachte, damp doek om de buitenkant van de radio schoon te maken. Gebruik geen agressieve chemicaliën of schuurmiddelen.
- Opslag: When not in use for extended periods, store the radio in a dry, dust-free environment.
- Antenne controleren: Periodically inspect antenna connections for corrosion or damage.
8. Probleemoplossing
| Probleem | Mogelijke oorzaak | Oplossing |
|---|---|---|
| Geen stroom | Stroomkabel losgekoppeld; onjuist volumetage; doorgebrande zekering. | Check power connections; verify power source; inspect fuse. |
| Geen ontvangst | Squelch too high; antenna disconnected; incorrect channel/mode. | Adjust squelch; check antenna connection; verify channel and mode settings. |
| Kan niet verzenden | Microfoon niet aangesloten; PTT-knop defect; antenneprobleem. | Ensure microphone is connected; test PTT; check antenna and SWR. |
| Slechte audiokwaliteit | Low signal strength; high noise; incorrect mode. | Adjust RF Gain; activate NRC; ensure correct modulation mode. |
| E5-foutcode | High SWR (Standing Wave Ratio) detected, indicating an antenna mismatch or fault. | Check antenna connection; verify antenna tuning for the operating frequency; inspect antenna cable for damage. Do not transmit with high SWR to prevent radio damage. |
9. Specificaties
| Functie | Specificatie |
|---|---|
| Merk | Radioditeit |
| Modelnummer | QT40 |
| Frequentiebereik | 28.000-29.7 MHz |
| Aantal kanalen | 40 |
| Transmissievermogen | 40 Watt |
| Modulatiemodi | AM, FM, SSB (USB/LSB), PA |
| Speciale kenmerken | Automatic Squelch, Echo, PC programmable, VOX Function, Digital Noise Reduction, NOAA Alert |
| Artikelgewicht | 3.3 pond (1.5 kg) |
| Productafmetingen | 11.3 x 7.87 x 2.4 inch (287 x 200 x 61 mm) |
| Spreekbereik Maximaal | 10 mijl (ongeveer, afhankelijk van de omstandigheden) |
| Waterbestendigheidsniveau | Niet waterbestendig |

This image provides a visual representation of the Radioddity QT40's dimensions (11.2 inches length, 7.9 inches width, 2.4 inches height) and weight (3.3 lbs).
10. Garantie-informatie
The Radioddity QT40 comes with an 18-month warranty from the date of purchase. This warranty covers manufacturing defects. Please retain your proof of purchase for warranty claims. The warranty does not cover damage caused by misuse, unauthorized modifications, or improper installation.
11. Ondersteuning
For technical assistance, troubleshooting beyond this manual, or warranty inquiries, please contact Radioddity customer support. Refer to the official Radioddity website voor de meest actuele contactinformatie en ondersteuningsbronnen.
Official Radioddity Webwebsite: www.radioddity.com