1. Inleiding
Thank you for choosing the WORKPRO Portable Tire Inflator W125218A. This device is designed for convenient and efficient inflation of tires for cars, motorcycles, bicycles, and various sports balls. It features a digital display, auto shut-off, multiple inflation modes, an LED light, and a power bank function. Please read this manual thoroughly before use to ensure safe and optimal operation.

Image: The WORKPRO Portable Tire Inflator is suitable for a wide range of applications, including car tires, motorcycle tires, bicycle tires, swimming rings, and various sports balls.
2. Veiligheidsinformatie
Neem altijd de volgende veiligheidsmaatregelen in acht om letsel of schade aan het apparaat te voorkomen:
- Laat de inflator niet onbeheerd achter tijdens gebruik.
- Ensure the correct pressure setting for the item being inflated to avoid over-inflation, which can cause bursting and serious injury.
- The inflation hose and nozzle may become hot during prolonged use. Allow them to cool before handling.
- Houd het apparaat buiten bereik van kinderen en huisdieren.
- Gebruik de opblaaspomp niet in natte omstandigheden of in de buurt van brandbare vloeistoffen of gassen.
- Gebruik uitsluitend de meegeleverde accessoires en adapters.
- If the device overheats, allow it to cool down before resuming operation.
- Wear appropriate eye and hearing protection during use.
3. Inhoud van het pakket
Controleer of alle artikelen in het pakket aanwezig zijn:
- WORKPRO Portable Tire Inflator
- Opblaasslang
- Naaldventieladapter (voor kogels)
- Presta Valve Adapter (for some bicycles)
- Wide Nozzle Adapter (for inflatables)
- USB-oplaadkabel
- Opbergzak

Image: The WORKPRO Portable Tire Inflator shown with its included accessories: inflation hose, various nozzle adapters, USB charging cable, and a storage bag.
4. Product voorbijview
Maak uzelf vertrouwd met de onderdelen van uw bandenpomp:
- Digitaal beeld: Geeft de huidige druk, de streefdruk, het batterijniveau en de geselecteerde modus weer.
- Bedieningsknoppen: Power, Mode selection, Pressure adjustment (+/-).
- Opblaaspoort: Waar de opblaasslang op aangesloten wordt.
- LED-lamp: Voor verlichting bij weinig licht.
- USB-C-oplaadpoort: Om het apparaat op te laden.
- USB-A-uitvoerpoort: Functioneert als een powerbank.

Afbeelding: Een gedetailleerde view of the inflator's digital display, showing pressure readings, battery indicator, and the three-color LED indicators for pressure status (red, yellow, green).
5. Instellen
5.1 Eerste keer opladen
Before first use, fully charge the tire inflator. The device is powered by three 2500mAh rechargeable batteries.
- Sluit de meegeleverde USB-oplaadkabel aan op de USB-C-oplaadpoort van de pomp.
- Sluit het andere uiteinde van de USB-kabel aan op een geschikte USB-voedingsadapter (niet meegeleverd) of een USB-poort met voeding.
- The battery indicator on the digital display will show charging progress. A full charge typically takes 3 to 5 hours.
- Zodra deze volledig is opgeladen, koppelt u de oplaadkabel los.

Image: The inflator connected to a car tire, highlighting its 7500 mAh battery capacity, capable of inflating multiple car tires on a single charge.
6. Gebruiksaanwijzing
6.1 In-/uitschakelen
- To power on, press and hold the power button (usually the 'O' button) for a few seconds.
- Om het apparaat uit te schakelen, houdt u de aan/uit-knop opnieuw ingedrukt. Het apparaat wordt ook automatisch uitgeschakeld na een periode van inactiviteit.
6.2 De inflatiemodus selecteren
The inflator offers 4 smart preset modes and 1 manual mode:
- Press the 'M' (Mode) button to cycle through the available modes: Car, Motorcycle, Bicycle, Ball, and Manual.
- Each preset mode has a default pressure value (e.g., Car: 36 PSI, Motorcycle: 35 PSI, Bicycle: 45 PSI, Ball: 8 PSI, Manual: 60 PSI).
- In any mode, you can adjust the target pressure using the '+' and '-' buttons. The maximum adjustable pressure is 150 PSI.
- To change pressure units (PSI, BAR, KPA), press the 'M' button and '+' button simultaneously.

Image: The inflator's screen showing the selection of different inflation modes (Car, Motorcycle, Bicycle, Ball, Manual) with their respective default PSI values.
6.3 Connecting to the Item for Inflation
- Screw the inflation hose securely into the inflation port on the top of the device.
- For car, motorcycle, or bicycle (Schrader valve) tires, attach the other end of the hose directly to the tire valve stem. Ensure a tight connection to prevent air leakage.
- For Presta valves (some bicycles), balls, or other inflatables, attach the appropriate adapter to the inflation hose before connecting to the item.
- Once connected, the digital display will show the current pressure of the item.
6.4 Inflatie starten en stoppen
- After setting the desired pressure and connecting the hose, press the power button (usually the 'O' button) to start inflation.
- The inflator will automatically stop when the preset target pressure is reached. This is the auto shut-off feature.
- Om het oppompen op elk gewenst moment handmatig te stoppen, drukt u nogmaals op de aan/uit-knop.
- After inflation, carefully disconnect the hose from the item and then from the inflator. Be aware that the hose may be hot.

Image: The inflator in use, demonstrating its fast inflation capability for a 195/60R16 car tire, indicating inflation from 25-35 PSI in under 1 minute and 0-35 PSI in under 5 minutes.
6.5 Pressure Indicator Lights
The device features three-color LED indicators for real-time pressure status:
- Groen licht: Pressure is between 90% and 110% of the preset value.
- Geel licht: Pressure is below 90% of the preset value.
- Rood licht: Pressure exceeds 110% of the preset value.
6.6 LED-zaklampfunctie
The built-in LED light can be used for illumination:
- Press the dedicated light button (if available, or a combination of buttons as per device markings) to turn on the flashlight.
- Cycle through different modes: steady light, flashing light, and SOS emergency mode.
- Druk nogmaals op de knop om het licht uit te schakelen.
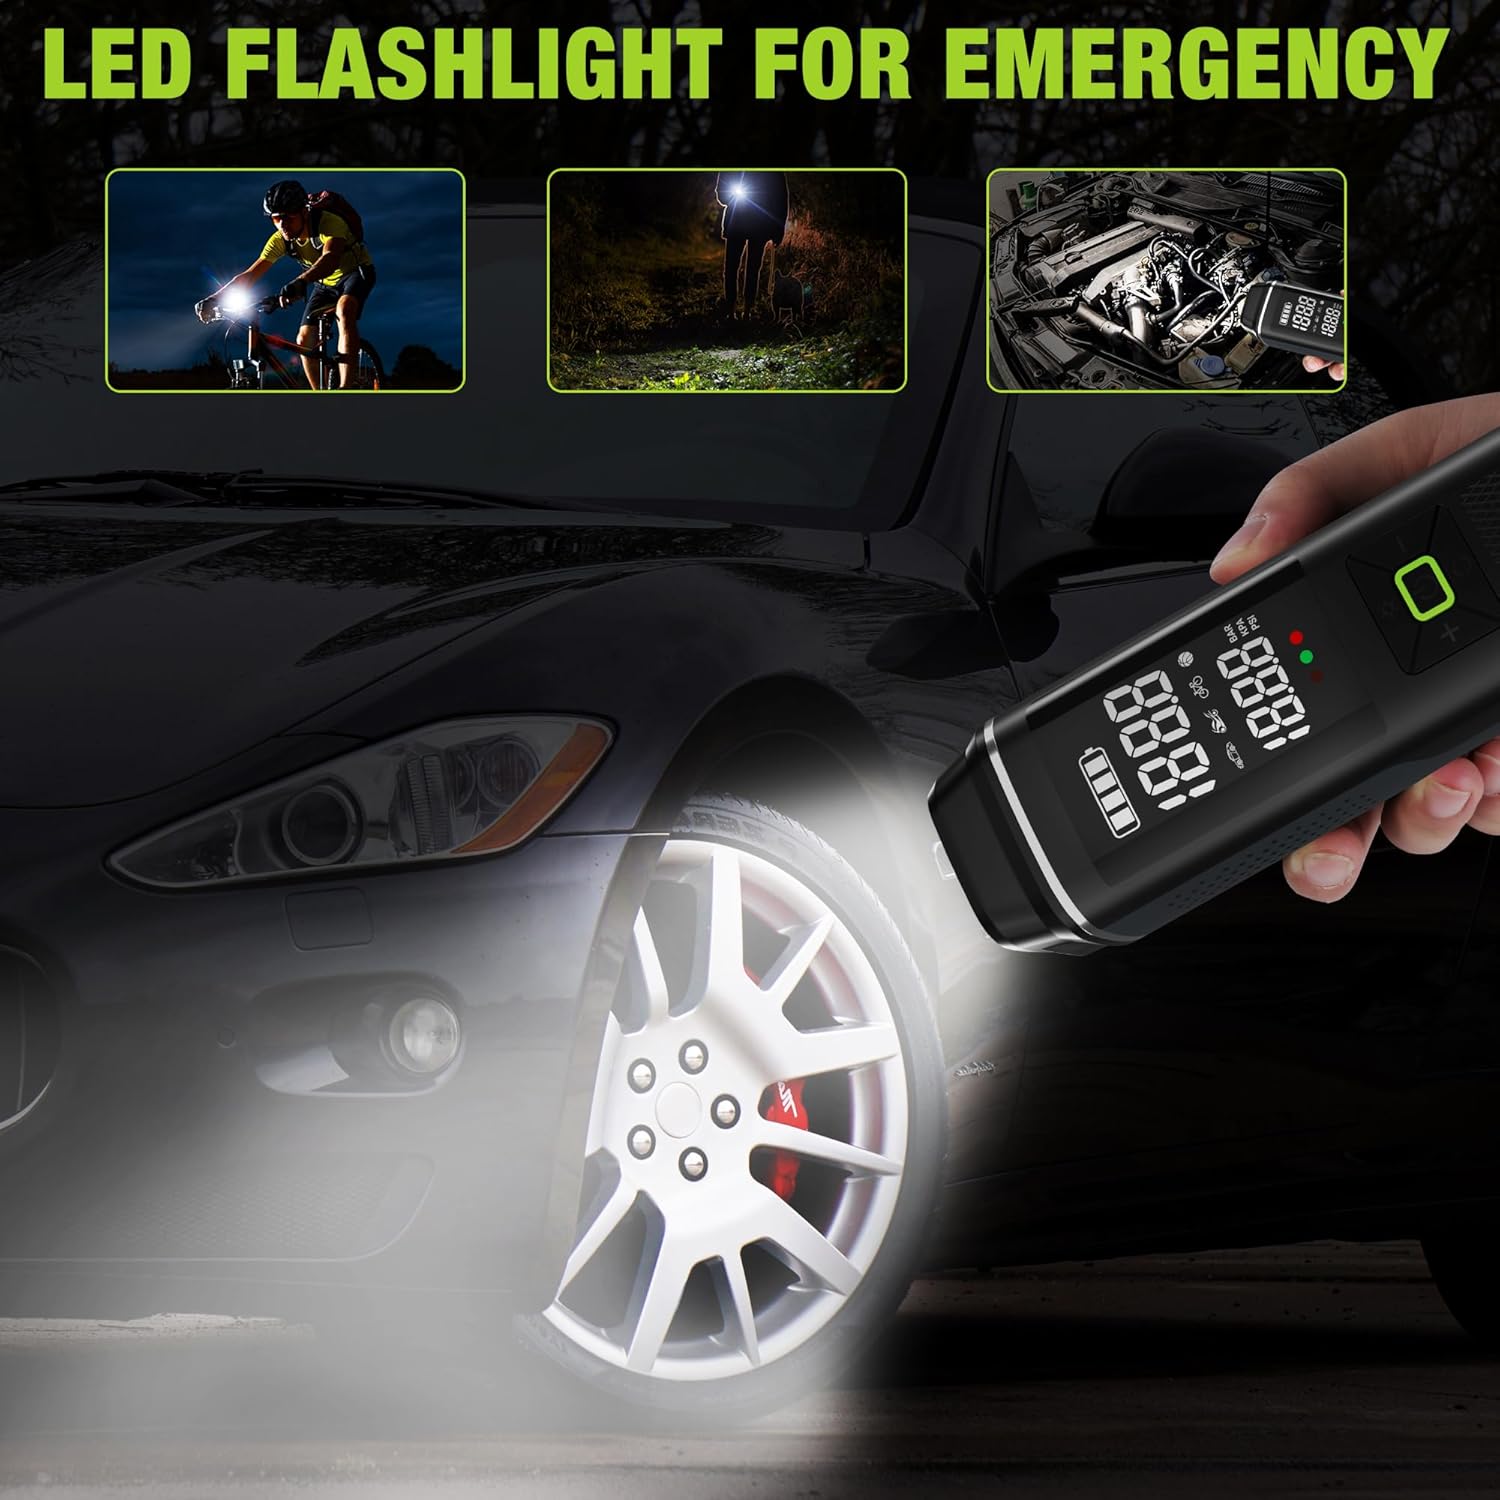
Image: The inflator's LED flashlight function demonstrated for night cycling, general illumination, and under-hood car inspection.
6.7 Portable Power Bank Function
The inflator can also serve as a power bank to charge electronic devices:
- Ensure the inflator is powered on.
- Connect your electronic device (e.g., smartphone) to the USB-A output port using a compatible charging cable (not included).
- De opblaaspomp begint nu met het opladen van uw apparaat.
- Disconnect your device when charging is complete or when the inflator's battery is low.

Image: The inflator being used to charge a smartphone via its USB output port, illustrating its portable power bank capability.
7. Onderhoud
- Schoonmaak: Veeg het apparaat af met een zachte, damp Gebruik een doek. Gebruik geen agressieve chemicaliën of schurende reinigingsmiddelen. Zorg ervoor dat het apparaat is uitgeschakeld en losgekoppeld van de stroombron voordat u het schoonmaakt.
- Opslag: Bewaar de opblaaspomp en de bijbehorende accessoires in de meegeleverde opbergtas op een koele, droge plaats, uit de buurt van direct zonlicht en extreme temperaturen.
- batterij zorg: To prolong battery life, avoid fully discharging the battery frequently. Recharge the device periodically if not used for extended periods (e.g., every 3-6 months).
8. Probleemoplossing
| Probleem | Mogelijke oorzaak | Oplossing |
|---|---|---|
| De pomp gaat niet aan. | Batterij bijna leeg. | Laad het apparaat volledig op. |
| Slow inflation or weak airflow. | Low battery; hose not securely connected; item too large for continuous inflation. | Ensure battery is fully charged. Check hose connections for leaks. For large items, inflate in stages, allowing the device to cool. |
| Apparaat raakt oververhit tijdens gebruik. | Langdurige continue werking. | Stop operation and allow the device to cool down for at least 10-15 minutes before resuming. Avoid continuous use for more than 5 minutes. |
| Luchtlekkage bij de aansluiting. | Hose not tightened properly; worn adapter. | Ensure the inflation hose and adapters are screwed on very tightly. Replace worn adapters if necessary. |
| Onjuiste drukmeting. | Losse verbinding; sensorprobleem. | Ensure the connection to the tire valve is secure. If the issue persists, contact customer support. |
9. Specificaties
| Modelnaam | Bandenpomp |
| Modelnummer | W125218A |
| Merk | WERKPRO |
| Deeltage | 12 Volt |
| Energiebron | Corded Electric (for charging), Battery Powered (for operation) |
| Batterijcapaciteit | 3 x 2500mAh (7500mAh totaal) |
| Maximale druk | 150 PSI |
| Oplaadtijd | 3-5 uur |
| Continuous Inflation Time | Over 30 minutes (on full charge) |
| Materiaal | Kunststof, aluminium |
| Artikelgewicht | 930 gram |
| UPC | 820909686958 |
10. Garantie en ondersteuning
For warranty information, technical support, or service inquiries, please contact WORKPRO customer service. Refer to the product packaging or the official WORKPRO webwebsite voor contactgegevens.
Bewaar uw aankoopbewijs voor garantieclaims.