Belangrijke veiligheidsmaatregelen
Please read and save this Instruction Manual. When using electrical appliances, basic safety precautions should be followed, including:
- Lees alle instructies.
- Verwijder alle zakken en verpakkingen van het apparaat voordat u het gebruikt.
- Laat het apparaat niet onbeheerd achter wanneer het in gebruik is.
- Zorg ervoor dat het apparaat correct is gemonteerd voordat u het in gebruik neemt.
- Raak geen hete oppervlakken aan. Gebruik handgrepen of knoppen.
- Om elektrische schokken te voorkomen, mag u het snoer, de stekker of het apparaat niet onderdompelen in water of een andere vloeistof.
- Wanneer een apparaat door of in de buurt van kinderen wordt gebruikt, is nauwlettend toezicht noodzakelijk.
- Haal de stekker uit het stopcontact wanneer u het niet gebruikt en voordat u het schoonmaakt. Laat het afkoelen voordat u onderdelen aanbrengt of verwijdert.
- Gebruik geen enkel apparaat waarvan het snoer of de stekker beschadigd is, of nadat het apparaat defect is geraakt of op enigerlei wijze beschadigd is.
- Het gebruik van accessoires die niet door de fabrikant van het apparaat worden aanbevolen, kan letsel veroorzaken.
- Niet buitenshuis gebruiken.
- Laat het snoer niet over de rand van een tafel of aanrecht hangen en laat het niet in aanraking komen met hete oppervlakken.
- Niet op of in de buurt van een hete gas- of elektrische kookplaat of in een hete oven plaatsen.
- Wees uiterst voorzichtig bij het verplaatsen van een apparaat dat hete olie of andere hete vloeistoffen bevat.
- Sluit altijd eerst de stekker aan op het apparaat en steek daarna de stekker in het stopcontact. Om los te koppelen, zet u een willekeurige bediening op "uit" en haalt u vervolgens de stekker uit het stopcontact.
- Gebruik het apparaat niet voor andere doeleinden dan waarvoor het bedoeld is.
Onderdelen en functies
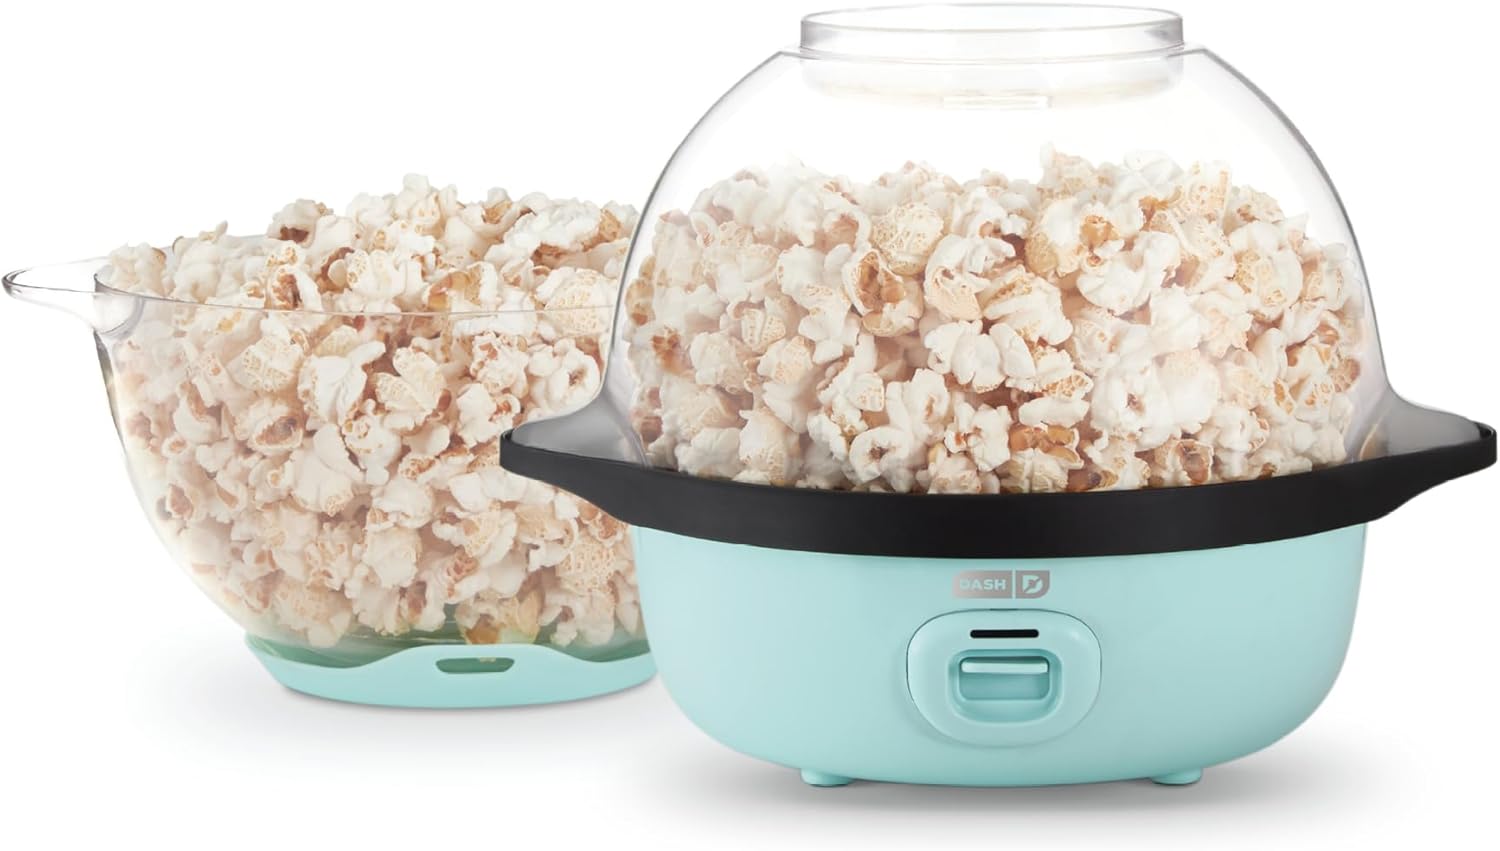
Hoofdeenheid: The base contains the heating element and motor for the stirring arm. The clear bowl sits on top of the base during operation and doubles as a serving dish.

Stirring Arm: A rotating arm designed to circulate kernels evenly across the heating plate for optimal popping.

Measuring Cup/Butter Melting Tray: This dual-purpose cup is used to measure kernels and can be placed on top of the clear bowl to melt butter during popping.

SmartStore™ Design: The base of the popcorn maker nests inside the clear bowl for compact and convenient storage.
Voor het eerste gebruik
- Verwijder alle verpakkingsmaterialen en stickers van het apparaat.
- Wipe down the heating plate with a damp lap.
- Wash the clear bowl, stirring arm, and measuring cup with warm, soapy water. Rinse thoroughly and dry completely.
- Zorg ervoor dat alle onderdelen droog zijn vóór montage en gebruik.
Using Your Popcorn Maker
Volg deze stappen om heerlijke popcorn te maken:
- Place the Popcorn Maker base on a clean, stable, and dry surface.
- Attach the stirring arm to the center post on the heating plate.
- Add 1-2 tablespoons of cooking oil (vegetable, canola, or coconut oil recommended) to the heating plate.
- Using the included measuring cup, add 1/2 cup of popcorn kernels to the heating plate. Do not overfill.
- Place the clear bowl securely onto the base.
- If desired, place butter (up to 2 tablespoons) in the measuring cup and place the measuring cup on top of the clear bowl. The heat from the popping corn will melt the butter.
- Plug the Popcorn Maker into a 120V AC outlet.
- Press the Power Button to start popping. The stirring arm will begin to rotate.
- Popcorn will begin to pop within 3-5 minutes. Once popping slows significantly (about 95% of kernels popped), press the Power Button to turn off the appliance.
- Carefully remove the clear bowl from the base using oven mitts, as it will be hot.
- If butter was melted, carefully pour it over the popcorn.
- The clear bowl can be flipped over and used as a serving dish.

The popcorn maker can produce up to 12 cups of popcorn, perfect for family movie nights.

The clear bowl conveniently doubles as a serving dish after popping.
Reiniging & Onderhoud
Proper cleaning ensures the longevity of your Popcorn Maker:
- Haal altijd de stekker uit het stopcontact en laat het apparaat volledig afkoelen voordat u het schoonmaakt.
- Remove the clear bowl and stirring arm. Wash these parts in warm, soapy water. They are also top-rack dishwasher safe.
- Wipe the heating plate and exterior of the base with a damp lap. Dompel de basis niet onder in water of een andere vloeistof.
- Do not use abrasive cleaners or scouring pads, as this may damage the non-stick surface.
- Zorg ervoor dat alle onderdelen goed droog zijn voordat u ze opbergt.

The nonstick surface of the heating plate allows for easy cleanup.
Probleemoplossing
| Probleem | Mogelijke oorzaak | Oplossing |
|---|---|---|
| Het apparaat gaat niet aan. | Niet aangesloten; aan/uit-knop niet ingedrukt. | Ensure the appliance is securely plugged into a working outlet. Press the Power Button. |
| De popcorn poft niet of er poffen maar heel weinig korrels. | Insufficient oil; Old or dry kernels; Too many kernels. | Ensure enough oil is used (1-2 tbsp). Use fresh popcorn kernels. Do not exceed 1/2 cup of kernels. |
| De popcorn smaakt verbrand. | Left on too long after popping; Too much oil. | Turn off the appliance immediately once popping slows. Use recommended oil amount. |
| Stirring arm not rotating. | Stirring arm not properly attached. | Ensure the stirring arm is securely attached to the center post. |
Specificaties
- Model: DSSP100GBAQ04
- Deeltage: 120 V ~ 60 Hz
- Vermogen: 550W
- Capaciteit: 3 Quarts (up to 12 cups of popped popcorn)
- Afmetingen: 8.9"L x 10.9"B x 8.3"H
- Gewicht: 3.66 pond
- Materiaal: Plastic
Garantie en ondersteuning
DASH products are manufactured to high quality standards. This appliance is covered by a 1-year limited warranty from the date of original purchase. For warranty service, please contact DASH Customer Support. You may also visit the official DASH website voor meer informatie en ondersteuningsbronnen.
For additional assistance, please refer to the official user guide PDF: DASH SmartStore™ Stirring Popcorn Maker User Guide