
OOYCYOO P 60A
OOYCYOO MPPT 60A Solar Charge Controller User Manual
Model: P 60A
1. Inleiding
This manual provides detailed instructions for the installation, operation, and maintenance of your OOYCYOO MPPT 60A Solar Charge Controller. This device is designed to efficiently manage power flow from your solar panels to your battery bank, ensuring optimal charging and system protection. It supports automatic 12V/24V system voltage identification and is compatible with various battery types.
Key features include a backlit LCD display, a 4-stage battery charging algorithm, and comprehensive protection functions.
2. Veiligheidsinstructies
- Sluit altijd eerst de accu aan, dan het zonnepaneel en als laatste de belasting. Ontkoppel in omgekeerde volgorde.
- Ensure all wiring is correctly polarized to prevent damage.
- Do not connect inverters or inductive loads directly to the controller's load terminals.
- Installeer de controller in een goed geventileerde ruimte, uit de buurt van brandbare materialen.
- The controller generates heat during operation; ensure adequate airflow. The integrated cooling fan activates when the temperature exceeds 45°C and turns off below 40°C.
- Use appropriate circuit breakers and fuses for all connections.
- This device is for indoor use only. Protect it from water and moisture.
3. Product voorbijview
The OOYCYOO MPPT 60A Solar Charge Controller is designed for efficient solar power management. It features an LCD display for real-time data, multiple protection functions, and support for various battery types.
3.1 Pakketinhoud
- 1 x OOYCYOO MPPT 60A Solar Charge Controller
- 1 x temperatuursensor
- 1 x Gebruikershandleiding (Engels)
3.2 Componentidentificatie

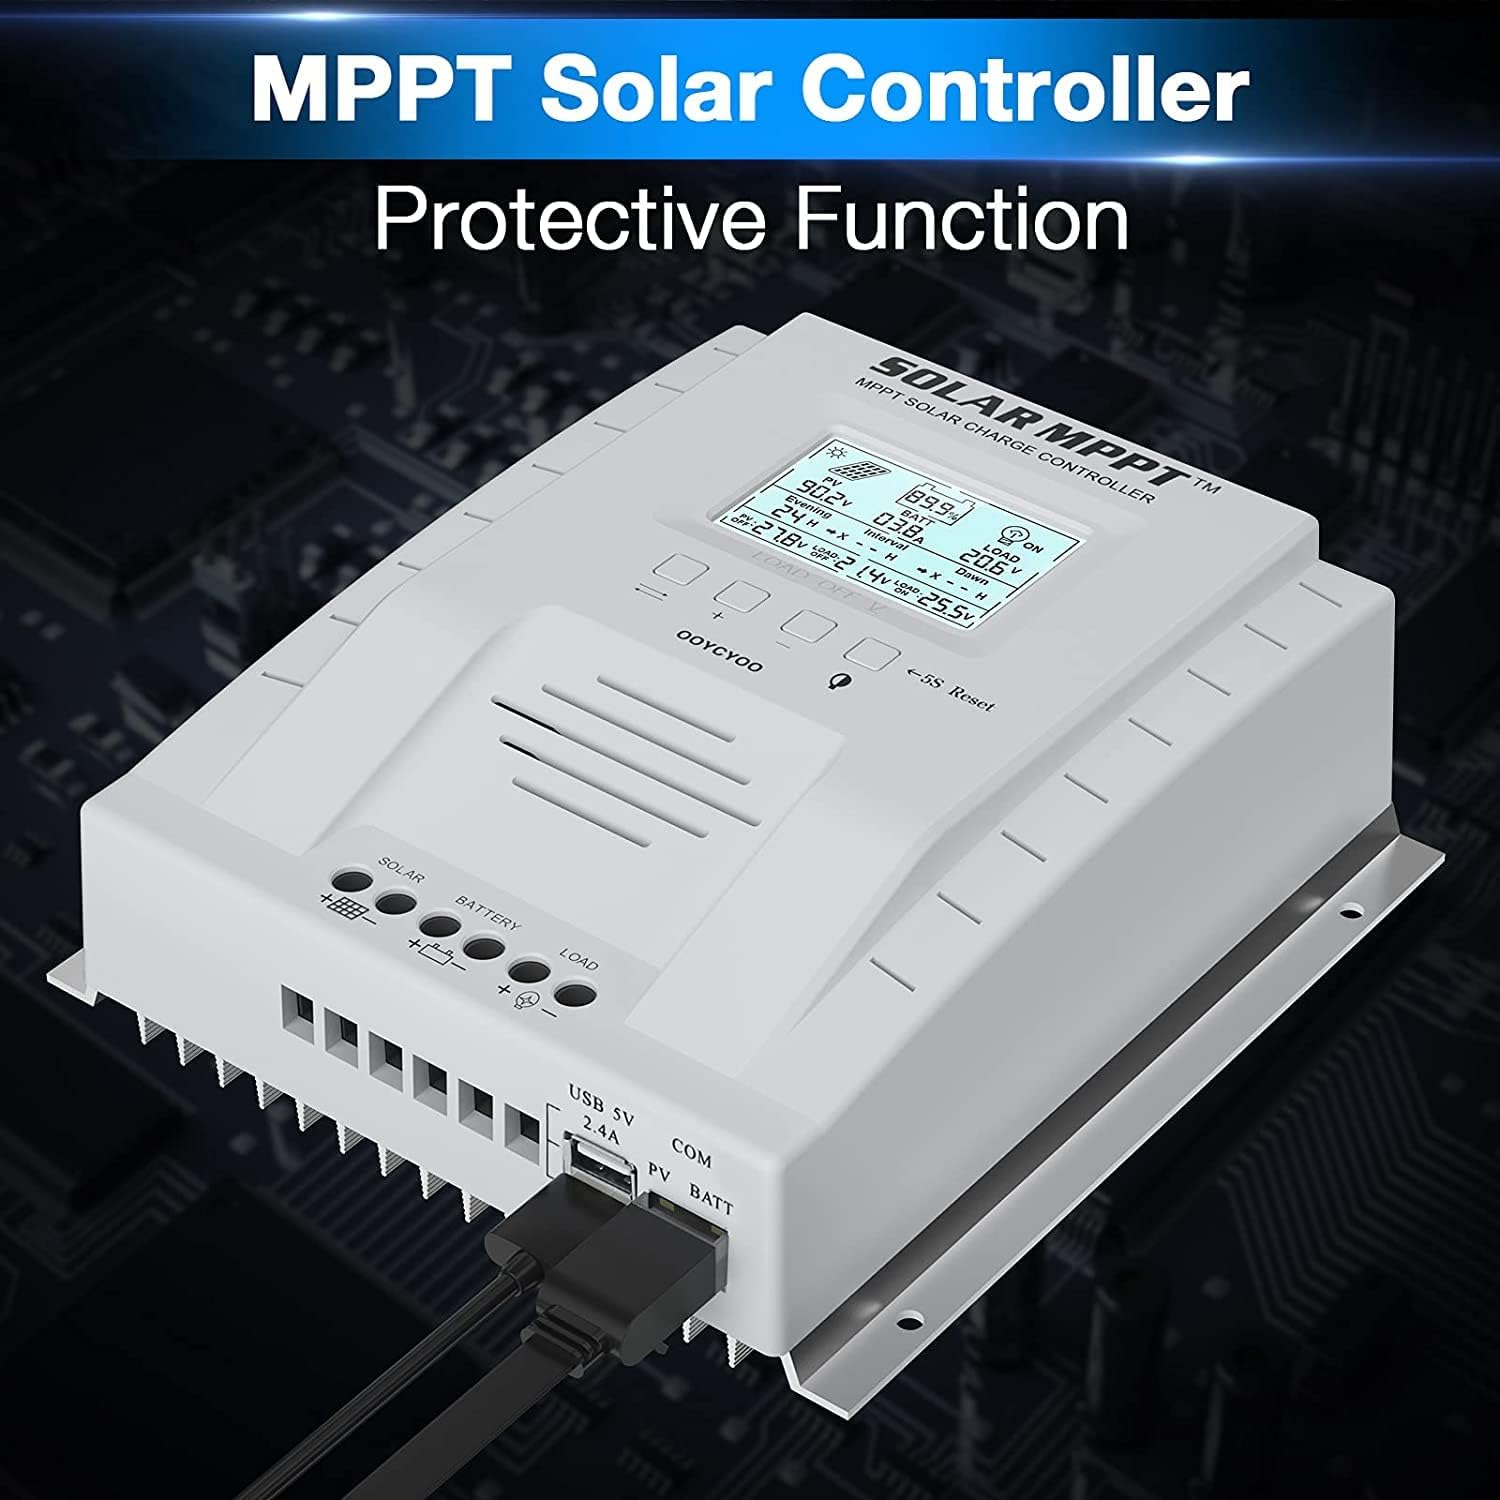
The controller features a clear LCD display on the front for monitoring system status. Below the display are control buttons for navigation and settings. Connection terminals for solar panels, battery, and load are located at the bottom. USB ports and an RS485 communication port are on the side.
4. Installatie en installatie
Een correcte installatie is cruciaal voor de veilige en efficiënte werking van uw zonne-laadregelaar. Volg deze stappen zorgvuldig.
4.1 De regelaar monteren
- Kies een droge, goed geventileerde plek, beschermd tegen direct zonlicht, hoge temperaturen en water.
- Zorg ervoor dat er voldoende ruimte rondom de controller is voor warmteafvoer.
- Mount the controller vertically on a wall or stable surface using the provided mounting holes.
4.2 bedradingsverbindingen
Follow the connection order precisely to avoid damage to the controller or other components.
- Sluit de batterij aan: Connect the positive and negative terminals of the battery to the corresponding battery terminals on the controller. Ensure correct polarity. The controller will automatically detect the system voltage (12V of 24V).
- Sluit de zonnepanelen aan: Connect the positive and negative leads from your solar panel array to the corresponding PV terminals on the controller. Ensure correct polarity. Do not exceed the maximum PV input voltage van 100V DC.
- Sluit de belasting aan (optioneel): Connect your DC loads to the load terminals on the controller. Note that the load output is for DC loads only. Do not connect inverters or inductive loads directly to these terminals.
- Sluit de externe temperatuursensor aan: Plug the temperature sensor into its dedicated port. This sensor helps the controller optimize charging based on battery temperature.

Belangrijke opmerking: Always connect the battery first and disconnect the solar panel last. Incorrect connection order can damage the controller.
5. Gebruiksaanwijzing
Once installed, the controller will begin operation automatically. The LCD display provides real-time system information.
5.1 LCD-scherm en knoppen

The backlit LCD displays critical system parameters such as PV voltage, batterij voltage, charging current, load current, and accumulated energy (KWH). The four buttons below the display are used for navigation and settings adjustment:
- Wisseltoets: Used to cycle through display screens or confirm selections.
- '+' (Plus) Key: Verhoogt waarden of gaat verder in menu's.
- '-' (Minus) Key: Verlaagt waarden of gaat terug in menu's.
- Manual Switch Load Key: Toggles the load output on/off manually.
- 5S Reset: Houd de knop 5 seconden ingedrukt om de fabrieksinstellingen te herstellen.
5.2 Battery Charging Algorithm
De controller maakt gebruik van een 4-secondentage-laadalgoritme om de levensduur en prestaties van de batterij te optimaliseren:
- Bulklading: Charges the battery at maximum current until the voltage bereikt het boostvolumetage.
- Boostlading: Ladingen bij een constant volumetage for a set period to ensure full charge.
- Drijvende lading: Maintains the battery at a lower voltage to prevent self-discharge and overcharging.
- Equalization (for specific battery types): Laadt de batterij periodiek over om de celspanning in evenwicht te brengen.tagen voorkomt sulfatering.
5.3 Ondersteunde batterijtypen
The controller is compatible with various battery types, including:
- Lead-Acid (Sealed, Gel, Flooded)
- Lithium (LFP)
- User-defined parameters for other battery types.
Pre-set charging parameters are available for Sealed, Gel, Flooded, and LI (LFP) batteries. Users can customize parameters for other battery types as needed.
6. Beschermingsfuncties
The OOYCYOO MPPT 60A Solar Charge Controller incorporates multiple protection mechanisms to ensure system safety and longevity:
- PV Overcurrent/Overpower Protection
- PV Short Circuit Protection
- PV-bescherming tegen omgekeerde polariteit
- Reverse Charging at Night Protection
- Bescherming tegen omgekeerde polariteit van de batterij
- Batterij overvoltage Bescherming
- Battery Over-discharge Protection
- Battery Overtemperature Protection
- Controller Overtemperature Protection
- Lithium Battery Low Temperature Protection
- Kortsluitbeveiliging voor de belasting
- Bescherming tegen overbelasting:
- TVS hoog volumetage Bescherming tegen voorbijgaande aard
7. Onderhoud
Regular maintenance ensures optimal performance and extends the lifespan of your solar charge controller.
- Controleer verbindingen: Controleer periodiek alle bedradingsverbindingen op vastheid en corrosie. Draai losse verbindingen vast.
- Maak de controller schoon: Keep the controller clean and free of dust. Use a dry cloth to wipe the exterior. Ensure ventilation openings are not obstructed.
- Controleer op schade: Check for any signs of physical damage, overheating, or unusual odors.
- Batterij-inspectie: Volg de onderhoudsrichtlijnen van de fabrikant voor uw specifieke batterijtype.
8. Probleemoplossing
In dit gedeelte worden veelvoorkomende problemen besproken die u kunt tegenkomen met uw zonne-laadregelaar.
| Probleem | Mogelijke oorzaak | Oplossing |
|---|---|---|
| Controller gaat niet aan / LCD-scherm blijft blanco | Geen batterij aangesloten of batterijspanningtage te laag. Omgekeerde polariteitsaansluiting. | Zorg er eerst voor dat de batterij is aangesloten en voldoende spanning heeft.tage. Controleer de polariteit van de batterij. |
| No charging from solar panels | Solar panels not connected or reverse polarity. Insufficient sunlight. PV voltage te laag of te hoog. | Check solar panel connections and polarity. Ensure adequate sunlight. Verify PV voltage is within operating range (e.g., 18V-96V for 12V system, 36V-96V for 24V system). |
| Laden werkt niet | Load output disabled. Load short circuit or overload. Battery voltagte laag. | Check load output status on LCD. Disconnect load and check for short circuit. Ensure battery is sufficiently charged. |
| Oververhitting van de controller | Poor ventilation. Excessive load or charging current. | Ensure adequate airflow around the controller. Reduce load or charging current if possible. |
| Onjuist voltage-lezingen | Loose connections. Faulty temperature sensor. | Check all wiring connections. Ensure temperature sensor is properly connected. |
9. Specificaties
Technical specifications for the OOYCYOO MPPT 60A Solar Charge Controller.
| Parameter | Waarde |
|---|---|
| Nominale laadstroom | 60A |
| Systeem Voltage | 12V/24V Auto Identification |
| Maximaal PV Open Circuit Voltage | 100V gelijkstroom |
| Max. PV Input Power (12V System) | 750W |
| Max. PV Input Power (24V System) | 1500W |
| DC/DC Transfer Efficiency | Tot 98.7% |
| Bedrijfstemperatuur | -20℃ tot +55℃ |
| Terminalgrootte: | 10 AWG |
| Afmetingen (L*B*H) | 8.3 x 8.4 x 3.4 cm (21.2 x 20.8 x 8.4 inch) |
| Gewicht | 3 kg (1.28 lbs) |
| Weergavetype | LCD-achtergrondverlichting |
| UPC | 768461886785 |
| Modelnummer | P60A |


10. Garantie en ondersteuning
For warranty information or technical support, please contact your retailer or the manufacturer directly. Refer to the product packaging or purchase documentation for specific contact details.
Ask a question about this manual
Ask about setup, troubleshooting, compatibility, parts, safety, or missing instructions. Manuals+ will review the question and use this page’s manual context to help answer it.