blucoil Portable USB Audio Interface
Blucoil Portable USB Audio Interface User Manual
Model: Portable USB Audio Interface
Brand: Blucoil
1. Product voorbijview
The Blucoil Portable USB Audio Interface is designed to deliver high-quality audio resolution for various applications including home studio recording, streaming, gaming, and podcasting. This compact device supports 24-bit/48kHz resolution and is compatible with both Windows and Mac operating systems. It features versatile input/output options and low-latency direct monitoring capabilities, making it an essential tool for capturing clear and precise audio.

Voorkant view of the Blucoil Portable USB Audio Interface, showing the microphone input, instrument input, and output controls.

The Blucoil Portable USB Audio Interface set up on a desk, ready for recording or streaming high-quality audio.
2. Installatiehandleiding
2.1 Systeemvereisten
- Operating System: Windows or Mac OS
- Beschikbare USB-poort
- Compatible recording software (e.g., Audacity, GarageBand)
2.2 De interface aansluiten
- Connect the USB cable from the interface to an available USB port on your computer. The interface is USB bus-powered, so no external power supply is needed.
- For microphone input, plug your condenser microphone into the XLR-1/4" combo input. Ensure the +48V phantom power button is engaged if your microphone requires it.
- For instrument input, connect your instrument (e.g., guitar, keyboard) to the 1/4" TRS input.
- Connect your studio monitors or speakers to the main outputs on the rear panel. Alternatively, plug headphones into the 1/4" stereo headphone jack on the front panel for monitoring.

The Blucoil Audio Interface connected to a laptop, demonstrating reliable connections for recording.
The interface accommodates various microphone types, including condenser microphones requiring 48V phantom power.
3. Gebruiksaanwijzing
3.1 Ingangsniveaus aanpassen
- Gebruik de Verdienen knob for the microphone input to set the input level.
- Gebruik de Niveau knob for the instrument input to set its input level.
- Monitor the Clip and Signal Indicators for each channel. A green light indicates a signal, while a red light indicates clipping (signal distortion). Adjust the gain/level knobs to prevent clipping.

Van dichtbij view of the interface controls, showing gain and level knobs for fine-tuning your sound.

A hand adjusting one of the input level knobs, demonstrating how to prevent signal clipping by observing the LED indicators.
3.2 Directe monitoring
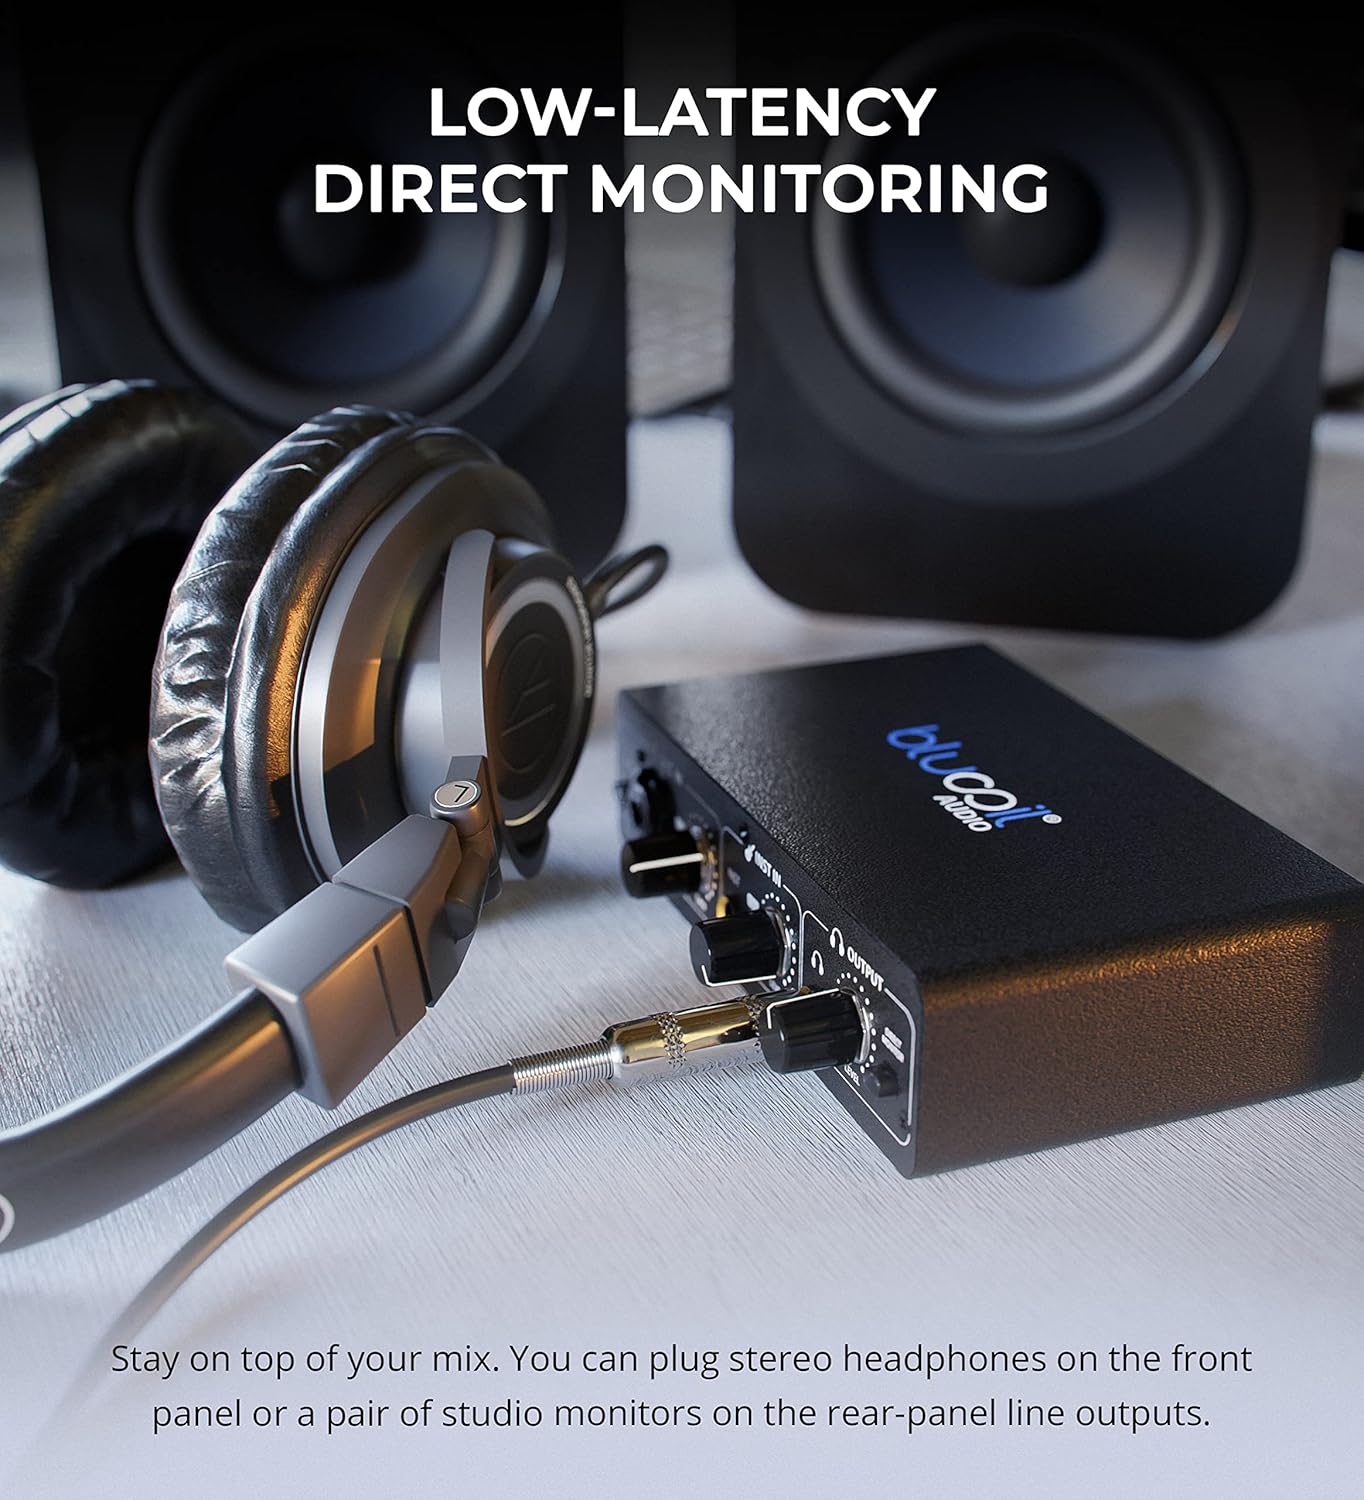
- Betrek de Directe monitor button to hear your input signals directly through your headphones or main outputs with zero latency. This allows you to monitor your performance without delay from your computer's processing.

Headphones connected to the Blucoil Audio Interface, enabling low-latency direct monitoring of input signals.
3.3 Output Volume Control
- Gebruik de Volumeniveau knob in the Output section to control the overall output volume for both headphones and main outputs.
4. Onderhoud en verzorging
- Houd het apparaat schoon door het af te vegen met een zachte, droge doek. Vermijd het gebruik van vloeibare reinigingsmiddelen of oplosmiddelen.
- Bewaar de interface op een koele, droge plaats, uit de buurt van direct zonlicht en extreme temperaturen.
- Zorg ervoor dat u het apparaat niet laat vallen en blootstelt aan sterke schokken.
- Zorg ervoor dat alle kabels stevig zijn aangesloten, maar zonder overmatige kracht te gebruiken om beschadiging van de poorten te voorkomen.
5. Probleemoplossing
| Probleem | Mogelijke oorzaak | Oplossing |
|---|---|---|
| Geen geluidsuitvoer | Incorrect volume settings, incorrect output selection in software, loose cables. | Check the Output Volume knob. Ensure the interface is selected as the output device in your computer's sound settings and recording software. Verify all cables are securely connected. |
| Input signal clipping (red light) | Input gain/level is too high. | Reduce the Gain or Level knob for the respective input until the red Clip indicator no longer illuminates. |
| Microfoon werkt niet (condensatormicrofoon) | 48V phantom power not enabled. | Press the +48V button to enable phantom power for condenser microphones. |
| No sound from instrument input | Instrument level too low, incorrect cable. | Increase the Level knob for the instrument input. Ensure you are using a proper 1/4" TS or TRS instrument cable. |
| Interface niet herkend door de computer | USB cable issue, driver issue (rare for class-compliant devices), faulty USB port. | Try a different USB port or cable. Restart your computer. While typically plug-and-play, ensure your operating system is up to date. |
6. Specificaties
- Artikelgewicht: 1 pond
- Productafmetingen: 3.94 x 6.69 x 1.73 inch
- ASIN: B096ZRJSX6
- Compatibele apparaten: Laptop
- Aansluittype: 1/4" Jack, USB Port, XLR-TRS Combo Connector
- Hardware-interface: USB
- Ondersteunde software: Windows audio recording and editing software (also compatible with Mac OS software like GarageBand)
- Besturingssysteem: Windows (also compatible with Mac OS)
- Merk: blucoil
- Connectiviteitstechnologie: USB
- Aantal kanalen: 4 (implied by inputs and outputs, 2 input channels, 2 output channels)
7. Garantie en ondersteuning
For detailed warranty information and customer support, please refer to the official Blucoil webwebsite of neem rechtstreeks contact op met hun klantenservice. Bewaar uw aankoopbewijs voor garantieclaims.
Ask a question about this manual
Ask about setup, troubleshooting, compatibility, parts, safety, or missing instructions. Manuals+ will review the question and use this page’s manual context to help answer it.