1. Inleiding
This manual provides essential information for the safe and efficient operation of your lightmaXX Nano Beam FX show effect light. Please read it thoroughly before use and retain it for future reference.
2. Veiligheidsinstructies
- Lees alle instructies zorgvuldig door.
- Bewaar deze handleiding voor toekomstig gebruik.
- Stel het apparaat niet bloot aan regen of vocht.
- Zorg voor voldoende ventilatie.
- Schakel de stroomtoevoer uit voordat u gaat schoonmaken of onderhoud uitvoeren.
- Use only specified power supply.
- Vermijd directe blootstelling van de ogen aan de lichtbron.
- Dit apparaat is uitsluitend bedoeld voor gebruik binnenshuis.
- Ensure the mounting bracket is securely fastened.
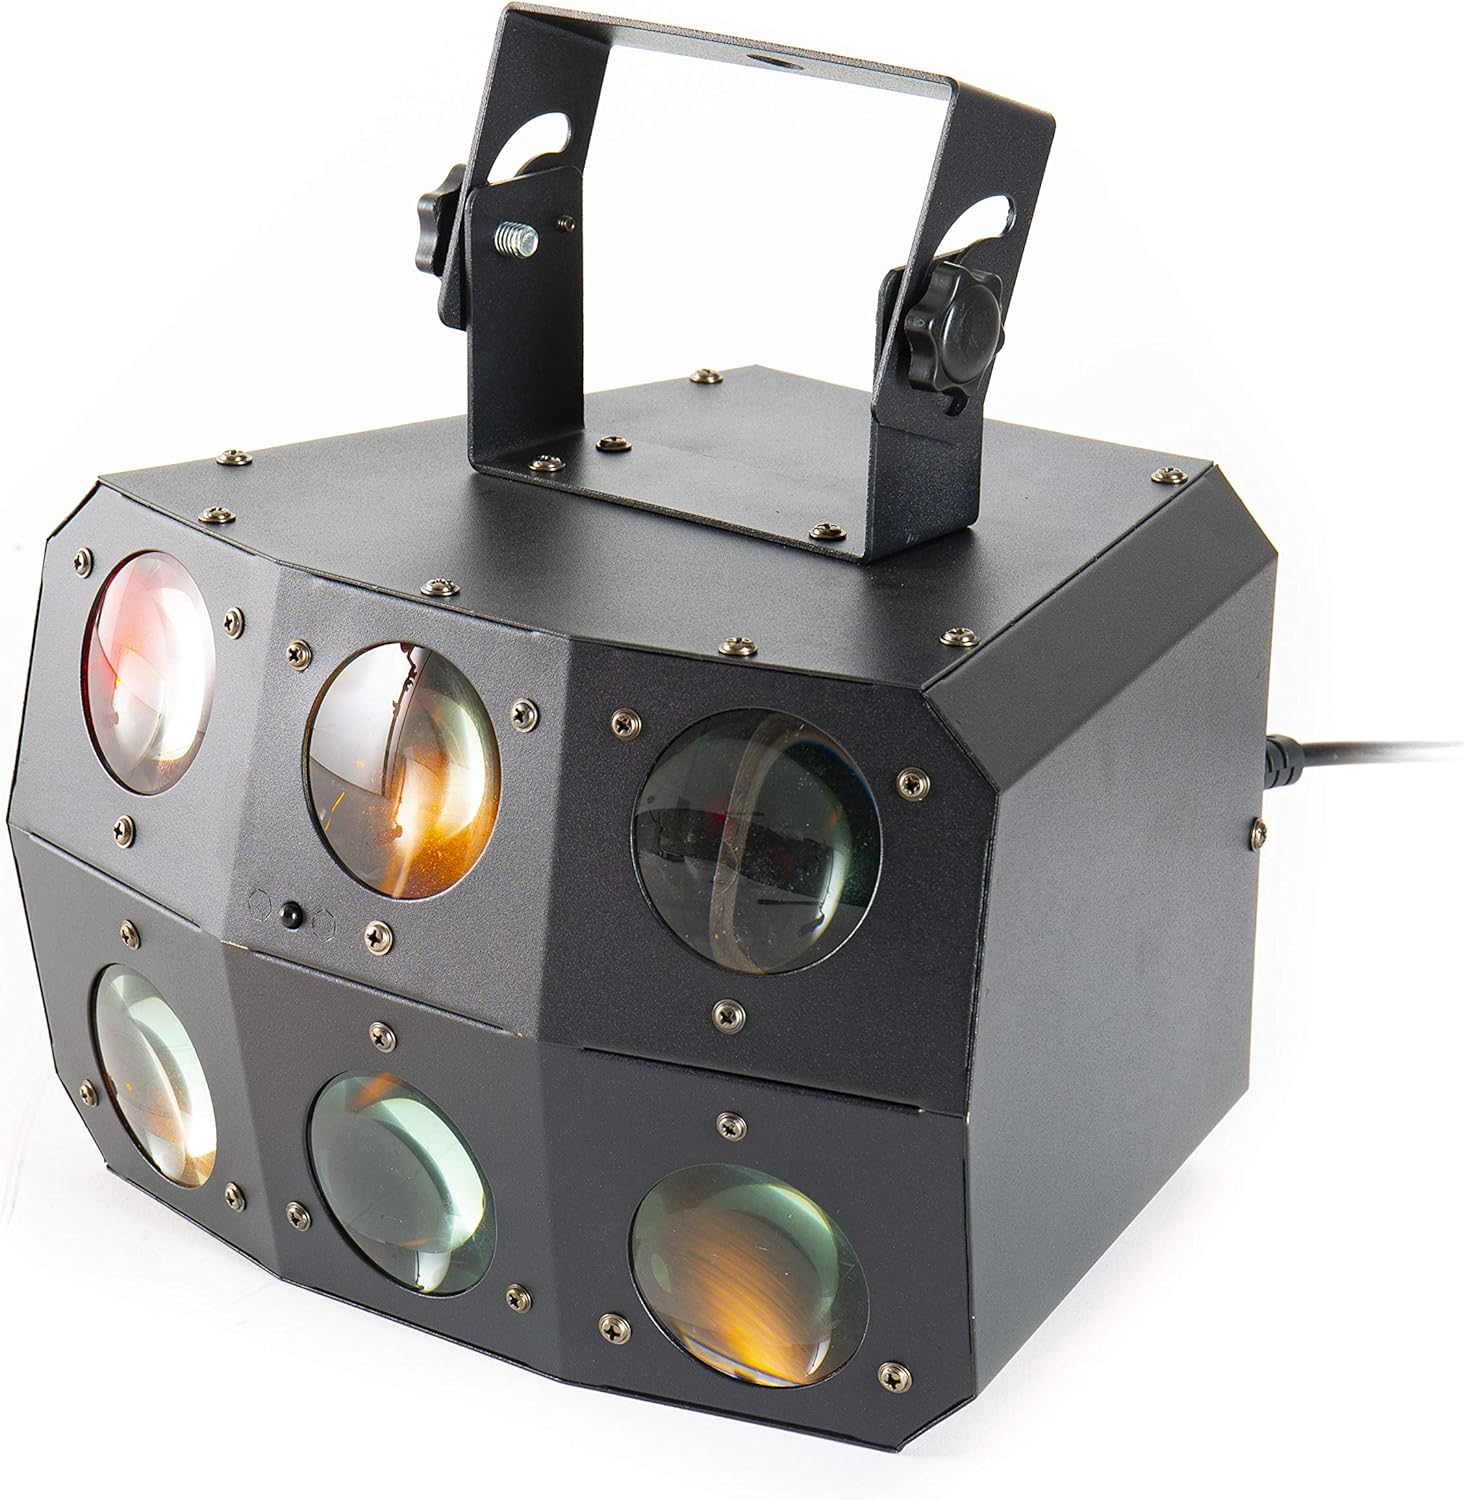
3. Inhoud van het pakket
Controleer of alle artikelen aanwezig en in goede staat zijn.
- lightmaXX Nano Beam FX Unit
- Stroomkabel
- Afstandsbediening
- Gebruiksaanwijzing (dit document)

Image 1: lightmaXX Nano Beam FX unit, power cable, and remote control.
4. Product voorbijview
4.1 Voorpaneel
The front panel features multiple lenses for projecting various light effects.
Afbeelding 2: Close-up view of the front lenses.
4.2 Achterpaneel en aansluitingen
The rear panel provides power input/output, DMX connections, and control interface.

Image 3: Rear panel with connections and control interface.
- MACHT IN: Sluit hier de meegeleverde stroomkabel aan.
- STROOM UIT: For daisy-chaining power to other units.
- DMX-IN: Connect DMX controller or previous DMX device.
- DMX-UIT: Connect to the next DMX device in the chain.
- MICROFOON: Built-in microphone for sound-activated modes.
- Display & knoppen: For menu navigation and settings (MENU, UP, DOWN, ENTER).
- SAFETY ROPE: Bevestigingspunt voor een veiligheidskabel.
4.3 afstandsbediening
The included remote control allows for convenient operation of the unit's functions.
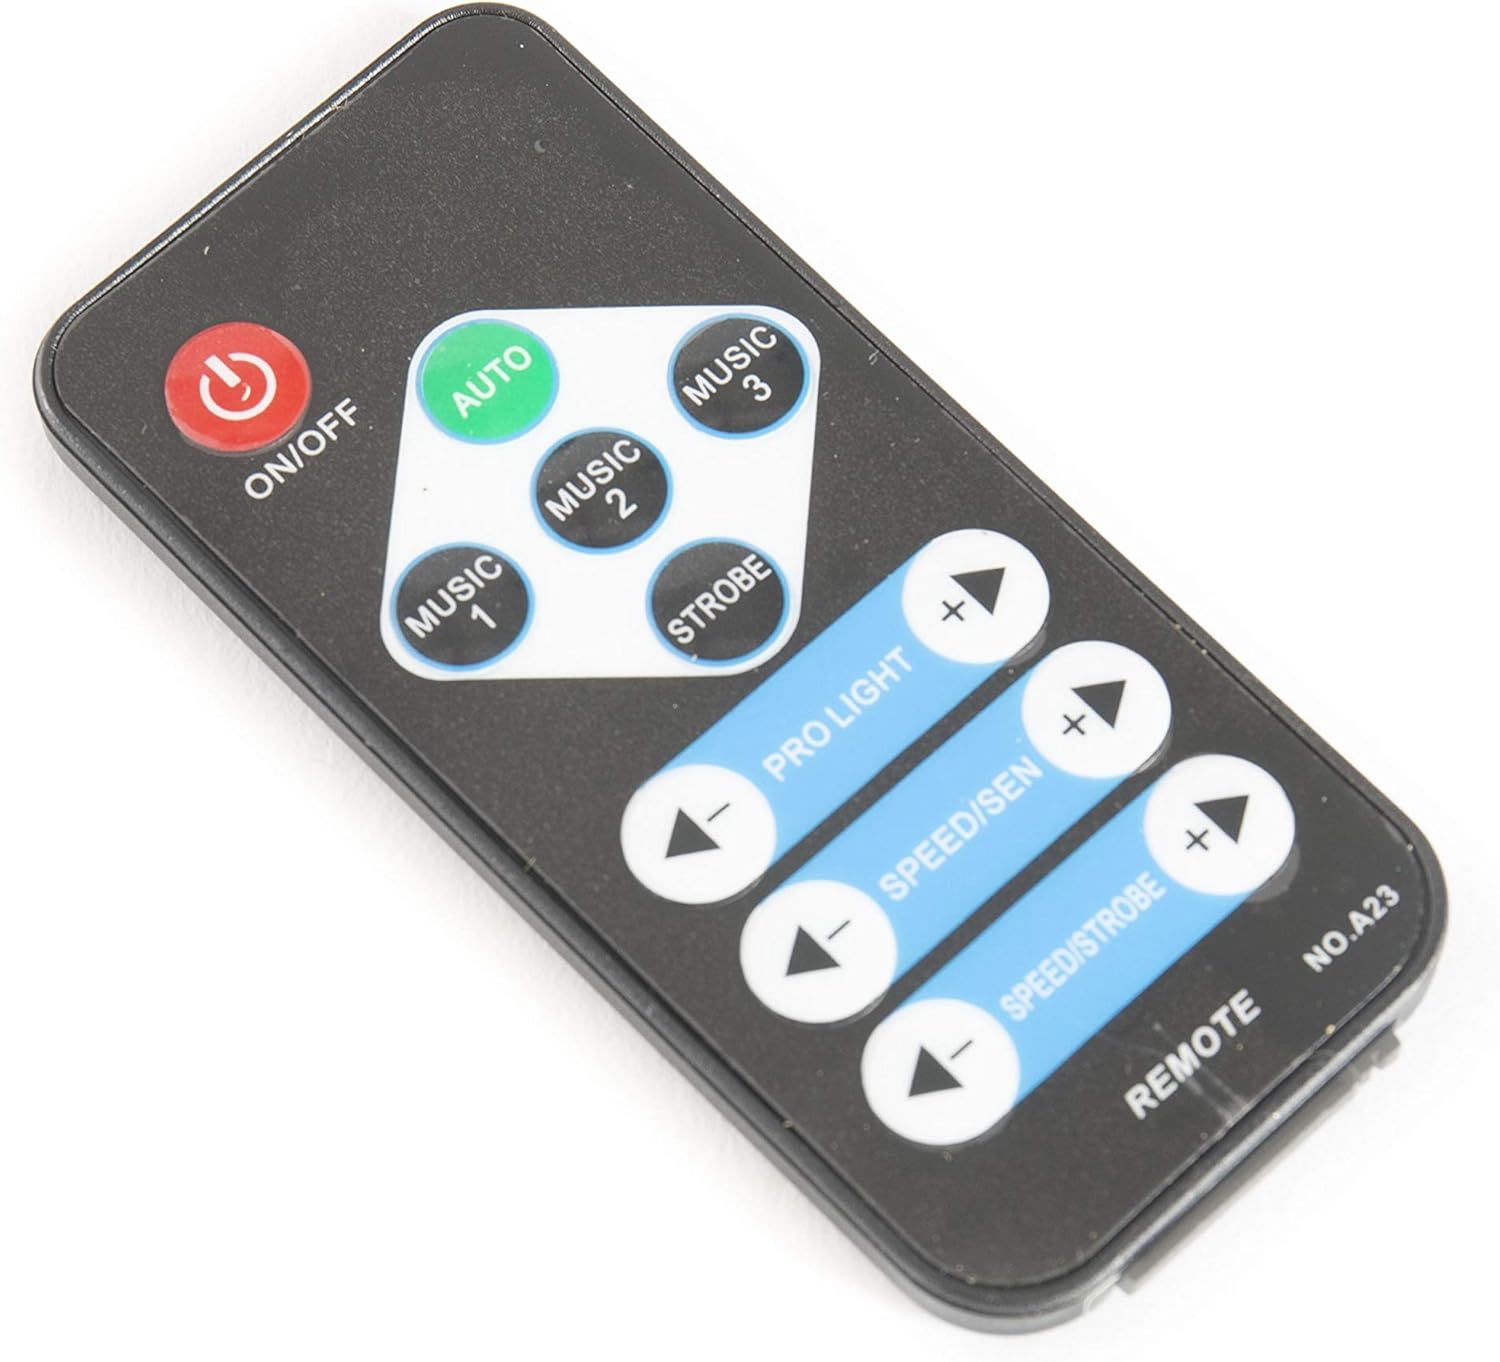
Image 4: Remote control for the Nano Beam FX.
- AAN/UIT: Power on or off the unit.
- AUTO: Activates automatic program mode.
- MUSIC 1/2/3: Activates sound-activated modes with different sensitivities or patterns.
- flitser: Activates strobe effect.
- PRO LIGHT: Adjusts light intensity or program selection.
- SPEED/SEN: Adjusts program speed or sound sensitivity.
5. Instellen
5.1 Uitpakken
Carefully remove the unit from its packaging. Inspect for any damage during transit. Retain packaging for future transport or storage.
5.2 Montage
The Nano Beam FX unit is equipped with a mounting bracket for secure installation.

Image 5: Adjustable mounting bracket.
- Attach the unit securely to a truss, ceiling, or wall using appropriate clamps and hardware (not included).
- Always use a safety cable (not included) attached to the SAFETY ROPE point on the rear panel, ensuring it can hold the weight of the unit.
- Adjust the angle of the unit using the knobs on the mounting bracket.
5.3 Stroomaansluiting
Connect the supplied power cable to the POWER IN socket on the rear panel and then to a suitable power outlet.
5.4 DMX-aansluiting (optioneel)
For advanced control, connect the unit to a DMX controller.
- Connect a DMX cable from your DMX controller's output to the DMX IN socket of the Nano Beam FX.
- If connecting multiple DMX devices, connect from the DMX OUT of the first unit to the DMX IN of the next.
- Refer to the DMX channel chart (not provided in product data) for specific DMX control parameters.
6. In bedrijf
6.1 In-/uitschakelen
Druk op de AAN/UIT button on the remote control or ensure the unit is connected to power. The unit will power on automatically when connected to power.
6.2-bedrijfsmodi
The Nano Beam FX offers several operating modes, selectable via the remote control or the rear panel display.
- Automatische modus: Druk op de AUTO button on the remote. The unit will cycle through its pre-programmed light shows automatically.
- MUSIC Mode: Pers MUZIEK 1, MUZIEK 2, of MUZIEK 3 on the remote. The unit will react to sound picked up by its internal microphone. Different music modes may offer varying sensitivities or patterns.
- STROBE-modus: Druk op de STROBE button on the remote to activate a flashing light effect.
- DMX-modus: If connected to a DMX controller, the unit will respond to DMX signals. Use the rear panel display to set the DMX address.

Afbeelding 6: Example of light effects (blue and red).

Afbeelding 7: Example of light effects (green and yellow).

Afbeelding 8: Example of light effects (orange and red).
6.3 Adjustments via Remote Control
- PRO LIGHT: Gebruik de + En - buttons to cycle through different light programs or adjust intensity in certain modes.
- SPEED/SEN: Gebruik de + En - buttons to adjust the speed of automatic programs or the sensitivity of sound-activated modes.
7. Onderhoud
7.1 Reinigen
Disconnect the unit from power before cleaning. Use a soft, lint-free cloth to wipe the exterior. For lenses, use a specialized lens cleaner and cloth to avoid scratches. Do not use abrasive cleaners.
7.2 Opslag
When not in use, store the unit in its original packaging or a suitable case in a dry, dust-free environment.
8. Probleemoplossing
| Probleem | Mogelijke oorzaak | Oplossing |
|---|---|---|
| Het apparaat wordt niet ingeschakeld. | Geen stroomtoevoer; defecte kabel. | Controleer de aansluiting van het netsnoer. Probeer een ander stopcontact. |
| Afstandsbediening werkt niet. | Dead battery; obstruction; out of range. | Replace remote battery; ensure clear line of sight; move closer to unit. |
| No light effects. | Unit in DMX mode without DMX signal; program not selected. | Select AUTO or MUSIC mode; check DMX connection and settings. |
| Sound-activated mode not responding. | Microphone sensitivity too low; no sound input. | Increase sensitivity using remote; ensure sound source is close to the unit. |
9. Specificaties
| Functie | Detail |
|---|---|
| Model | Nano Beam FX |
| Merk | lichtmaXX |
| Productafmetingen | 32x30x29cm |
| Artikelgewicht | 3.5 kg |
| Energiebron | Elektrische kabel |
| Lichtbron Wattage | 3 Watt (per lichtbron) |
| Aantal lichtbronnen | 24 |
| Fabrikantreferentie | LIG0015648-000 |
| ASIN | B07JM9XVT4 |
10. Garantie en ondersteuning
Voor garantie-informatie en technische ondersteuning kunt u terecht bij de officiële klantenservice van de fabrikant. webwebsite of neem contact op met uw verkoper. Bewaar uw aankoopbewijs voor eventuele garantieclaims.