Belangrijke veiligheidsinformatie
Please read and understand all instructions before beginning installation. Failure to follow these instructions may result in electric shock, fire, or other hazards that can cause injury or property damage. Keep these instructions for future reference.
- WAARSCHUWING: Risico op elektrische schokken. Schakel de stroom uit via de stroomonderbreker of zekeringkast voordat u met installatie of onderhoud begint.
- Alle elektrische aansluitingen moeten voldoen aan de lokale voorschriften en verordeningen, de National Electric Code (NEC) en ANSI/NFPA 70-1999.
- Raadpleeg een gekwalificeerde elektricien als u twijfelt over het installatieproces.
- This fixture is rated for 120 Volts.
- This product is UL and ETL listed, indicating compliance with safety standards.
Inhoud van het pakket
Carefully unpack your new fixture and lay out all parts on a clear area. Ensure all components listed below are present before discarding any packaging materials.
- Semi-Flush Mount Fixture (1)
- Montagemateriaal (bijv. montageplaat, schroeven, draadklemmen)
- Glazen kap (1)
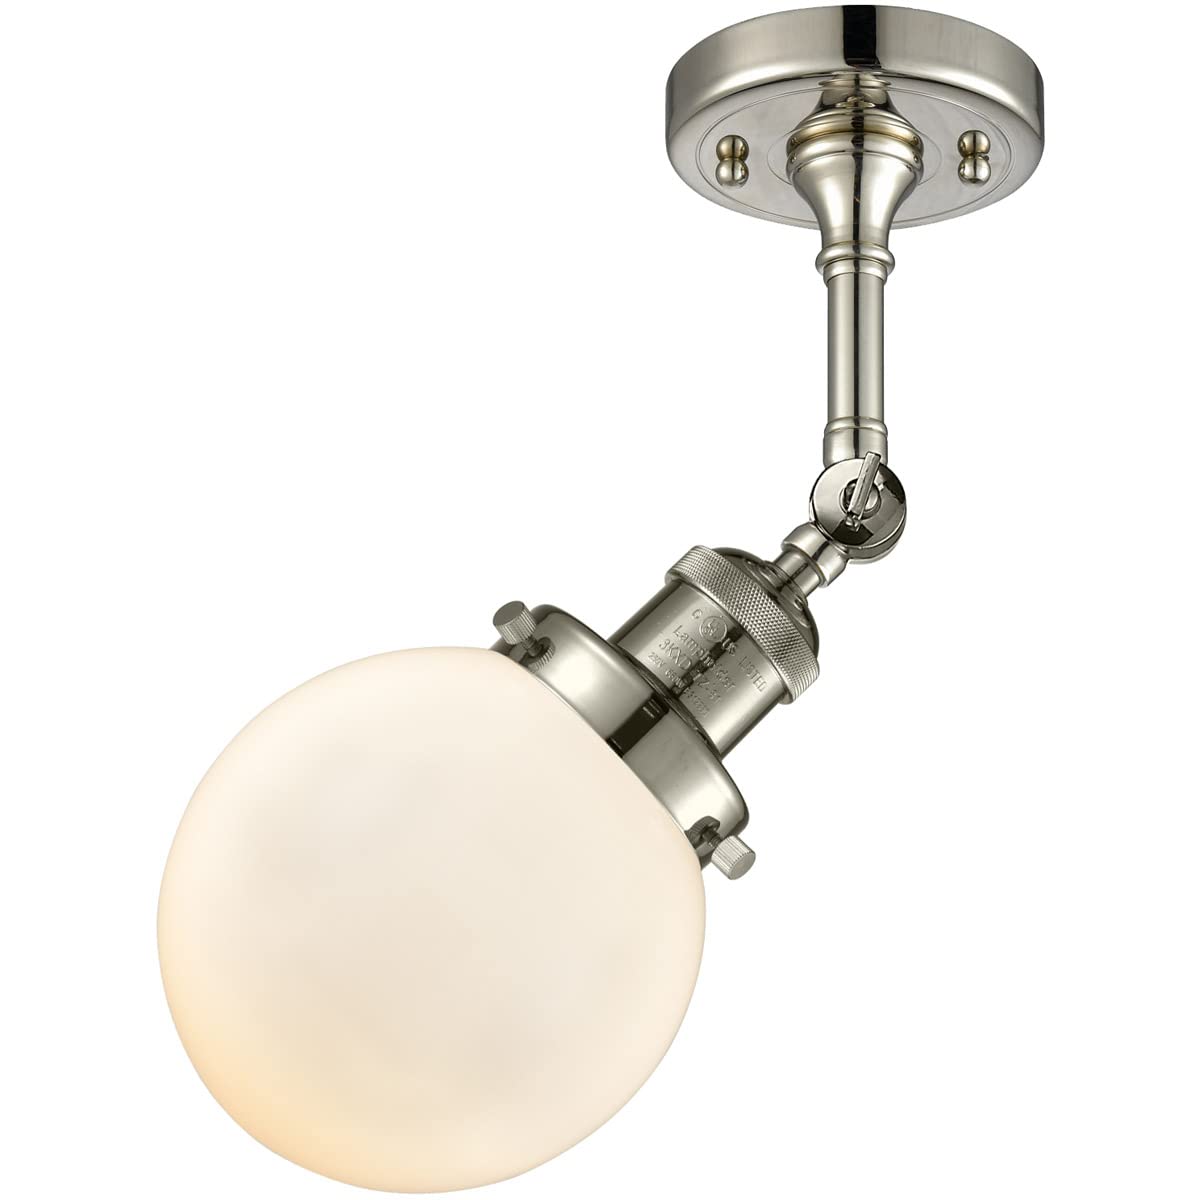
Afbeelding 1: Voorkant view of the Innovations LED Semi-Flush Mount in Polished Nickel. The fixture features a circular backplate, an adjustable arm, and a spherical white glass shade. The metal components are finished in polished nickel.
Instellen en installeren
Assembly is required for this fixture. Follow these steps for safe and proper installation.
- Schakel de stroom uit: Voordat u begint, moet u ervoor zorgen dat de stroom naar de aansluitdoos is uitgeschakeld bij de stroomonderbreker of zekeringkast.
- Montageplaat voorbereiden: Bevestig de montageplaat aan de aansluitdoos met behulp van de meegeleverde schroeven. Zorg ervoor dat deze stevig vastzit.
- Maak elektrische aansluitingen: Connect the fixture's wires to the corresponding house wires. Connect the black fixture wire to the black (live) house wire, the white fixture wire to the white (neutral) house wire, and the bare copper or green fixture wire to the green or bare copper (ground) house wire. Secure connections with wire nuts.
- Bevestigingspunt: Carefully align the fixture base with the mounting plate and secure it with the provided screws or nuts. Ensure no wires are pinched during this step.
- Installeer glazen kap: Attach the spherical glass shade to the fixture according to the design. Typically, this involves securing it with small thumb screws or a threaded ring.
- Herstel de stroom: Zodra de installatie is voltooid en alle verbindingen goed vastzitten, schakelt u de stroom bij de stroomonderbreker weer in.

Afbeelding 2: Zijkant view of the Innovations LED Semi-Flush Mount. This perspective highlights the polished nickel finish of the metal arm and the connection point to the wall or ceiling, along with the spherical glass shade.
Gebruiksaanwijzing
This LED semi-flush mount is designed for simple operation.
- Aan/uit: Bedien de lamp met een standaard wandschakelaar die is aangesloten op het circuit van het armatuur.
- Dimbare functie: This fixture is dimmable. To utilize the dimming function, ensure you have a compatible LED dimmer switch installed on the circuit. Follow the dimmer switch manufacturer's instructions for proper operation.
- Lichtbron: The fixture uses an integrated LED light source with a color temperature of 2700 Kelvin, providing a warm white light.
Onderhoud
Regelmatig onderhoud helpt om het uiterlijk en de functionaliteit van uw armatuur te behouden.
- Schoonmaak: Schakel de stroom uit voordat u gaat schoonmaken. Veeg het armatuur af met een zachte, droge doek. Gebruik geen schurende reinigingsmiddelen, oplosmiddelen of poetsmiddelen, aangezien deze de afwerking kunnen beschadigen.
- Glazen kap: The glass shade can be carefully removed and washed with mild soap and water, then dried thoroughly before reattaching.
- LED lichtbron: The LED light source is integrated and not user-replaceable. If the LED fails, contact customer support for assistance.
Probleemoplossing
Als u problemen ondervindt met uw armatuur, raadpleeg dan de volgende veelvoorkomende problemen en oplossingen:
| Probleem | Mogelijke oorzaak | Oplossing |
|---|---|---|
| Licht gaat niet aan. | Geen stroom naar het armatuur. | Check circuit breaker or fuse. Ensure wall switch is in the 'ON' position. Verify electrical connections. |
| Het licht flikkert of dimt niet goed. | Incompatibele dimmer of losse verbinding. | Ensure a compatible LED dimmer switch is used. Check wire connections for tightness. |
| Het armatuur zit los. | De bevestigingsschroeven zitten niet vast. | Tighten mounting screws securely to the junction box. |
If the problem persists after attempting these solutions, contact Innovations customer support.
Specificaties
- Model: INNO201F-PN-G201-6-LED
- Merk: Innovaties
- Finish: Gepolijst nikkel
- Materiaal: Plastic (shade), Metal (fixture body)
- Lichtbrontype: Geïntegreerde LED
- Aantal lichtbronnen: 1
- Wattage: 3.5 watt
- Deeltage: 120 Volt
- Kleurtemperatuur: 2700 Kelvin (Warm Wit)
- Speciale eigenschap: Dimbaar
- Montagetype: Ceiling Mount (Semi-Flush)
- Productafmetingen: Approximately 6 x 12 x 14.25 inches (Width x Depth x Height)
- Artikelgewicht: 2.8 pond
- Veiligheidsclassificatie: ETL, UL Listed (Damp location rated)
- UPC-nummer: 793588811563
Garantie en ondersteuning
Innovations provides the following warranty for this product:
- Finish: 2 jaar garantie
- Elektrische componenten: Levenslange garantie
For warranty claims, technical support, or any questions regarding your Innovations LED Semi-Flush Mount, please contact Innovations customer service. Keep your purchase receipt as proof of purchase for warranty purposes.