Invoering
Thank you for choosing the Ferm TDM1025 Bench Pillar Corded Electric Drill. This manual provides essential information for the safe and efficient operation, maintenance, and troubleshooting of your new drill. Please read these instructions carefully before use and keep them for future reference.
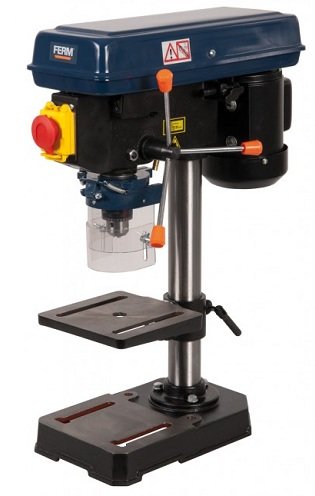
Image: Ferm TDM1025 Bench Pillar Corded Electric Drill. This image shows the complete drill press assembly, including the base, column, motor head, and work table.
Veiligheidsinstructies
Neem bij het gebruik van elektrisch gereedschap altijd de basisveiligheidsmaatregelen in acht om het risico op brand, elektrische schokken en letsel te verminderen.
Algemene veiligheidsregels:
- Veiligheid werkgebied: Zorg dat de werkplek schoon en goed verlicht is. Rommelige of donkere plekken zijn een uitnodiging voor ongelukken.
- Elektrische veiligheid: Stel elektrisch gereedschap niet bloot aan regen of natte omstandigheden. Vermijd lichamelijk contact met geaarde oppervlakken.
- Persoonlijke veiligheid: Stay alert, watch what you are doing, and use common sense. Do not operate tools while tired or under the influence of drugs, alcohol, or medication.
- Persoonlijke beschermingsmiddelen: Always wear eye protection. Use dust masks, non-skid safety shoes, hard hats, or hearing protection as appropriate for the conditions.
- Gebruik en onderhoud van gereedschap: Forceer het elektrische gereedschap niet. Gebruik het juiste elektrische gereedschap voor uw toepassing. Haal de stekker uit het stopcontact voordat u aanpassingen uitvoert, accessoires verwisselt of elektrisch gereedschap opbergt.
- Werkstuk beveiligen: Altijd clamp or secure the workpiece to prevent movement during drilling.
- Guard Usage: Ensure the transparent guard is always in place and properly adjusted for safe working.
Instellen
Uitpakken:
Carefully remove all components from the packaging. Inspect for any damage that may have occurred during transit. Retain packaging materials for future transport or storage.
Montage:
- Basis en kolom: Securely attach the column to the cast iron base using the provided fasteners. Ensure it is stable and upright.
- Drill Head: Mount the drill head assembly onto the top of the column. Tighten all securing bolts.
- Werktafel: Slide the work table onto the column and secure it at a comfortable working height. Ensure the table locking mechanism functions correctly.
- Boorkopinstallatie: Insert the chuck into the spindle taper. Tap it firmly with a soft mallet to ensure a secure fit.
- Guard Attachment: Attach the transparent guard to the drill head, ensuring it can be easily adjusted and provides adequate protection.
Stroomaansluiting:
Connect the drill to a standard 230V AC power outlet. Ensure the power switch is in the "OFF" position before plugging in the tool.
Gebruiksaanwijzing
Boorbits installeren:
- Ensure the drill is unplugged.
- Open the chuck jaws using the chuck key.
- Insert the drill bit into the chuck, ensuring it is centered and fully seated.
- Draai de spantangbekken stevig vast met de spantangsleutel. Verwijder de spantangsleutel direct na het vastdraaien.
Adjusting Work Table:
- Hoogteverstelling: Loosen the table locking handle, adjust the table to the desired height, and then firmly tighten the handle.
- Hoekverstelling: The table can be tilted from 0 to 45 degrees. Loosen the tilt locking bolt, set the desired angle, and re-tighten the bolt.
Snelheidsinstellingen:
The drill features 5 speed settings (580-2650 RPM) for optimal performance across various materials. Adjust the belt position on the pulleys inside the drill head to change the speed. Refer to the speed chart inside the pulley cover for recommended settings.
Lasergeleiding:
Activate the cross laser guidance system for precise drilling alignment. The laser projects a crosshair onto the workpiece, indicating the exact drilling point.
Boorprocedure:
- Bevestig het werkstuk stevig aan de werktafel met behulp van klemmen.amps.
- Adjust the table height and angle as needed.
- Select the appropriate drilling speed.
- Turn on the drill.
- Laat de boor langzaam in het werkstuk zakken met behulp van de aanvoerhendel, onder constante en gelijkmatige druk.
- Once drilling is complete, retract the drill bit from the workpiece before turning off the drill.
Onderhoud
Regelmatig onderhoud zorgt ervoor dat uw boormachine lang meegaat en veilig blijft werken.
- Schoonmaak: After each use, clean the drill thoroughly to remove dust, chips, and debris. Use a soft brush or compressed air. Do not use solvents that may damage plastic parts.
- Smering: Periodically apply a light machine oil to moving parts, such as the column and spindle, to ensure smooth operation.
- Snoerinspectie: Controleer het netsnoer regelmatig op tekenen van beschadiging, scheuren of rafels. Vervang beschadigde snoeren onmiddellijk.
- Onderhoud van de klauw: Keep the chuck jaws clean and free of debris to ensure proper grip on drill bits.
- Riemspanning: Check the drive belt tension periodically. Adjust if necessary to prevent slippage and ensure consistent speed.
Probleemoplossing
| Probleem | Mogelijke oorzaak | Oplossing |
|---|---|---|
| De boormachine start niet. | Geen stroomvoorziening. Aan/uit-schakelaar staat uit. Beschadigd netsnoer. | Controleer het stopcontact en de stroomonderbreker. Zet de aan/uit-schakelaar op "AAN". Inspect and replace power cord if damaged. |
| Overmatige trillingen tijdens bedrijf. | Loose drill bit. Unbalanced workpiece. Losse bevestigingsbouten. | Ensure drill bit is securely tightened in chuck. Secure workpiece firmly. Controleer en draai alle montagebouten vast. |
| Poor drilling performance or burning wood. | Botte boor. Verkeerde snelheidsinstelling. Insufficient feed pressure. | Replace or sharpen drill bit. Adjust speed according to material. Apply steady, appropriate feed pressure. |
| Laser guidance not working. | Laser switch off. Batteries (if applicable) depleted. | Ensure laser switch is on. Controleer en vervang de batterijen indien nodig. |
Specificaties
| Modelnummer | TDM1025 |
| Merk | Vergisten |
| Energiebron | Elektrische kabel |
| Deeltage | 230V |
| Amptijdperk | 6 Amps |
| Geen laadsnelheid | 580-2650 RPM (5 settings) |
| Capaciteit van de klauwplaat | 13mm |
| Speciale functie | Variable Speed, Laser Guidance |
| Work Table Adjustment | Height adjustable, 0-45 degree angle adjustment |
Garantie en ondersteuning
Garantie-informatie:
Ferm products are manufactured to high quality standards and are guaranteed against defects in materials and workmanship. Please refer to the warranty card included with your product for specific terms and conditions, including warranty period and coverage details. Keep your purchase receipt as proof of purchase.
Klantenservice:
Voor technische assistentie, reserveonderdelen of garantieclaims kunt u contact opnemen met uw lokale Ferm-dealer of een erkend servicecentrum. U kunt ook de officiële Ferm-website bezoeken. website voor meer informatie en ondersteuningsbronnen.
Note: Specific contact details are not provided in this manual. Please refer to your product packaging or the manufacturer's website voor de meest actuele ondersteuningsinformatie.