
Invoering
This manual provides essential information for the installation, operation, and maintenance of your Roca NAIA MEZ LAV ALTO LISO high basin mixer tap. Please read these instructions carefully before installation and retain them for future reference.
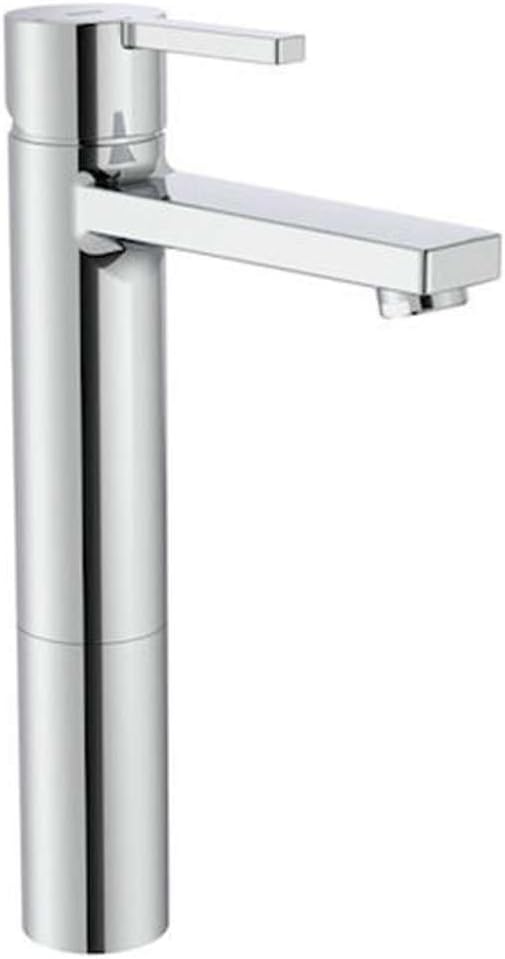
Image 1: The Roca NAIA MEZ LAV ALTO LISO high basin mixer tap, featuring a sleek chrome finish and a single lever for water control.
Veiligheidsinformatie
Always ensure the main water supply is turned off before beginning any installation or maintenance work. If you are unsure about any part of the installation process, consult a qualified plumber.
- Gebruik geen schuurmiddelen of schuursponsjes op de chromen afwerking.
- Zorg ervoor dat alle verbindingen waterdicht zijn om lekkages te voorkomen.
- Bescherm het product tegen temperaturen onder het vriespunt.
Instellen en installeren
The Roca NAIA MEZ LAV ALTO LISO tap is designed for single-hole deck mounting. Installation should be performed by a competent individual or a qualified professional.
Meegeleverde componenten:
- Mixer tap unit
- Flexible connection hoses (G 3/8" thread)
- Mounting hardware (M8 bolt)
- Click-clack drain
Vereist gereedschap (niet inbegrepen):
- Verstelbare sleutel
- Schroevendraaier
- Afdichtingstape (PTFE-tape)
Installatiestappen:
- Bereid de B voor.asin: Zorg ervoor dat het montagegat op uw basin is clean and free of debris. The tap requires a single hole for installation.
- Flexibele slangen aansluiten: Screw the flexible connection hoses into the base of the tap unit. Hand-tighten first, then use a wrench for a final snug turn, ensuring not to overtighten.
- Monteer de kraan: Insert the tap unit into the basin gat. Van onder de basin, secure the tap using the provided mounting hardware (washer and nut) onto the M8 bolt. Tighten securely to prevent movement.
- Watertoevoer aansluiten: Connect the flexible hoses to your hot and cold water supply lines. The hose with the red marking typically connects to hot water, and the blue marking to cold water. Use sealant tape on the threads and tighten connections with a wrench.
- Install Click-Clack Drain: Follow the instructions provided with the click-clack drain for proper installation into the basin's drain hole. Ensure a watertight seal.
- Test op lekken: Slowly turn on the main water supply. Check all connections for leaks. Operate the tap to ensure proper water flow and temperature mixing.

Image 2: Technical diagram showing the dimensions of the Roca NAIA MEZ LAV ALTO LISO tap and its installation components, including the M8 bolt and G 3/8" flexible hoses.
Gebruiksaanwijzing
The Roca NAIA MEZ LAV ALTO LISO tap features a single lever for controlling both water flow and temperature.
- Waterstroom: Lift the lever upwards to increase water flow. Push it downwards to decrease and turn off the water.
- Temperatuurregeling: Move the lever to the right for cold water and to the left for hot water. The tap is designed to open in cold water when the lever is in the front position, promoting energy saving.
Note: This tap is designed to save water and energy, with a flow rate of 5 liters per minute at 3 bar pressure.
Verzorging en onderhoud
Regular cleaning and proper maintenance will ensure the longevity and appearance of your Roca tap.
Het oppervlak reinigen:
- Clean the chrome surface with a soft cloth and mild soap or a non-abrasive liquid cleaner specifically designed for chrome finishes.
- Rinse thoroughly with clean water and dry immediately with a soft cloth to prevent water spots.
- Niet gebruiken abrasive cleaners, scouring pads, acids, or solvents, as these can damage the chrome finish.
Beluchterreiniging:
Periodically unscrew the aerator at the tip of the spout and clean any accumulated debris or limescale. Rinse it under running water and reattach it securely.
Probleemoplossing
| Probleem | Mogelijke oorzaak | Oplossing |
|---|---|---|
| Lage waterstroom |
|
|
| Lekkage uit de tuit |
|
|
| Lekkage vanuit de basis |
|
|
| Geen warm/koud water |
|
|
Technische specificaties
- Model: NAIA MEZ LAV ALTO LISO
- Modelnummer: A5A3796C00
- Merk: Rots
- Oppervlakteafwerking: Chroom
- Materiaal: Brass, Stainless Steel, Zinc
- Installatiemethode: Single-hole, Deck-mounted
- Aantal handgrepen: 1
- Handvatmateriaal: Messing
- Plaatsing van de handgreep: Centrum
- Stroomsnelheid: 5 L/min (at 3 bar)
- Speciale kenmerken: Water and energy saving, Cold water opening in front position, Lightweight
- Productafmetingen: 9.4 x 26 x 46.6 cm (lengte x breedte x hoogte)
- Artikelgewicht: 2.62 kilogram
- Meegeleverde componenten: Click-clack drain, Flexible connection hoses
Garantie-informatie
Specific warranty details for Roca products may vary by region and retailer. Please refer to your purchase documentation or contact your point of sale for detailed warranty terms and conditions. Generally, Roca products are covered against manufacturing defects.
Klantenservice
For further assistance, technical support, or to inquire about spare parts, please contact Roca customer service or visit the official Roca website. When contacting support, please have your product model number (A5A3796C00) and purchase details available.
Officiële Roca Webwebsite: www.roca.com