1. Inleiding
Thank you for choosing the Stiga SE 2216 Q Electric Chainsaw. This manual provides essential information for the safe and effective use, assembly, maintenance, and troubleshooting of your chainsaw. Please read this manual thoroughly before operating the machine to ensure your safety and prolong the life of the product. Keep this manual in a safe place for future reference.
2. Veiligheidsinstructies
WAARSCHUWING: Always follow basic safety precautions to reduce the risk of fire, electric shock, and serious personal injury.
- Persoonlijke beschermingsmiddelen (PBM): Always wear safety glasses, hearing protection, gloves, sturdy footwear, and appropriate clothing when operating the chainsaw.
- Werkgebied: Ensure the work area is clear of obstructions, well-lit, and free from children and bystanders. Do not operate in wet conditions.
- Elektrische veiligheid: Inspect the power cord for damage before each use. Do not use the chainsaw if the cord is damaged. Use only extension cords suitable for outdoor use and rated for the chainsaw's power requirements.
- Terugslagpreventie: Be aware of kickback. Avoid the tip of the guide bar contacting any object. Maintain a firm grip with both hands.
- Onderhoud: Disconnect the chainsaw from the power supply before performing any maintenance, cleaning, or when changing accessories.
- Opslag: Bewaar de kettingzaag op een droge, veilige plaats, buiten het bereik van kinderen.
3. Montage en opstelling
3.1 Uitpakken
Verwijder alle onderdelen voorzichtig uit de verpakking. Controleer of alle onderdelen die op de paklijst staan vermeld aanwezig en onbeschadigd zijn. Bewaar de verpakking voor toekomstige opslag of transport.
3.2 Installing the Guide Bar and Chain
Before installation, ensure the chainsaw is disconnected from the power supply.
- Remove the chain cover by loosening the quick-tensioning knob.
- Plaats de ketting om het tandwiel en de geleiderail en zorg ervoor dat de snijkanten in de juiste richting wijzen.
- Fit the guide bar onto the mounting studs, ensuring the chain engages with the drive sprocket.
- Replace the chain cover and lightly tighten the quick-tensioning knob.

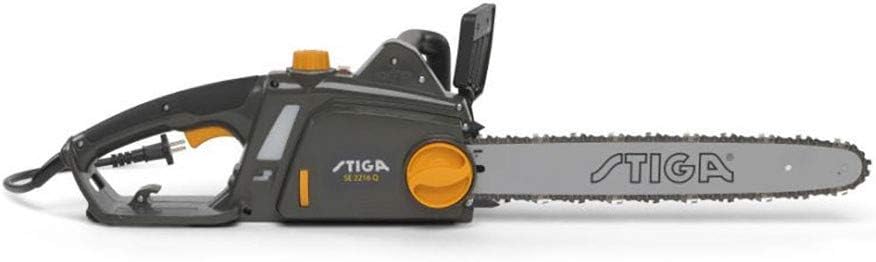
Afbeelding 1: Zijkant view of the Stiga SE 2216 Q Electric Chainsaw with the guide bar and chain correctly installed. This image shows the overall assembly of the chainsaw, highlighting the bar, chain, and main body.
3.3 De kettingspanning afstellen
The Stiga SE 2216 Q features a quick-tensioning knob for easy chain adjustment.
- With the chain cover lightly tightened, turn the quick-tensioning knob clockwise to increase chain tension or counter-clockwise to decrease it.
- The chain is correctly tensioned when it can be pulled away from the guide bar by approximately 2-3 mm at the center, but still moves freely around the bar.
- Once tension is correct, fully tighten the quick-tensioning knob to secure the chain cover and guide bar.
3.4 Filling the Oil Tank
The chainsaw has an automatic oil pump for chain lubrication. Ensure the oil tank is filled with appropriate chain lubricant before each use.
- Locate the oil tank cap, usually on the side of the chainsaw body.
- Unscrew the cap and fill the tank with high-quality chain lubricant. The tank capacity is 0.13 liters.
- Draai de dop goed vast om lekkage te voorkomen.
4. Gebruiksaanwijzing
4.1 Aansluiten op stroom
Connect the chainsaw's power cord to a suitable outdoor-rated extension cord, and then to a grounded power outlet. Ensure the voltage matches the chainsaw's requirements.
Afbeelding 2: Boven view of the Stiga SE 2216 Q Electric Chainsaw, illustrating the power cord connection point. This image helps identify where the power cable connects to the tool.
4.2 Starting and Stopping the Chainsaw
- Beginnen: Ensure a firm grip with both hands. Press the safety lock-off button (if present) and then squeeze the trigger switch. The chain will begin to move.
- Stoppen: Release the trigger switch. The chain brake will engage automatically or can be manually activated by pushing the front hand guard forward.
4.3 Snijtechnieken
Always maintain a balanced stance and firm grip. Let the chainsaw do the work; do not force it. Start cuts with the bottom of the guide bar, avoiding the tip to prevent kickback. For felling, limbing, or bucking, consult professional guides or training for specific techniques.
5. Onderhoud
Regular maintenance ensures optimal performance and extends the life of your chainsaw. Always disconnect the power supply before performing any maintenance.
- Kettingsmering: The automatic oil pump ensures continuous lubrication. Regularly check the oil level and refill as needed.
- Ketting slijpen: A sharp chain is crucial for safe and efficient cutting. Sharpen the chain regularly or replace it when dull. Refer to specific chain sharpening instructions for the 3/8" .050" (91PX-57X) chain type.
- Onderhoud van de geleiderail: Reinig de geleiderail en de oliegaten regelmatig. Draai de geleiderail periodiek om gelijkmatige slijtage te garanderen.
- Schoonmaak: After each use, clean the chainsaw body, air vents, and chain brake mechanism to remove sawdust and debris.
- Opslag: When not in use, store the chainsaw in a dry, secure location. Empty the oil tank if storing for extended periods.
6. Probleemoplossing
| Probleem | Mogelijke oorzaak | Oplossing |
|---|---|---|
| Kettingzaag start niet | No power supply; damaged cord; safety switch not engaged. | Check power connection; inspect cord; ensure safety lock-off and trigger are pressed correctly. |
| De ketting beweegt niet. | Chain brake engaged; incorrect chain tension; chain jammed. | Disengage chain brake; adjust chain tension; clear any debris jamming the chain. |
| Slechte snijprestaties | Botte ketting; verkeerde kettingspanning; onvoldoende smering. | Sharpen or replace chain; adjust chain tension; refill oil tank. |
| Overmatige trillingen | Loose components; damaged chain or guide bar. | Check all fasteners; inspect chain and guide bar for damage and replace if necessary. |
7. Specificaties
| Functie | Detail |
|---|---|
| Model | SE 2216 Q |
| Motortype | Electric with brush |
| Motorvermogen | 2200 W |
| Lengte van de staaf | 40 cm (16 inch) |
| Kettingtype | 3/8" .050" (91PX-57X) |
| Kettingsnelheid | 14 m/s |
| Capaciteit olietank | 0.13 liter |
| Oliepomp | Automatisch |
| Tensioning System | Quick tensioning knob (tool-less) |
| Net Weight (without bar and chain) | 4.5 kg |
| Net Weight (with bar and chain) | 5.1 kg |
| Vibration Level (front/rear) | 5.28 / 4.44 m/s² |
| Geluidsvermogensniveau (LWA) | 107 dB(A) |
8. Garantie en ondersteuning
For warranty information, please refer to the warranty card included with your product or visit the official Stiga website. For technical support, spare parts, or service inquiries, please contact your authorized Stiga dealer or customer service center. Always provide the model number (SE 2216 Q) and serial number when contacting support.


